
Living in a studio apartment can be challenging, especially when it comes to creating a comfortable sleep area. Without proper design, your sleeping space can feel cramped and uninviting, leading to restless nights and sluggish days. If your sleep zone lacks a clear definition, it’s time to make a change!
This guide will help you transform a small studio into a functional and cozy sleep zone. You will learn how to optimize your space, choose the right furnishings, and create a calming atmosphere that promotes restful sleep. By the end of this guide, you will have a dedicated sleep area that feels separate from your living space.
This project is rated as beginner level and can be completed in approximately 2-3 hours. You’ll discover how to arrange furniture, select bedding, and incorporate lighting to enhance your studio’s overall appeal. Ready to create a sleep zone that ensures you wake up refreshed? Let’s dive in!
TL;DR Summary
- Define your sleep zone in your studio apartment.
- Choose the right furniture and bedding for comfort.
- Incorporate lighting and decor to enhance relaxation.
- Follow these steps to create a restful retreat in just 2-3 hours.
TL;DR Summary
Editor’s Choice

CozyLux Queen Comforter Set Dark Grey – Bed in a Bag Queen Size 7 Pieces…

Giryuhd LED Desk Lamp for Office Home & Battery Operated Lamp Rechargeab…

Fracho Cotton Mattress Topper Queen Size, Extra Thick Pillow Top Mattres…
Prerequisites/Materials Needed
- Furniture:
- Bed frame or platform bed
- Comfortable mattress (twin, full, or queen)
- Bedding:
- Pillows (2-4, depending on preference)
- Bed sheets (fitted and flat)
- Comforter or duvet
- Lighting:
- Table lamp or floor lamp
- String lights or fairy lights (optional)
- Decor:
- Wall art or decorations
- Plants (real or faux)
- Storage:
- Under-bed storage boxes (if needed)
Prerequisites/Materials Needed
Editor’s Choice

Brightown 12 Pack LED Fairy Lights Battery Operated String Lights – 7ft …

OLIXIS 3 Inch Queen Size Gel Infused Memory Foam Mattress Topper, a Soft…
Mellow Naturalista Classic – 12 Inch Solid Wood Platform Bed with Wooden…
Skill Level & Time Estimate
Skill Level: beginner
Total time estimate: 2-3 hours. Here’s a breakdown:
- Planning and measuring your space: 30 minutes
- Furniture assembly: 1 hour
- Bedding setup and decor arrangement: 1 hour
- Final touches and adjustments: 30 minutes
Skill Level & Time Estimate
Editor’s Choice

DUMOS 43 Inch Folding Storage Ottoman Bench, Large Hidden Storage Chest …
CozyLux Queen Comforter Set Dark Grey – Bed in a Bag Queen Size 7 Pieces…
Queen Murphy Bed, Space Saving Folding Wall Bed with Hydraulic Lift Syst…
Step 1: Measure Your Space

Start by measuring your studio space to understand where the sleep zone will fit best. This step is crucial for ensuring you maximize your floor area without overcrowding.
- Use a tape measure to determine the dimensions of your studio.
- Identify potential areas for your bed—ideally, choose a spot away from the entrance for more privacy.
Pro Tip: Consider measuring your bed size (twin, full, etc.) to visualize how it will fit in your chosen space. This matters because proper measurements help avoid buying furniture that doesn’t fit or looks out of place.
Time estimate: 30 minutes.
Step 1: Measure Your Space
Editor’s Choice

HARDELL Digital Caliper, 6″ Rechargeable Caliper Measuring Tool with Lar…

NEW JETO Metal Bed Frame,Twin Size Bed Frame with Storage Space,Heavy Du…
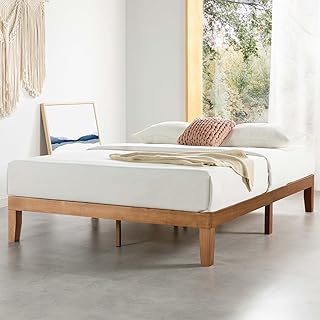
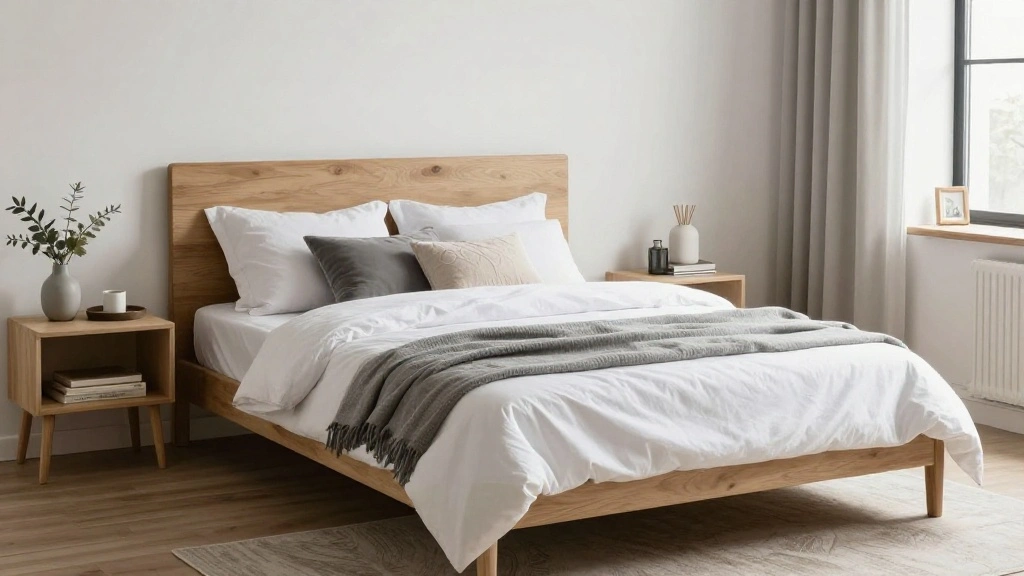
Step 2: Choose Your Bed and Bedding

Once you know where your sleep zone will be, select a bed and bedding that match your style and comfort needs. A good bed can significantly improve your sleep quality.
- Decide on a bed type—choose between a platform bed, a bed frame, or a futon.
- Select a comfortable mattress that provides ample support.
- Pick your bedding: sheets, comforters, and pillows that match your decor.
Warning: Avoid oversized bedding that may overwhelm your small space. It’s important to maintain balance and coherence in your studio.
Time estimate: 1 hour.
Step 2: Choose Your Bed and Bedding
Editor’s Choice

EGOHOME Full Size Memory Foam Mattress, 8 Inch Bed Mattress in A Box wit…

HYMOKEGE Queen Comforter Set Seersucker 7 Pieces, All Season Luxury Bed …
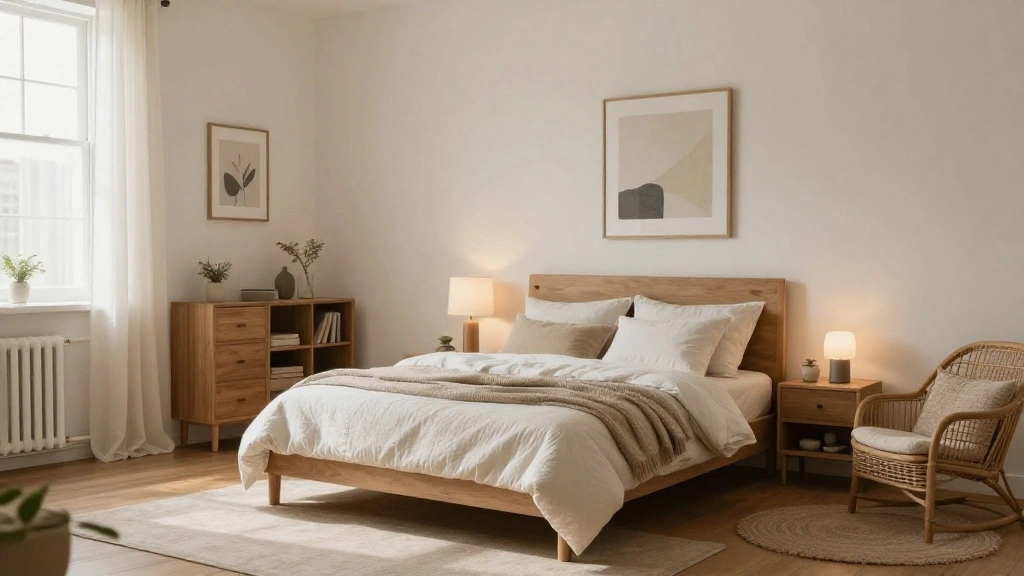
Step 3: Arrange Your Furniture

Arranging your studio’s furniture is key to defining your sleep zone. A well-thought-out layout can create an inviting atmosphere.
- Position the bed against a wall to free up floor space.
- Place nightstands or small tables on either side of the bed for functionality.
- Consider adding a chair or small bench at the foot of the bed for additional seating.
Pro Tip: Use furniture that can double as storage (e.g., a bed with drawers) to keep your studio organized. This matters as it helps maintain a clutter-free environment, which is essential for restful sleep.
Time estimate: 30 minutes.
Step 4: Add Lighting
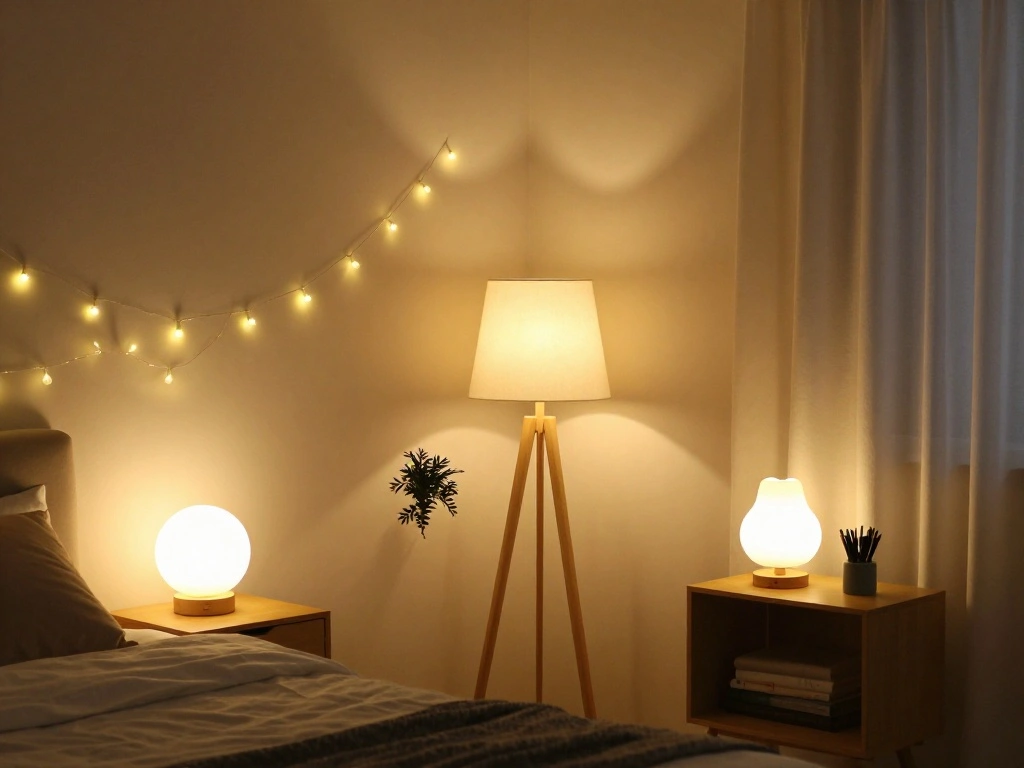
Good lighting can transform your sleep zone’s ambiance. Soft, warm lighting helps create a relaxing environment.
- Choose a bedside lamp that complements your decor.
- If space allows, consider adding a floor lamp for additional light.
- Hang string lights or fairy lights around the bed for a cozy touch.
Warning: Avoid harsh overhead lights, as they can be too bright and disruptive. Soft lighting is essential for relaxation.
Time estimate: 30 minutes.
Step 4: Add Lighting
Editor’s Choice

Raexpectis Modern Floor Lamp with Adjustable Brightness, Remote Control,…

LJLNION 98.5ft Christmas Lights Color Changing with Remote, 300 LED RGB …

G Keni Nursery Night Light for Baby, Portable LED Touch Night Lamp for K…
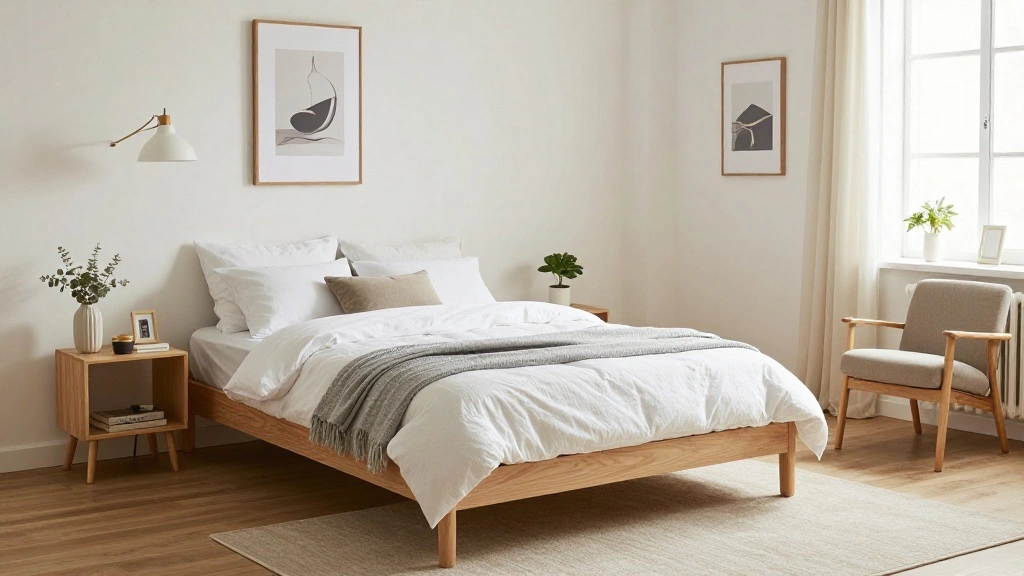
Step 5: Incorporate Decor

Add personal touches to your sleep zone with decor that reflects your style and enhances relaxation. Decor can make your space feel more inviting.
- Select wall art or photographs that bring you joy.
- Add plants or flowers for a fresh touch.
- Consider decorative pillows and throws to enhance comfort.
Pro Tip: Use light, calming colors for decor to promote a peaceful atmosphere. This matters as the right decor can make your sleep zone feel like a serene retreat.
Time estimate: 30 minutes.
Step 5: Incorporate Decor
Editor’s Choice

Costa Farms Money Tree (Pachira Aquatica) Live Indoor Bonsai-Style Plant…
Step 6: Organize Storage Solutions
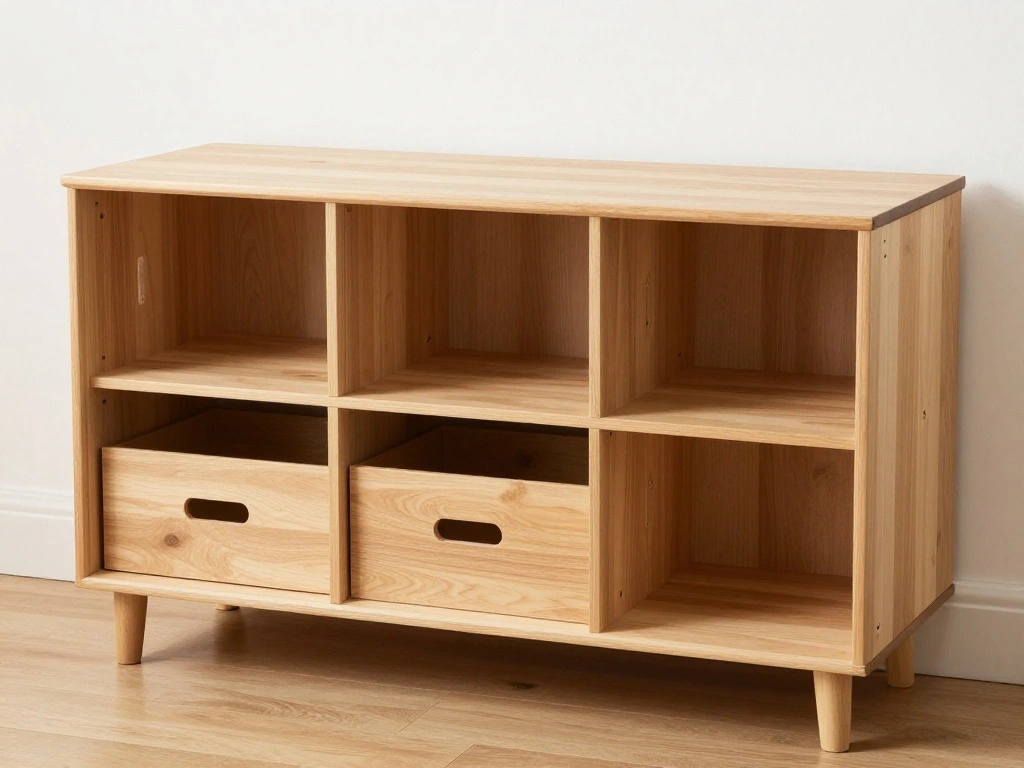
Storage is crucial in a studio. Organizing your belongings will help maintain a tidy and functional sleep zone.
- Utilize under-bed storage boxes to keep extra linens or clothes.
- Add a small dresser or shelving unit if space allows.
- Incorporate decorative baskets for easy access to smaller items.
Warning: Avoid cluttering your sleep zone with too many items. Keeping the area organized helps promote relaxation.
Time estimate: 30 minutes.
Step 6: Organize Storage Solutions
Editor’s Choice

IRIS USA 50 Qt Plastic Under Bed Storage Organizer Bin Container with Se…

AODK Dresser for Bedroom with 4 Storage Drawers, Small Dressers Chest of…

GRANNY SAYS Wicker Storage Baskets for Shelves, Wicker Baskets for Organ…
Step 7: Final Touches and Adjustments
Take a step back and evaluate your newly created sleep zone. Make any adjustments to ensure everything feels just right.
- Check the layout for comfort and accessibility.
- Adjust lighting to achieve the desired ambiance.
- Make the bed and arrange decorative pillows attractively.
Pro Tip: Spend a night in your new sleep zone to test comfort levels. This matters because personal comfort is the ultimate goal.
Time estimate: 30 minutes.
Pro Tips
- Use Multi-Functional Furniture: Look for beds with built-in storage or foldable furniture to save space.
- Choose Calming Colors: Soft blues and greens promote relaxation and sleep.
- Invest in Quality Bedding: A good mattress and comfortable sheets can enhance sleep quality significantly.
- Maximize Vertical Space: Use wall shelves to free up floor space and display decor.
- Incorporate Sound Dampening: Use rugs or curtains to reduce noise levels in your studio.
Common Mistakes to Avoid
- Warning: Not measuring your space can lead to overcrowding. Always measure before purchasing furniture.
- Warning: Choosing a bed that’s too large can make your space feel cramped. Opt for a size that fits comfortably.
- Warning: Overloading your sleep zone with decor can create visual clutter. Keep it simple and cohesive.
Common Mistakes to Avoid
Editor’s Choice

MAF 18 Inch Full Size Bed Frame with Round Corner Legs Mattress Slide St…

45 Inch Large Storage Ottoman Bench with Wooden Tray Coffee Table, Light…
Troubleshooting Section
- Problem: The bed feels too cramped.
- Solution: Re-evaluate the layout and consider moving the bed to a different wall or using a smaller bed size.
- Problem: The lighting is too harsh.
- Solution: Replace bright bulbs with softer, warmer ones or add a lampshade.
- Problem: The space feels cluttered.
- Solution: Remove non-essential items and use storage solutions to organize belongings.
Troubleshooting Section
Editor’s Choice

Sigalux LED Light Bulbs 60 Watt Equivalent A19 Standard Light Bulbs 2700…

Hlivelood Queen Size Murphy Bed with 2 LED Lights, Farmhouse Wood Hidden…

Budding Joy 90L Under Bed Storage Containers, Closet Organizers and Stor…
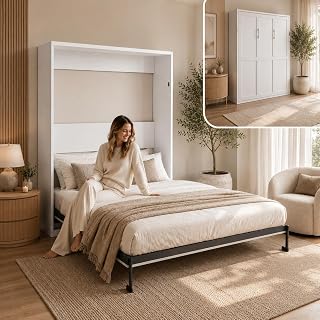
Variations/Alternative Methods
- Consider a loft bed if you want to free up floor space underneath for a desk or seating area.
- Use a screen or curtain to visually separate the sleep zone from the living area.
- Incorporate a Murphy bed for maximum flexibility when you need more space during the day.
Variations/Alternative Methods
Editor’s Choice

LIVAUVEAD Queen Murphy Bed with Storage & Charging Station, Murphy Cabin…

HOMCOM 4 Panel Room Divider, Folding Privacy Screen, 5.6′ Room Separator…

Twin Loft Bed with Desk and 8 Drawers, Industrial Metal High Loft Bed wi…
FAQs
- What if I don’t have a lot of space? Focus on choosing furniture that is multi-functional and consider vertical storage options.
- How long should I spend decorating my sleep zone? It depends on your pace, but you can complete the basics in 2-3 hours.
- Is it safe to use string lights in my sleep zone? Yes, just ensure they’re properly installed and not too close to flammable materials.
FAQs
Editor’s Choice
Brightown 12 Pack LED Fairy Lights Battery Operated String Lights – 7ft …

Polibi Space-Saving Buffet Hutch with Foldable Table – 33.5″ Multi-Funct…
Conclusion
Congratulations! You’ve successfully set up a dedicated sleep zone in your studio apartment. With a cozy bed, appropriate lighting, and personalized decor, you’ve created a space that promotes restful sleep and relaxation.
Now that you’ve transformed your studio, take the time to enjoy your new sleep zone. Consider adding personal touches over time to continue enhancing your space. Happy sleeping!