
Are you tired of a cluttered entryway? You’re not alone! Many renters struggle with finding a designated space for shoes, bags, and other essentials right by the door. Without a proper drop zone, your home can quickly feel chaotic and uninviting.
This guide will help you create a stylish and functional drop zone that respects your rental space. You’ll learn how to maximize storage while adhering to rental rules.
With just a few simple steps, you will transform your entryway into an organized and welcoming space.
In this guide, you’ll specifically learn how to choose the right furniture, organize your items effectively, and add personal touches that make the area feel like home.
This project is suitable for a beginner and will take approximately 2-3 hours to complete.
Let’s dive in and create that perfect drop zone that combines functionality and style!
TL;DR Summary
- Create a renter-friendly drop zone with minimal tools.
- Choose furniture that fits your space and style.
- Organize items to keep your entryway neat.
- Add personal touches for a homely feel.
Recommended Products

More Comfortable Shoe Change Cabinet: With a 2-inch thickened padded sponge cushion on the bench top, you can change shoes by sitting on the bench more comfortable without bending down or squatting

Flexible Storage: The shoe bench features an adjustable middle shelf with three height options (3.9", 6.3", and 11.8"), ensuring that high heels, mid-calf boots, and sneakers all fit neatly without crowding. Additionally, the two-door design provides ample storage space to accommodate 8-12 pairs of shoes, keeping your entryway organized

Claim Your Boho Vibes: Part of the ELLAN Collection, this shoe bench combines a woven rattan look, rounded corners, and slim pulls for a cozy, relaxed boho feel. Pair it with the matching storage cabinets to create a unified, inviting space
TL;DR Summary
Editor’s Choice

Optish 2 Pack Wooden Coat Rack Wall Mount, 16.1″ Rustic Coat Hanger Hook…

5 Pack Small Woven Storage Baskets for Shelves, Cotton Rope Baskets Orga…
SONGMICS Storage Ottoman, Storage Chest Bench with Legs, End of Bed Benc…
Prerequisites/Materials Needed
- Furniture:
- Bench or small table (1)
- Wall-mounted hooks (2-4)
- Storage baskets (2-3)
- Tools:
- Drill or screwdriver (1)
- Measuring tape (1)
- Level (1)
- Decor:
- Small rug (1)
- Plants or decorative items (2-3)
Recommended Products

Dual-Function Organizer: Tidy Keys & Elevate Space:This key holder wall mount does more than keep your keys organized—it integrates a practical planter tube for customizable decor. You can swap out greenery, blooms or trinkets by personal taste or season, while it neatly stores car keys, house keys and small accessories, blending utility with charm for entryways, kitchens or living rooms.

【DUAL INSTALLATION, MAXIMUM FLEXIBILITY】- Offers both strong adhesive strips for scratch-free mounting (ideal for renters or tiles) and heavy-duty expansion screws for permanent security (perfect for concrete walls). You get the ultimate choice for any wall type and preference, ensuring a hassle-free setup.

[FITS ANY ROOM] Tired of hunting for your keys or dealing with constant clutter? This 11-inch key holder for wall is your new home hero! Perfect for entryways, hallways, and bedrooms, it keeps keys, hats, and other small essentials neatly organized. Its sleek design and whitewash finish add a cozy farmhouse charm to your home while elevating your room decor aesthetic.
Prerequisites/Materials Needed
Editor’s Choice

Homleke 2-Tier Storage Bench, Shoe Bench with Thickened Padded Seat Cush…

5 Pack Woven Storage Baskets for Shelves, Decorative Basket Organizer St…

Homode Wall Hooks with Shelf, Wood Coat Rack with Shelf Wall-Mounted, En…
Skill Level & Time Estimate
Skill Level: beginner
Total time estimate: 2-3 hours
Breakdown:
– Choosing furniture: 30 minutes
– Organizing: 1 hour
– Decorating: 30 minutes
– Assembly: 1 hour
Recommended Products

Life Made Easier: The KISENG key organizer provides dedicated space for keys, mail, hats, glasses, and more, maximizing wall space. Keep everything neat and accessible, so you’ll never worry about losing your keys or other essentials again.

LIGHTWEIGHT AND STURDY: Using natural wood, drying it to reduce the weight, to avoid falling when hanging due to too heavy, handmade molding, sturdy and durable, the overall appearance of the coordinated, beautiful shape, set of storage in the decorative in one reasonable design

【Clutter-Free Living】Keep your entryway neat with this wall mounted coat rack with shelf; Designed to store coats, keys, bags, hats, and mail while optimizing wall space; A practical addition to hallways, bedrooms, or entryways
Skill Level & Time Estimate
Editor’s Choice
Optish 2 Pack Wooden Coat Rack Wall Mount, 16.1″ Rustic Coat Hanger Hook…
5 Pack Small Woven Storage Baskets for Shelves, Cotton Rope Baskets Orga…
Homleke 2-Tier Storage Bench, Shoe Bench with Thickened Padded Seat Cush…
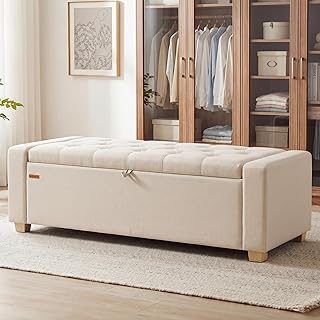
Step 1: Choose Your Furniture
Start by selecting furniture that fits your space and style. A bench or small table serves as the focal point of your drop zone. Follow these steps:
- Measure the available space by your door.
- Consider a bench with storage or a small table for surface space.
- Choose a color or style that compliments your decor.
Pro Tip: Look for multi-functional furniture to save space and add storage.
Why this matters: The right furniture sets the tone for the entire drop zone.
Time estimate: 30 minutes.
Recommended Products

Farmhouse Charm: With its wood-effect appearance, clean lines, and metal accents, this console table comes from our LIRY Collection—brings a cozy, rustic vibe to your entryway, enhancing you space with country elegance

3-Tier Storage Spaces console table: The 3-tier narrow console table includes 2 dense mesh shelves and 2 spacious non-woven fabric drawers below the wooden tabletop. 2-tier open shelf design allows you to place books, vases, DVDs, storage boxes, etc. assuring your desktop is more tidy and satisfying your various needs

Spacious Storage Cabinet: This entryway console table comes with 2 storage cabinets that offer plenty of space to keep your essentials neatly out of sight. Each cabinet includes an inner shelf, perfect for storing books, baskets, media storage, shoes or daily items in an organized way
Step 1: Choose Your Furniture
Editor’s Choice
5 Pack Woven Storage Baskets for Shelves, Decorative Basket Organizer St…
Homleke 2-Tier Storage Bench, Shoe Bench with Thickened Padded Seat Cush…

HOOBRO Narrow Console Table, 29.5″ Small Entryway Table, Thin Sofa Side …
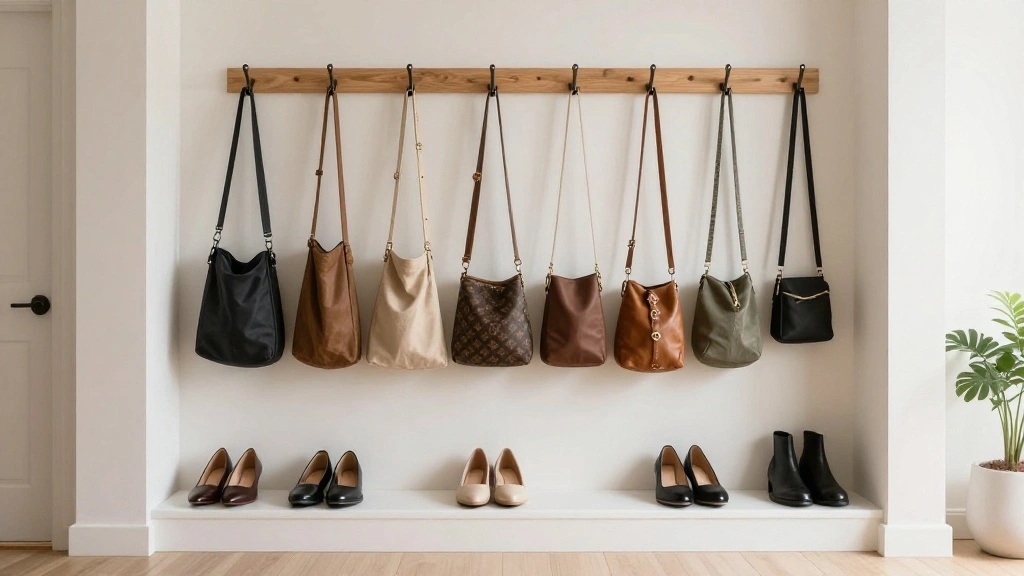
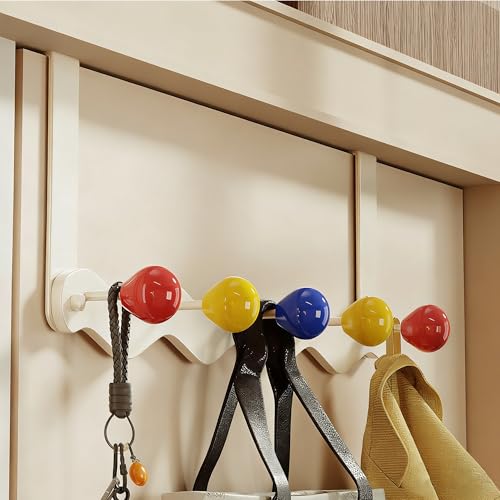
Step 2: Install Wall-Mounted Hooks

Install wall-mounted hooks for easy access to bags and coats. Here’s how:
- Decide on the height for the hooks (around 5-6 feet off the ground).
- Use a level to mark where each hook will go.
- Drill holes and install the hooks according to manufacturer instructions.
Warning: Avoid drilling into electrical wires; check for wiring first.
Why this matters: Hooks keep items off the floor, reducing clutter and making the space functional.
Time estimate: 30 minutes.
Recommended Products
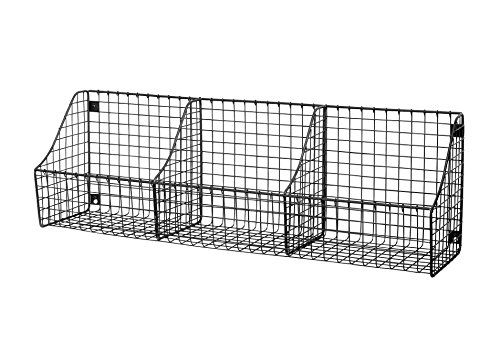
TRIPLE ORGANIZATION: Maximize storage with this 3 Section Wall Mount Wire Storage Basket designed to hold towels toiletries pantry goods or cleaning supplies in one organized wall mount storage basket

✅Please check the size carefully: 11.0' X 4.72' X 4.72'(Bottom size: 3.74'X9.37'). Include 4 adhesives. Please measure your closet / cabinet shelf space or tabletop / countertop space and refer to the basket bin's dimensions before ordering In case it does not meet your needs or space size!

Boho Chic Decor: This over the door hanging wall basket features a minimalist boho chic decor that blends seamlessly with any space, including nursery, bedroom, bathroom, and dorm room. It adds a unique decorative touch while providing practical storage solutions for everyday organization
Step 2: Install Wall-Mounted Hooks
Editor’s Choice

Stud Finder Wall Scanner – 5 in 1 Stud Finder Tool w/Smart Chip and HD L…
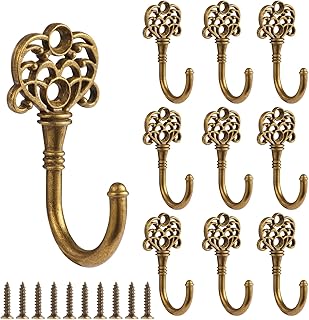
10 PCS Vintage Metal Wall Hooks, Bohemian Decorative Hook with Screws, W…

Torpedo Level Magnetic, Firecore 9 Inch Shockproof Small Leveler Tool wi…
Step 3: Organize Your Items

Organize your items to maintain a neat entryway. Follow these steps:
- Place shoes in storage baskets or under the bench.
- Use the hooks for bags and coats.
- Keep a small bin for mail or keys on the table.
Pro Tip: Label storage baskets to make it easier to find items.
Why this matters: Organization helps you find items quickly and keeps your entryway looking tidy.
Time estimate: 1 hour.
Recommended Products

More Comfortable Shoe Change Cabinet: With a 25 mm sponge cushion on the bench top, you can change shoes by sitting on the bench more comfortable without bending down or squatting

Organize Your Entryway: The shoe rack for entryway is a great solution for every home. Tidy up your shoes and provide a seat bench for you when wearing shoes. The shoe rack bench will fit perfectly in your entryway.

【COMPARTMENT DESIGN MEETS OPEN STORAGE】This shoe bench comes from VASAGLE CUSTOS Collection, characterized by the open compartment design that embodies easy-to-blend-in minimalism, while ensuring everything's organized and easily accessible
Step 3: Organize Your Items
Editor’s Choice

GRANNY SAYS Wicker Storage Baskets for Shelves, Wicker Baskets for Organ…

Optish Coat Rack Wall Mount, 16.5 Inches Wood Coat Hooks, Wall Hooks for…

Hipiwe Seagrass Basket Key Holder Box for Entryway Tabletop Desk Organiz…
Step 4: Add a Rug

Add a small rug to define the space and add warmth. Here’s how:
- Choose a rug that fits your style and is easy to clean.
- Place it in front of the bench or table.
- Ensure it’s secured to avoid tripping hazards.
Warning: Make sure the rug does not obstruct the entryway.
Why this matters: A rug can make the area feel more inviting and cozy.
Time estimate: 30 minutes.
Recommended Products

INCLUDES – 1 quartz organizer, 8 strips; 1 organizer holds 2 lbs
Over-the-Door Organizer & Space Saver: Designed for small spaces, hang and use instantly without occupying space. Easily hold clothes and accessories, say goodbye to clutter!

These green vacuum suction cup hooks are designed for clean, dry, flat, smooth and non porous surfaces such as glass doors, mirrors, polished ceramic tile, polished stainless steel and plastic panels. The 2 pack set provides practical hanging spots for bathrooms, kitchens, showers, closets, entryways and smooth glass door decor.
Step 4: Add a Rug
Editor’s Choice

Mohawk Home Felt Rug Pad 8′ x 10′ – 1/4 Inch Thick Cushion for Area Rugs…

Alaterre Furniture Newport 40 Inch Solid Wood Entryway Bench – Modern Fa…
Step 5: Personalize Your Drop Zone

Add personal touches to make your drop zone feel like home. Follow these steps:
- Choose decorative items like plants or artwork.
- Arrange items on the table to make them visually appealing.
- Consider seasonal decorations for a fresh look.
Pro Tip: Use items that reflect your personality or interests.
Why this matters: Personalization makes the space feel welcoming and uniquely yours.
Time estimate: 30 minutes.
Recommended Products

Sturdy and Practical: HRONRAD farmhouse key hooks is made of solid wood with fine workmanship, helping you to organize small items and blends well with any home decor style.

Sturdy and Practical: HRONRAD farmhouse key hooks is made of solid wood with fine workmanship, helping you to organize small items and blends well with any home decor style.

◆NOTE: As the key hook may be bent during transportation, you can adjust the degree of bending of the hook according to what you want. The material of the hook is flexible, but it is not recommended to adjust it forcefully, otherwise the hook will easily break.
Step 5: Personalize Your Drop Zone
Editor’s Choice

(Canvas Print Without Any Frame) Sunflower Pictures Farmhouse Wall Art-1…
Step 6: Maintain Your Drop Zone

Establish a routine to keep your drop zone tidy. Here’s what to do:
- Spend a few minutes each day tidying up.
- Encourage family members to use the hooks and bins.
- Regularly check for items that need to be put away.
Warning: Letting clutter build up defeats the purpose of your drop zone.
Why this matters: Maintenance ensures your drop zone remains functional and attractive over time.
Time estimate: 15 minutes daily.
Recommended Products

Built-In Charging Station: The narrow console table for small space has a power strip with 1 AC outlet, 1 USB-A port, and 1 Type-C port, plus a 150cm (59" ) cord. This 3 tier small entryway table charges phones, tablets, and other devices simultaneously. A useful entryway table for modern homes

Narrow Space-Saving Design – Slim 36"L x 7"W x 32"H profile fits entryways, hallways, behind sofas, apartments, and other compact spaces.

Note: Total Length: 78.8 inches — Made by combining two 39.4-inch sofa tables.
Step 6: Maintain Your Drop Zone
Editor’s Choice

ROMGUAR CRAFT 3 Tier Bamboo Shoe Rack for Closet Free Standing Wood Shoe…

Sterilite 4-Pack 64 Quart Latching Box, Clear Plastic Storage Organizer …
Pro Tips
- Color Coordination: Use colors that match your home for a cohesive look.
- Seasonal Swaps: Change decorations based on seasons for variety.
- Functional Art: Use art that doubles as storage, like decorative boxes.
- Vertical Space: Utilize vertical storage options to maximize space.
- Accessibility is Key: Keep frequently used items at eye level for easy access.
Recommended Products
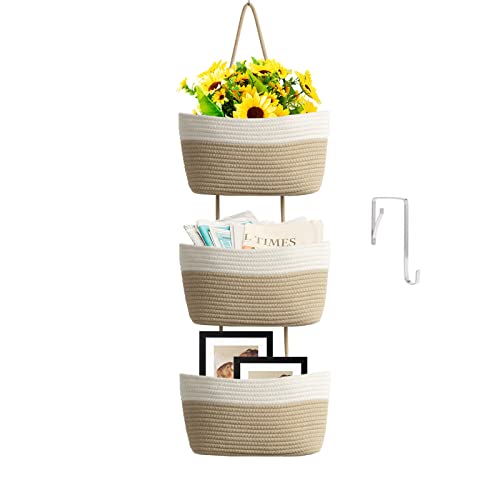
Premium Material: These nursery hanging baskets are made of 100% natural cotton, skin-friendly. Strictly selected cotton thread, solid and durable, add bricks and tiles to your quality life. Time flies, and these hanging baskets are still perfect as new

Premium Material: These nursery hanging baskets are made of 100% natural cotton, skin-friendly. Strictly selected cotton thread, solid and durable, add bricks and tiles to your quality life. Time flies, and these hanging baskets are still perfect as new

2-in-1 Storage Solution: Hang MaraFansie grid storage basket over the cabinet door or on a railing for versatile use in most cabinets, keeping items neat and easily accessible.
Pro Tips
Editor’s Choice

Funny Christmas Bathroom Decor, Pink Christmas Decoration, Funny Gift De…
Common Mistakes to Avoid
Warning: Choosing oversized furniture can make the space feel cramped.
Solution: Always measure the area beforehand.
Warning: Not securing the rug properly can lead to accidents.
Solution: Use rug grips or tape to keep it in place.
Warning: Ignoring maintenance can create clutter.
Solution: Establish daily tidying habits to keep the area clean.
Common Mistakes to Avoid
Editor’s Choice

CRAFTSMAN 25-Ft Tape Measure with Fraction Markings, Retractable, Self-L…
Troubleshooting Section
Problem: The drop zone feels too cluttered.
Solution: Re-evaluate your storage options and remove unnecessary items.
Problem: Items often fall off hooks.
Solution: Ensure hooks are securely installed and consider using different styles.
Problem: The rug keeps sliding.
Solution: Use non-slip rug pads.
Problem: The bench is uncomfortable.
Solution: Add cushions for comfort.
Problem: Items are hard to find.
Solution: Label storage bins clearly.
Troubleshooting Section
Editor’s Choice

Outdoor Bench Cushion, Water-Resistant & Fade-Resistant, Porch Swing Cus…

Veken Rug Gripper Pad for Hardwood Floors, Thick Non Slip Rug Pads for A…
10 PCS Vintage Metal Wall Hooks, Bohemian Decorative Hook with Screws, W…
Variations/Alternative Methods
- Use a shoe cabinet instead of a bench for a sleeker look.
- Implement a pegboard for a customizable hook system.
- Consider a foldable table for temporary use when needed.
Choose based on your space constraints and style preference.
FAQs
- What if I don’t have a lot of space? Consider vertical storage solutions like wall-mounted shelves.
- How long should I spend organizing? Aim for at least an hour to get everything sorted effectively.
- Is it safe to drill into my rental? Always check with your landlord before making any changes.
- What if I can’t find hooks that match? Spray paint hooks to match your home decor.
- How can I make the area smell nice? Use scented candles or diffusers to freshen the space.
FAQs
Editor’s Choice

QsQueen Scalloped Wood Wall Shelf – 17 Inch Floating Shelf with Wood B…
Conclusion
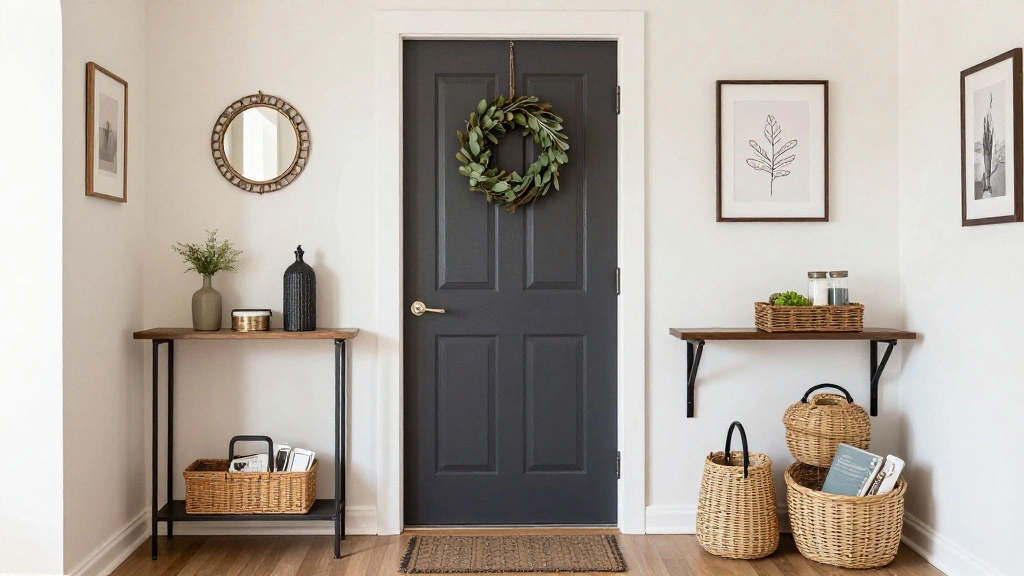
Congratulations! You’ve successfully created a renter-friendly drop zone by your door. Your entryway is now organized, functional, and inviting.
Now that you’ve completed this project, consider tackling other areas in your home to maximize space and organization. Explore more DIY projects or consider adding additional storage solutions throughout your rental.
Keep up the great work and enjoy your newly transformed entryway! You did it!