

Are you staring at a large blank wall, feeling overwhelmed by the emptiness? A bare wall can make a room feel cold and uninviting, creating an urgent need for creative solutions. Don’t worry; you can transform that space into a stunning focal point without breaking the bank!
This guide will help you achieve an eye-catching wall decor that reflects your style and personality. By the end of this article, you’ll have the confidence to decorate your wall using affordable materials and DIY techniques. You’ll learn specific steps to plan, gather materials, and execute your vision.
Whether you’re a beginner or just looking to spruce up your space, this project is easy to tackle and will take approximately 2-3 hours. Get ready to unleash your creativity and bring warmth to your home!
TL;DR Summary
- Transform a large blank wall into a stunning focal point on a budget.
- Follow seven easy steps to gather materials and execute your decor.
- Learn about common mistakes and troubleshooting tips to ensure success.
- Discover variations and expert insights for even better results.
Recommended Products

Made of polycarbonate thermoplastic material to provide durability, flexibility, and resilience to withstand hard impacts and heavy force

Color: Matte Black. Our high-end finish in metallic matte black has an expensive look and feel to better suit your home's décor

Trendy Room Decor: Add some vibrancy to your playroom or nursery room with our canvas banner hanging flag banner. Perfect for modern minimalist homes, our canvas banner will enhance your kids' room decor.
TL;DR Summary
Editor’s Choice

Dahey 2 Pack Wood Wall Planter Vase with Artificial Eucalyptus Farmhouse…

upsimples 11×14 Picture Frame Set of 5, Display Pictures 8×10 with Mat o…

Art3d Smoothing Tool Kit for Applying Peel and Stick Wallpaper, Vinyl Ba…
Prerequisites/Materials Needed
- Wall Decor Items:
- Framed prints or photos (3-5)
- Wall stickers or decals
- Tapestry or fabric (1 piece, 5×7 feet)
- Plywood or canvas (1 piece, 2×3 feet)
- Tools:
- Measuring tape
- Level
- Hammer
- Nails or adhesive strips
- Optional Items:
- Paint (to add color)
- String lights or fairy lights
Recommended Products

High Quality and Durable Materia: Made of eco-friendly vinyl, inks and adhesive, containing non-toxic and are odor free, keeping your kids far from chemicals harm;

Reliable Material: wondever wall decals are made of high quality self-adhesive PVC material, safe and non-toxic, easy to peel and stick, durability and waterproof.
Prerequisites/Materials Needed
Editor’s Choice
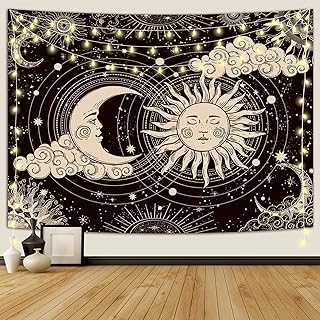
Wonrizon Sun and Moon Tapestry, Aesthetic Black Dark Spiritual Tapestrie…

Large Tree Wall Decals Colorful Leaves Flower Wall Stickers Peel and Sti…
Skill Level & Time Estimate
Skill Level: Beginner
Total time estimate: 2-3 hours
Step breakdown:
- Planning: 30 minutes
- Gathering materials: 1 hour
- Preparing the wall: 30 minutes
- Hanging decor: 1 hour
Recommended Products

Size:150*210cm/59.1”*82.7".The Psychedelic Sun and Moon tapestry wall decor for bedroom, living room, dorm, home...

Size:51”*59"/130*150cm.The mystic Sun and Moon tapestry wall decor for bedroom, living room, dorm, home, office, salon, yoga room etc..

Unique Stained Glass Design: This tapestry for bedroom features a stunning sun and moon pattern, enhanced with floral and plant branch elements, giving it a stained-glass-like aesthetic that adds a touch of elegance and mystery to any room
Skill Level & Time Estimate
Editor’s Choice
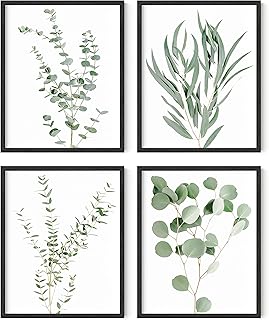
HAUS AND HUES Botanical Plant Wall Art Prints – Set of 4 Plant Decor Pri…
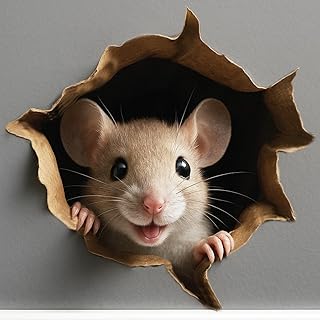
GRITKULTURE Removable Peek A Boo Mouse in Mouse Hole Decal Sticker 5.1in…

Vittanly 15 Pack Picture Frames Collage Wall Decor for Mounting or Table…
Step 1: Plan Your Design
Start by visualizing how you want your wall to look. Consider creating a mood board or sketching your ideas. Follow these sub-steps:
- Decide on a theme or color scheme.
- Choose the type of decor items you want to use.
- Measure the wall to determine the layout and spacing.
Pro Tip: Use painter’s tape to outline where you plan to hang items. This will give you a clearer picture of the arrangement before making any holes.
Why this matters: Planning helps you avoid mistakes and ensures a cohesive look. Completing this step should take approximately 30 minutes.
Recommended Products

【 Battery Star String Lights 】- Powered by 3 × AA batteries ( not included ), the star fairy string lights are 17 feet long with 50 bright LEDs. The thin clear wiring and lovey star-shaped LED bulbs will add a delicate and romantic touch to your personal space or room decor. Each star bulb is about 1.3 inches wide with durable, waterproof plastic construction

Upgrade 120LED Photo Clips String Light: Our Copper Wire Fairy String Light have 120LED; Total 40ft long with extra 10ft long power cord; And 10cm distance between LED bulbs, allowing you to free adjustment any sizes on the led string lights for picture
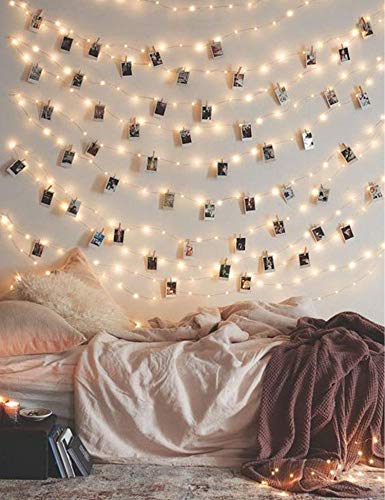
WHAT OTHERS CAN'T - 50 LED String Lights total length 17Ft, 10cm between 2 blubs. (Package includes 50 clear clips) It allows you to free adjustment any sizes on the led string lights for picture, any anyway you want!
Step 1: Plan Your Design
Editor’s Choice

BAYKA Floating Shelves for Wall, Wall Mounted Rustic Wood Shelves for Ba…

Baisuart S02250 Canvas Prints Wall Art Beach Sunset Ocean Waves Nature P…

4 Rolls Premium Painters Tape, Blue Tape, Masking Tape, Paint Tape for M…
Step 2: Gather Your Materials
Now, it’s time to collect all the materials you’ll need. This step is crucial for a smooth execution. Here’s how:
- Make a checklist of items based on your plan.
- Visit local thrift stores, craft stores, or online marketplaces to find affordable decor.
- Consider DIY options if you can’t find what you need.
Pro Tip: Look for multi-pack items; they often save you money compared to buying individually.
Why this matters: Having everything ready ensures you can focus on the fun part—decorating! This step will likely take about 1 hour.
Recommended Products
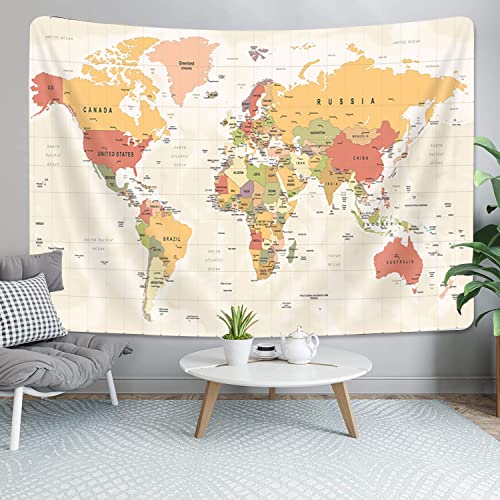
3D Printing - The Travel Map Tapestry is made of polyester fabric, which durable enough to be home decor for wall art. This hanging tapestry comes with vivid colors bring happy feel with you and your family.

Abundant quantity: you will receive 20 pieces of clear CDs for room decor, each of them measures approx. 12 cm/ 4.72 inch in diameter, and 0.12 cm/ 0.047 inch in width, sufficient to meet your daily use or replacement demands, and you can share them with your family members

【All-in-One Complete Craft Kit - Ready to Use】This comprehensive DIY set includes everything you need to start your project immediately: 50 unfinished wood slices (4x4 inches), a full set of 26 reusable alphabet stencils, and 2 handy paint brushes. No extra purchases needed—unleash your creativity right out of the box.
Step 2: Gather Your Materials
Editor’s Choice

Framed Colorful Floral Wall Art Set of 3, Abstract Scandinavian Flower C…

Vittanly 8×10 Picture Frames Set of 9, Shatter Resistant Plexiglass, Dis…

Hapinest DIY Wall Collage Kit for Tween and Teen Girls, Gifts for Ages 1…
Step 3: Prepare the Wall
Before you can hang anything, you need to prepare the wall surface. Here’s how:
- Clean the wall with a damp cloth to remove dust and grime.
- Fill any holes or imperfections with spackle and let it dry.
- Paint the wall if you want a fresh background.
Warning: Ensure the wall is completely dry before hanging any items, as moisture can damage your decor.
Why this matters: A clean, smooth wall allows your decor to stand out and look professional. Expect this step to take around 30 minutes.
Recommended Products

Reliable Material: wondever wall decals are made of high quality self-adhesive PVC matte material, safe and non-toxic, easy to peel and stick, durability and waterproof.
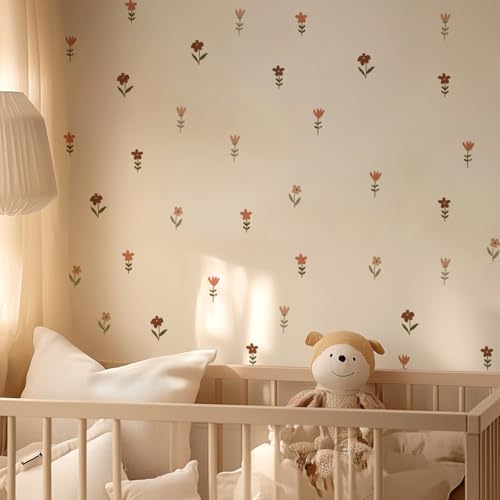
Value Package: 6 Sheets Boho wall stickers, each measures 14.8 cm*21 cm (5.82 inch * 8.26 inch) wall stickers in total.

Boho Wall Decals: Bring a unique boho vibe to your space with these daisy wall decals, blending vibrant colors and natural elements for a relaxed, free-spirited ambiance, adds a sophisticated touch, perfect for those who appreciate minimalist bohemian decor
Step 3: Prepare the Wall
Editor’s Choice

Pro Grade Paint Roller Kit, Brush & Roller,10 Piece Set, Wall Painting N…

DAP DryDex Dry Time Indicator Spackling, Pink/White, 32 Oz (7079812330)

USANOOKS Microfiber Cleaning Cloth Grey – 12 Pcs (12.5″x12.5″) – High Pe…
Step 4: Arrange Your Decor Items on the Floor
Before committing to the wall, practice arranging your decor on the floor. Here’s how:
- Lay out your items on the floor based on your initial plan.
- Adjust the layout until you’re satisfied with the arrangement.
- Take a photo for reference when hanging.
Pro Tip: Use a mix of heights and shapes to create visual interest.
Why this matters: Experimenting on the floor allows you to see how items work together before making permanent decisions. This step should take about 30 minutes.
Recommended Products
Size:130*150cm/51.2”*59.1".The Psychedelic Sun and Moon tapestry wall decor for bedroom, living room, dorm, home...

Material: Polyester, soft, bouncy, durable, skin-friendly.

Material: This sun and moon tapestry is made of high quality polyester fabric, which is soft, durable, lightweight, washable and easy to hang or pack away for your indoor or outdoor use. So lovely and special home wall decor, the golden cloud is funny and the sun moon is sacred, suitable for all style decoration.
Step 4: Arrange Your Decor Items on the Floor
Editor’s Choice

4 Tier Wood Tall Plant Stand Metal Rack Indoor, Multiple Flower Pot Hold…

GIBSON HOLDERS 1PL Adjustable White Wire and Clear Acrylic Display Easel…
Step 5: Mark the Hanging Points
Next, you’ll need to transfer your floor arrangement to the wall. Follow these steps:
- Use the photo you took as a reference.
- Measure and mark where each item will hang.
- Use a level to ensure that everything is straight.
Warning: Double-check your measurements to avoid unnecessary holes in the wall.
Why this matters: Accurate markings ensure your decor hangs as planned and looks great. This step should take about 30 minutes.
Recommended Products
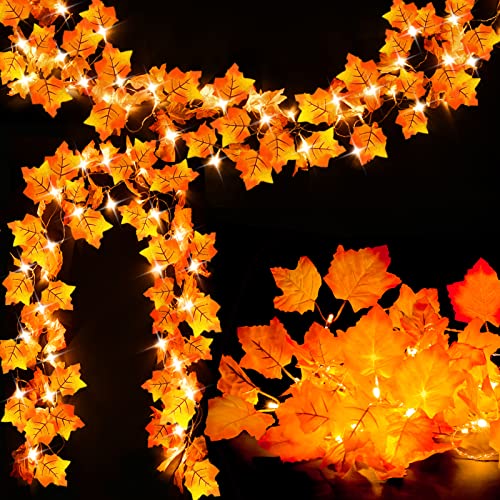
Maple Leaf String Lights: This set includes 2 strings of maple leaf lights, each measuring 8.2 feet in length with 20 warm yellow LEDs and 40 maple leaves, each LED comes with 2 maple leaves. The total length of both strings is 16.4 feet, with 40 LEDs and 80 maple leaves. For a fuller decorative look, you can twist the two strings together for a denser effect

Commercial quality string lights: The globe around the lights are shatterproof because they are made out of plastic. 100 led bulbs give off a warm white light. An ul listed power adapter comes with the lights. Diameter of the bulb is 0.7 inch, and the spacinga between bulbs is 4 inches

[8 LIGHTING MODES WITH TIMER & REMOTE CONTROL] These fairy lights offer 8 lighting modes (steady on + 7 dynamic effects). The timer keeps them on for 6 hours and off for 18 hours every 24 hours. Press and hold the timer button for 3 seconds to turn the timer on/off (lights flash twice for on, once for off). The remote also saves your last selected mode and brightness automatically, so you don't need to reset them next time.
Step 5: Mark the Hanging Points
Editor’s Choice

Blisstime Picture Hanging Kit – 100 Feet Braided Hanging Wire, 60 Pcs D …

Motovera Self Leveling Laser Level 100ft, Green Cross Line with Tripod, …
Step 6: Hang Your Decor Items
Now comes the fun part—hanging your decor! Here’s how to do it:
- Start with the largest item first, usually at eye level.
- Use nails or adhesive strips based on the weight of each item.
- Step back often to ensure everything looks balanced.
Pro Tip: For heavier items, use wall anchors to ensure they stay secure.
Why this matters: Properly hanging items ensures they don’t fall and enhances the overall look. Expect this step to take about 1 hour.
Recommended Products

Vibrant Design: Our giant 55.1 x 23.6 inch coloring poster features a captivating central theme with the words "stay groovy" surrounded by a lively array of adorable and stylish motifs such as hearts, rainbows, flowers, stars, and lips. The design is sure to capture the attention of children.

【Pack & Size】-- You will receive 6 pieces of fake blank vinyl records with different color stickers in the center, and each decorative record measures about 30 cm/ 12 inches in diameter, which is the right size for wall and party decoration to catch the attention of friends and guests. The quantity enough your daily use or arts, crafts and DIY projects, and you can share them with your family and friends.

Package Included: 3 pcs white canvas banners wall hanging brooch organizer, size: 10.6*18.9 inches( 27*48cm)
Step 6: Hang Your Decor Items
Editor’s Choice

48PCS Nano Double Sided Adhesive Pads,Waterproof No Damage Removable Hea…

KURUI Drywall Anchors and Screws Assortment Kit 270PCS, 135 Plastic Dry …

KURUI 303Pcs Picture Hanging Kit, Picture Hangers Assorted Kit with Heav…
Step 7: Add Finishing Touches
Finally, it’s time to add those little details that make your wall stand out. Here’s what to do:
- Incorporate plants or other three-dimensional items for depth.
- Add string lights or fairy lights for a cozy ambiance.
- Step back and assess; make adjustments as needed.
Pro Tip: Consider seasonal decor to change things up without major effort.
Why this matters: Finishing touches can elevate your decor and make your space feel complete. This step should take about 30 minutes.
Step 7: Add Finishing Touches
Editor’s Choice

CEWOR Artificial Plants Fake Pothos with Plastic Pot Artificial Potted P…

Brightown 12 Pack LED Fairy Lights Battery Operated String Lights – 7ft …

Personalized Custom Canvas Prints: Photo On Canvas (Framed 11X14) Transf…
Pro Tips
- Layering Textures: Use a mix of materials like wood, fabric, and metal for a visually appealing wall.
- Seasonal Changes: Refresh your decor with the seasons to keep the space feeling new.
- Lighting Matters: Consider wall-mounted lights or lamps to highlight your decor.
- DIY Projects: Create your own art or decor items for a personal touch.
- Gallery Wall: Create a gallery wall with a mix of photos and art for an eclectic look.
Pro Tips
Editor’s Choice
Personalized Custom Canvas Prints: Photo On Canvas (Framed 11X14) Transf…

LED Wall Mounted Lights, Rechargeable Wall Sconces with Remote & Touch C…

15.8 x 78.7 Inch Anti Collision Wall Padding for Kids Padded Wall Panels…
Common Mistakes to Avoid
Warning: Avoid these common pitfalls to ensure a successful decor experience:
- Hanging items too high or low: Measure carefully to ensure eye-level hanging.
- Overcrowding: Leave space between items for a clean look.
- Ignoring wall texture: Use appropriate hanging methods for different wall types.
- Not considering lighting: Ensure your decor is well-lit to enhance visibility.
Common Mistakes to Avoid
Editor’s Choice

3-in-1 Picture Hanging Tool, All-in-One Art Hanging Kit with Leveling, P…

9W Picture Light Plug in, 24″ Adjustable LED Art Light with Remote Contr…
Troubleshooting Section
Problem: Items keep falling off the wall.
Solution: Check the weight limits of your hanging method and consider using wall anchors.
Problem: The wall decor looks unbalanced.
Solution: Adjust the items by moving them around until you achieve a balanced look.
Problem: The decor feels too cluttered.
Solution: Remove one or two items to create more breathing space.
Problem: The colors clash.
Solution: Consider repainting the wall or replacing some decor items to achieve harmony.
Troubleshooting Section
Editor’s Choice

KURUI 140Pcs #8 Self Drilling Drywall Anchors with Screws Kit, Heavy Dut…

Command 15 lb Large Picture Hanging Strips 14 Pairs (28 Strips), Damage-…

16 PCS Framed Eclectic Wall Art Decor, Modern Maximalist Home Gallery Wa…
Variations/Alternative Methods
- Framed Collage: Use a series of smaller frames to create a collage effect; great for displaying memories.
- Wall Murals: Consider adding a removable wall mural for a bold statement.
- Floating Shelves: Install floating shelves to display decor and books while avoiding wall damage.
Variations/Alternative Methods
Editor’s Choice
BAYKA Floating Shelves for Wall, Wall Mounted Rustic Wood Shelves for Ba…

SONGMICS 4×6 Picture Frames Collage Wall Decor, 12-Pack Photo Collage Fr…

Reyhui Sunshine Forest Mural Wallpaper Landscape Tree Wallpaper Large Na…
FAQs
- What if I don’t have enough decor items? Consider making your own DIY projects like artwork or using plants.
- How long should I wait to hang items after painting? Wait at least 24 hours for paint to fully dry.
- Is it safe to use adhesive strips on textured walls? Check the manufacturer’s instructions; some strips are designed for textured surfaces.
- What if I don’t want to drill holes in my wall? Use adhesive hooks or strips as an alternative.
- Can I change the decor seasonally? Yes! Seasonal decor refreshes your space without major renovations.
FAQs
Editor’s Choice

Bamworld Hanging Planters for Indoor Plants Wall Decor Living Room Plant…
Command 15 lb Large Picture Hanging Strips 14 Pairs (28 Strips), Damage-…

8 Pack 8 * 10In Canvas Boards for Painting, Art Canvas for Drawing with …
Conclusion
Congratulations! You’ve transformed that large blank wall into a beautiful focal point. Take a moment to admire your hard work and creativity!
Now that you’ve completed this project, consider exploring other areas in your home that could use a little TLC. You can also experiment with different decor styles or seasonal updates to keep your space fresh and inviting.
Remember, decorating is an ongoing process, so feel free to revisit your wall and make adjustments over time. Enjoy your cozy, personalized space!