
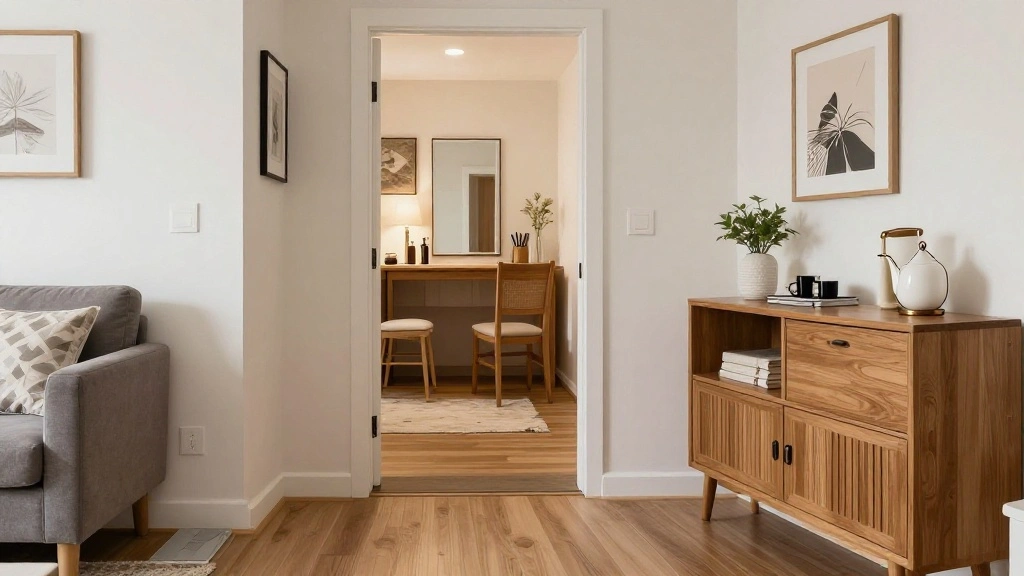
Living in a small apartment can often lead to clutter and chaos, especially when it comes to managing your belongings. You might find yourself constantly searching for your keys, bag, or mail, which can add unnecessary stress to your day. If you’ve ever felt overwhelmed by the disarray in your entryway or kitchen counter, you’re not alone. Creating a designated drop zone can be the solution you need!
In this guide, you will learn how to effectively create a functional drop zone in your small apartment. By the end of this project, you’ll have a dedicated space to organize your items, making your daily routine smoother and more efficient. We’ll walk you through each step, from choosing the right location to selecting storage solutions that fit your style.
This guide is tailored for beginners, and you can complete it in approximately 1-2 hours. Let’s get started on transforming your clutter into an organized drop zone that enhances your living space!
TL;DR Summary
- Identify the best location for your drop zone.
- Select appropriate storage solutions to minimize clutter.
- Organize items effectively for easy access.
- Maintain your drop zone regularly to keep it functional.
TL;DR Summary
Editor’s Choice

FYY Over the Door Hooks, 4 Pack Hangers Hooks with Rubber Prevent Scratc…

Homleke 2-Tier Storage Bench, Shoe Bench with Thickened Padded Seat Cush…

ThreeHio 2 Pack Garage Shelves Wall Mounted with Wire baskets, Heavy Dut…
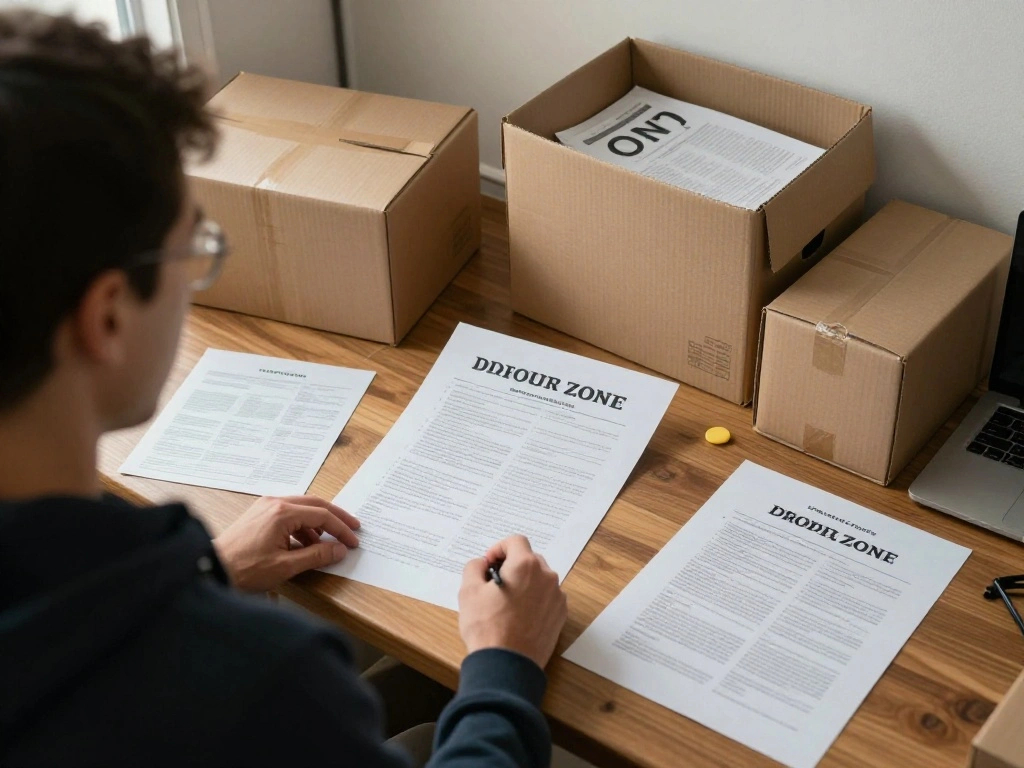
Prerequisites/Materials Needed
- Location: Entryway, kitchen, or living space
- Storage Solutions:
- Hooks (2-3)
- Storage bins or baskets (1-3)
- Shoe rack (optional)
- Small table or shelf (optional)
- Tools:
- Drill (if installing hooks)
- Measuring tape
- Marker
Prerequisites/Materials Needed
Editor’s Choice

3 Pack Woven Rope Storage Baskets for Shelves,13.5″×11″×9.5″ Storage B…

Autonomier 4 Tier Extra Small Shoe Rack (16.3″ Wide), Narrow Stackable K…

Wall Hooks for Hanging Towel/Coat – 22LB Screw in Metal Hanger Wall Moun…
Skill Level & Time Estimate
Skill Level: beginner
Total time estimate: 1-2 hours
Breakdown:
- Choosing a location: 10-15 minutes
- Selecting storage solutions: 20-30 minutes
- Organizing items: 30-60 minutes
Skill Level & Time Estimate
Editor’s Choice

Optish Over The Door Hooks, Door Hanger Hooks for Hanging, Towel Racks f…

WALMANN 2 Pack Garage Wall Shelf, 23.5″ x 12″ Wall Mounted Storage Shelv…
Homleke 2-Tier Storage Bench, Shoe Bench with Thickened Padded Seat Cush…
Step 1: Choose the Right Location
Start by selecting the most practical location for your drop zone. Consider areas where you typically enter the apartment or where items tend to accumulate. Follow these sub-steps:
- Survey your space: Look for areas like the entryway, kitchen, or living room.
- Evaluate traffic flow: Ensure the location doesn’t obstruct movement.
- Consider accessibility: Choose a spot that’s easy to reach when you come home.
Pro Tip: If you have limited space, a wall-mounted solution can save floor space.
Why this matters: A well-chosen location ensures that your drop zone will be used regularly, keeping your area organized.
Time estimate: 10-15 minutes
Step 1: Choose the Right Location
Editor’s Choice

Optish Coat Rack Wall Mount, 16.5 Inches Wood Coat Hooks, Wall Hooks for…

SONGMICS Shoe Rack Bench, 4 Tier Bamboo Shoe Storage Organizer, Entryway…

CTSNSLH 4 Tier Plastic Storage Bins with Lid 23QT – Stackable Storage Bi…
Step 2: Select Storage Solutions

Next, choose appropriate storage solutions that match your style and the available space. Consider these options:
- Hooks: Ideal for bags, coats, or keys.
- Baskets or bins: Great for organizing smaller items like mail or shoes.
- Shelves or tables: Provide additional space for decorative items or quick access to essentials.
Pro Tip: Choose storage that complements your existing decor to create a cohesive look.
Why this matters: The right storage solutions will help you maintain order and make it easy to find your belongings.
Time estimate: 20-30 minutes
Step 2: Select Storage Solutions
Editor’s Choice

OIAHOMY 75L Large Woven Cotton Rope Storage Basket with Handle for Organ…

𝙐𝙥𝙜𝙧𝙖𝙙𝙚 34 in Floating Shelf Bracket – 34″x8″ Hidde…

Command 15 Lb XL Heavyweight Wall Hook, Damage Free Hanging Wall Hook wi…
Step 3: Install Hooks or Shelves

If you’ve chosen to install hooks or shelves, now is the time to do it. Follow these steps:
- Measure and mark: Use your measuring tape to determine the height for hooks or shelves, then mark the spots with a marker.
- Drill holes: If using hooks, drill holes into the wall according to the manufacturer’s instructions.
- Attach the hooks/shelves: Secure them firmly, ensuring they can hold the weight of items you plan to hang or place.
Warning: Always check for hidden electrical wires or plumbing before drilling into walls.
Why this matters: Proper installation ensures that your drop zone is safe and functional.
Time estimate: 30-45 minutes
Step 3: Install Hooks or Shelves
Editor’s Choice

JINSHUNFA Adhesive Wall Hooks 13LB Heavy Duty No Drill Transparent Water…

Power Drill Cordless: DEKOPRO Cordless Drill 20V Electric Power Drills S…

QsQueen Scalloped Wood Wall Shelf – 17 Inch Floating Shelf with Wood B…
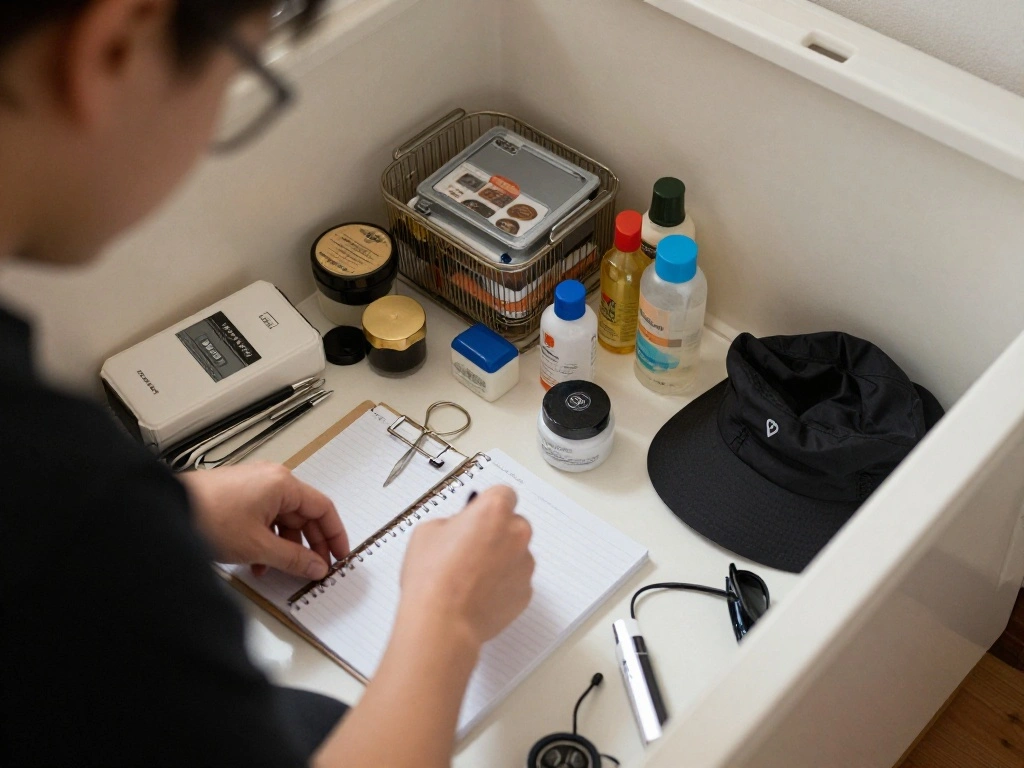
Step 4: Organize Your Items

Now that you have your storage solutions in place, it’s time to organize your items. Follow these steps:
- Gather items: Collect all items that will be part of your drop zone, like keys, bags, and mail.
- Sort items: Divide items into categories, such as frequently used, occasional, and seldom used.
- Place items: Put frequently used items within easy reach, while occasional items can go in bins or less accessible spots.
Pro Tip: Use labels for bins to make it easy to find what you need.
Why this matters: A well-organized drop zone will save you time and reduce stress in your daily routine.
Time estimate: 30-60 minutes
Step 4: Organize Your Items
Editor’s Choice

ZICOTO Decorative Storage Boxes with Lids – Set of 2 Beautiful Fluted Ph…
Step 5: Maintain Your Drop Zone
To keep your drop zone functional, you need to maintain it regularly. Here’s how:
- Set a routine: Spend 5-10 minutes each week to tidy up your drop zone.
- Reassess items: Check if items still belong in the drop zone and remove those that don’t.
- Encourage family participation: Ensure everyone knows how to use the drop zone to maintain its organization.
Warning: Neglecting your drop zone can lead to clutter returning, defeating the purpose of creating it.
Why this matters: Regular maintenance ensures your drop zone remains efficient and useful over time.
Time estimate: 5-10 minutes weekly
Step 5: Maintain Your Drop Zone
Editor’s Choice

Sterilite 4-Pack 64 Quart Latching Box, Clear Plastic Storage Organizer …

Bush Home Salinas Hall Tree with Shoe Storage Bench in Shiplap Gray and …
Optish Coat Rack Wall Mount, 16.5 Inches Wood Coat Hooks, Wall Hooks for…
Step 6: Personalize Your Space

Lastly, make your drop zone feel like part of your home. Follow these steps:
- Add personal touches: Include decorative items like a small plant or a picture frame.
- Use colors that match your decor: Select storage solutions and accessories that enhance your apartment’s aesthetic.
- Make it functional: Ensure that any personal items do not obstruct the functional purpose of the drop zone.
Pro Tip: Regularly change decor elements for a fresh look without needing to reorganize.
Why this matters: A personalized space will encourage you to maintain the organization of your drop zone.
Time estimate: 15-20 minutes
Pro Tips
- Use Vertical Space: Maximize storage by utilizing wall space for hooks and shelves.
- Keep it Simple: Choose minimalist designs to avoid visual clutter.
- Color Code Items: Use color coding for bins to easily identify contents at a glance.
- Stackable Bins: Opt for stackable bins to save space and maintain organization.
- Seasonal Adjustments: Change the items in your drop zone according to the seasons for better organization.
Pro Tips
Editor’s Choice

6 x 4 inch Large Moving Labels for Boxes, Blank Moving Boxes Labels Stic…
10 PCS Vintage Metal Wall Hooks, Bohemian Decorative Hook with Screws, W…
Common Mistakes to Avoid
Warning: Overstuffing your drop zone can lead to chaos. Avoid cramming too many items into your designated area; instead, limit what you keep there.
Warning: Ignoring maintenance can result in clutter returning. Schedule regular clean-ups to keep your drop zone functional.
Warning: Not using functional storage solutions can lead to disorganization. Choose bins or hooks that fit your items well to maximize space.
Common Mistakes to Avoid
Editor’s Choice

Akro-Mils 30240 AkroBins Plastic Storage Bins, Space-Saving Stackable Bi…

Kitsure Shoe Rack – Non-Woven Shoe Rack Shelf, Shoe Organizer for Closet…

Optish Coat Rack Wall Mount, Wall Hooks for Hanging, Entry Coat Hooks Co…
Troubleshooting Section
Problem: Items keep piling up in the drop zone.
Solution: Set a regular cleaning schedule and limit the number of items allowed in the drop zone.
Problem: Storage solutions feel cluttered.
Solution: Reassess which items belong in the drop zone and remove unnecessary ones.
Problem: The drop zone is too far from the entrance.
Solution: Consider moving the drop zone closer to the entryway or creating a secondary drop zone.
Troubleshooting Section
Editor’s Choice
Homleke 2-Tier Storage Bench, Shoe Bench with Thickened Padded Seat Cush…

Sterilite 4 Pack Ultra Latching Box, Storage Bins with Lids, Clear Plast…
![4 Set [EXTRA LARGE] Hanging Wall Mount Storage Baskets with Adhesive Hoo...](https://m.media-amazon.com/images/I/812qykSTCXL._AC_UL320_.jpg)
4 Set [EXTRA LARGE] Hanging Wall Mount Storage Baskets with Adhesive Hoo…
Variations/Alternative Methods
Mobile Drop Zone: Use a rolling cart to create a portable drop zone that can be moved as needed.
Wall-Mounted Solutions: Consider wall-mounted bins or organizers that save floor space and provide easy access.
Multi-Functional Furniture: Use furniture pieces that serve as storage, such as benches with compartments, to create a drop zone without taking up extra space.
FAQs
What if I don’t have enough wall space? Consider using a rolling cart or a multi-functional furniture piece to create a drop zone without needing wall installations.
How long should I spend organizing my drop zone? Spend about 30-60 minutes initially, with 5-10 minutes weekly for maintenance.
Is it safe to install hooks on drywall? Yes, as long as you use appropriate anchors for the type of wall you have.
FAQs
Editor’s Choice

3 Tier Rolling Kitchen Carts on Wheels with Storage,650Lbs Heavy Duty Ut…
![[Upgraded] 10 PCS Screw Hooks with Self-Drilling Drywall Anchors, Plasti...](https://m.media-amazon.com/images/I/81xuir6xqlL._AC_UL320_.jpg)
[Upgraded] 10 PCS Screw Hooks with Self-Drilling Drywall Anchors, Plasti…

DUMOS 30 Inch Folding Storage Ottoman Bench, Large Hidden Storage Chest …
Conclusion

Congratulations! You have successfully created a drop zone in your small apartment. By taking the time to organize and personalize your space, you’ve made daily life easier and more enjoyable. Remember to maintain your drop zone regularly to keep it functional.
As you continue to refine your living space, consider other organization projects that can enhance your apartment. Explore options for your kitchen, bedroom, or home office for even greater efficiency. Enjoy your newly organized drop zone!