
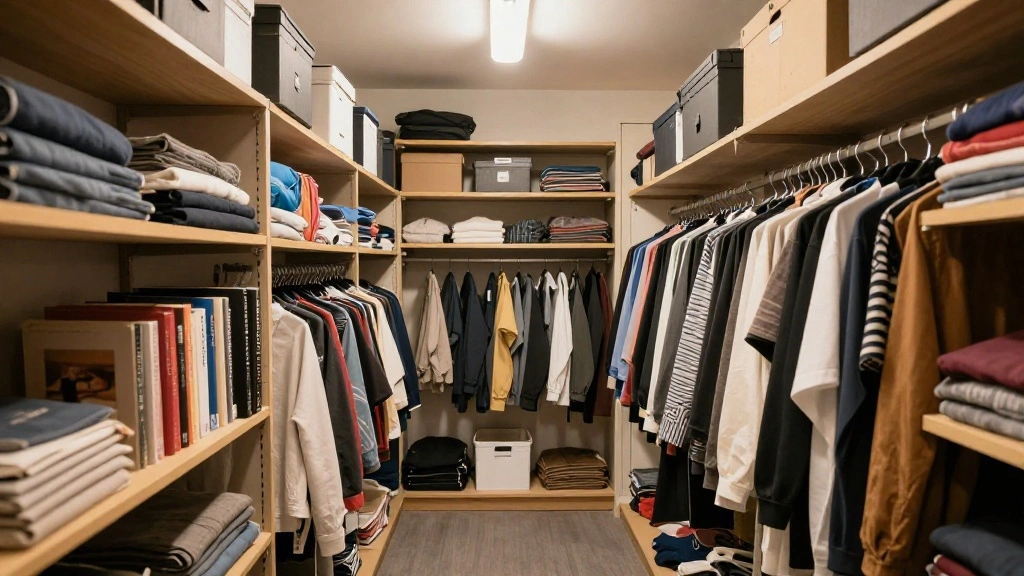
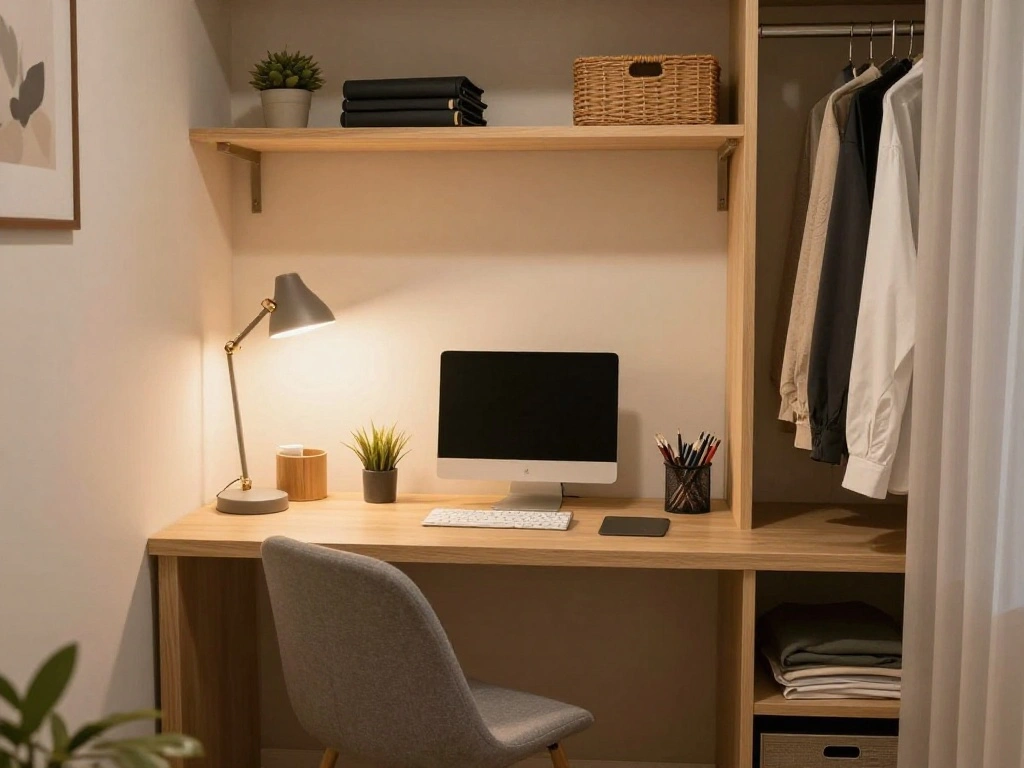
In today’s fast-paced world, finding a dedicated workspace can be a challenge, especially if you’re living in a small apartment or have limited room at home. A cluttered environment can hinder productivity and make it difficult to focus on your tasks. But what if you could transform a neglected closet into a productive office space? This guide will show you how to create a functional office in your closet, giving you a space to concentrate and work efficiently.
By the end of this guide, you’ll successfully convert your closet into a well-organized office area that meets your work needs. You’ll learn how to assess the space, choose the right furniture, and optimize your closet layout for maximum efficiency. This project is perfect for beginners and can be completed in an estimated 2-3 hours.
Ready to get started? Follow along as we walk you through the necessary steps to create your dream workspace in just a few hours. Let’s turn that unused closet into your new office!
TL;DR Summary
- Assess your closet space to determine what can be used for an office.
- Choose furniture that fits well within the closet dimensions.
- Organize the area with storage solutions for supplies.
- Personalize your new office to make it inspiring and comfortable.
Recommended Products

[PREMIUM MATERIALS & PERFECT SIZE] These storage containers are made of PP plastic and natural bamboo, BPA FREE, enduring & tough. Perfect size for storage:10.2L x 7.2W x 4.1H inch. This plastic storage bins can helps you organize and store various items for your storage needs

Material: 100% Acrylic, Measures: 2.5" x 6.8" x 9.6" high.

TL;DR Summary
Editor’s Choice
Harwaya Black Wall Shelves for Bedroom 24 Inch Long, 8 In Deep Floating …

YIHONG 6 Pack Clear Pantry Organizer Bins, Plastic Containers with Handl…

DUMOS 31 Inch Small Computer Desk for Home Office, Gaming Writing Desks …
Prerequisites/Materials Needed
- Measuring tape
- Desk or table (preferably under 30 inches in height)
- Chair (size that fits comfortably in the closet)
- Storage bins or organizers
- Lighting (desk lamp or wall-mounted light)
- Power strip
- Decor (optional: plants, art, etc.)
Recommended Products

No Assembly Needed: Ready to use out of the box, no screws or tools. This small desk folds open in seconds, perfect for quick setups in dorms, apartments, or small spaces

Multifunction Design: Our multifunction desk made for a variety of uses including writing, work, crafts, offering a rectangular design for a spacious open top, good for laptop, printer, breakfast, study decorations

Smooth Single-Piece Tabletop: Seamless 30-inch surface provides a stable, flat workspace ideal for meals, crafts, laptops, and everyday tasks.
Prerequisites/Materials Needed
Editor’s Choice

Ohmlove Plastic Storage Baskets With Bamboo Lid – Plastic Storage Contai…
Skill Level & Time Estimate
Skill Level: beginner
Total time estimate: 2-3 hours
Breakdown:
– Assessing the space: 30 minutes
– Choosing furniture: 30 minutes
– Organizing and arranging: 1-1.5 hours
– Personalizing the space: 30 minutes
Skill Level & Time Estimate
Editor’s Choice

BAYKA Floating Shelves for Wall, Wall Mounted Rustic Wood Shelves for Ba…
DUMOS 31 Inch Small Computer Desk for Home Office, Gaming Writing Desks …

OPNICE Desk Organizer and Accessories, 2-Tier Computer Monitor Stand Ris…
Step 1: Measure Your Closet

To start, measure the dimensions of your closet. This step is crucial as it helps you understand the space you have to work with. Follow these sub-steps:
- Use a measuring tape to measure the height, width, and depth of the closet.
- Note down the measurements for easy reference.
- Check for any shelves or rods that may need removal.
Warning: Ensure you measure accurately to avoid purchasing furniture that won’t fit. Pro Tip: Consider using a digital app to help with measurements and space planning. This step should take about 30 minutes.
Recommended Products
【92Qt Storage Boxes】With total volume of 92QT, the storage box measures 15.35in*11in*8.27in each tier.The Storage bins are good for sorting out crafts, photos, makeup product etc. Also handy as extra storage in the garage, classroom, bedroom, bathroom, office, or pantry. Combining good looks and practicality

✅Functional Storage for Any Space: You can use these pantry bins for various things throughout your home to organize and make your life easier. They are fit to pantry organization,ideal for cabinet, kitchen, fridge, bathroom,under sink, closet,laundry room and RV.The clear organizing bins to store drinks, snacks, cans, meat,body face wash, cleaning supplies and daily necessities.

【High Quality Materials】This plastic storage bins with lids are crafted from durable and lightweight plastic and come with a natural bamboo lid. Perfectly sized for storage at 10 x 7.2 x 4.1 inches, the set of 6 containers offers ample storage options to keep different items neatly organized, making decluttering a simple and enjoyable task.
Step 1: Measure Your Closet
Editor’s Choice
DUMOS 31 Inch Small Computer Desk for Home Office, Gaming Writing Desks …
BAYKA Floating Shelves for Wall, Wall Mounted Rustic Wood Shelves for Ba…
Step 2: Clear Out the Closet
Next, clear out all items from the closet. This will give you a blank slate to work with. Follow these sub-steps:
- Remove all clothing, shoes, and miscellaneous items from the closet.
- Decide what to keep, donate, or discard.
- Clean the interior of the closet to prepare for the new setup.
Warning: Be cautious when handling old items, especially if they have been stored for a long time. Pro Tip: Use boxes to categorize items you are keeping for easy access later. This step should take about 30 minutes.
Recommended Products

Superior Brightness Enjoy crisp, natural lighting with our office lamp, designed to enhance focus and reduce eye fatigue. With 500 lumens of brightness and high CRI, it delivers vivid, accurate colors for reading, writing, or designing. The LED technology lasts up to 20,000 hours, ensuring long-term efficiency without flickering or overheating. Upgrade your workspace with a powerful and energy-efficient desk light

RG0 Certified Eye-Caring Desk Lamps: LEPOWER LED desk light is designed with RG0 lamp beads and professional optical lenses, which 100% prevent hazardous blue light. Our desk lighting has reached the RG0 level in IEC 62778, effectively protecting your eyes from fatigue and preventing vision loss

Super Bright & Eye-Caring: This LED desk lamp features a dual-head design for a wider lighting range, delivering high brightness while remaining soft and flicker-free; Reduces eye strain, making it ideal for home office, reading, studying, and long work sessions
Step 2: Clear Out the Closet
Editor’s Choice

IRIS USA 4-Pack Storage Bins with Lids, 13 Quart, Made in USA Stackable …

USANOOKS Microfiber Cleaning Cloth Grey – 12 Pcs (12.5″x12.5″) – High Pe…
Step 3: Choose Your Office Furniture
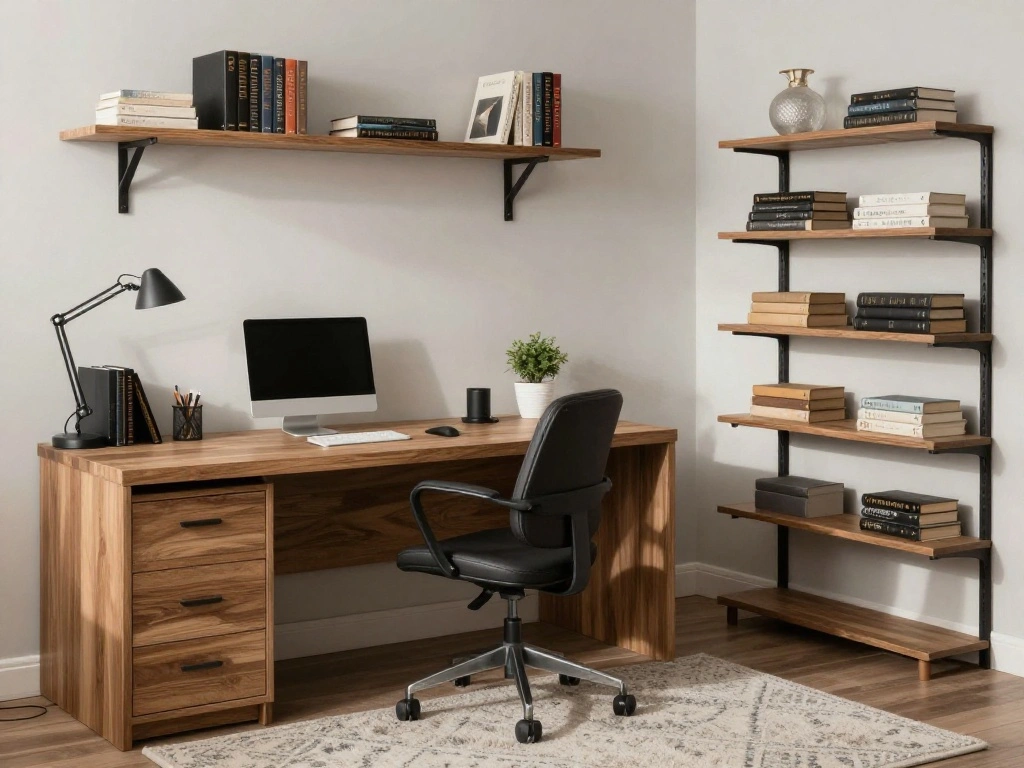
Now that your closet is empty, it’s time to choose the right furniture. Your choices should fit the dimensions and provide functionality. Follow these sub-steps:
- Select a desk or table that fits comfortably within the closet.
- Choose a chair that is ergonomic and allows for comfortable seating.
- Ensure there’s enough room to move around when the door is closed.
Pro Tip: Consider foldable or wall-mounted desks if space is tight. This step should take about 30 minutes.
Recommended Products

Life Saver: Never feel like you have to search for socks or undergarments with these handy drawer organizer that can clear up space and help you stay organized.

Ready to Use Instantly:No installation needed.This purse hook for table is ready to use in seconds. Just place it directly on any desktop, table, or counter, and you're good to go. Equipped with a non-slip sponge pad, it stays securely in place while you hang all your essentials. Whether you're working in the office, studying at school, or dining at a restaurant, this desk purse hook keeps your belongings within easy reach. No setup hassle required

[Declutter & Reclaim Peace] Home organization made easy. This felt storage bin brings style to any space, keeps things tidy, and fits effortlessly into any room, whether it’s the bedroom, living room, office, or playroom.
Step 4: Set Up Electrical and Lighting
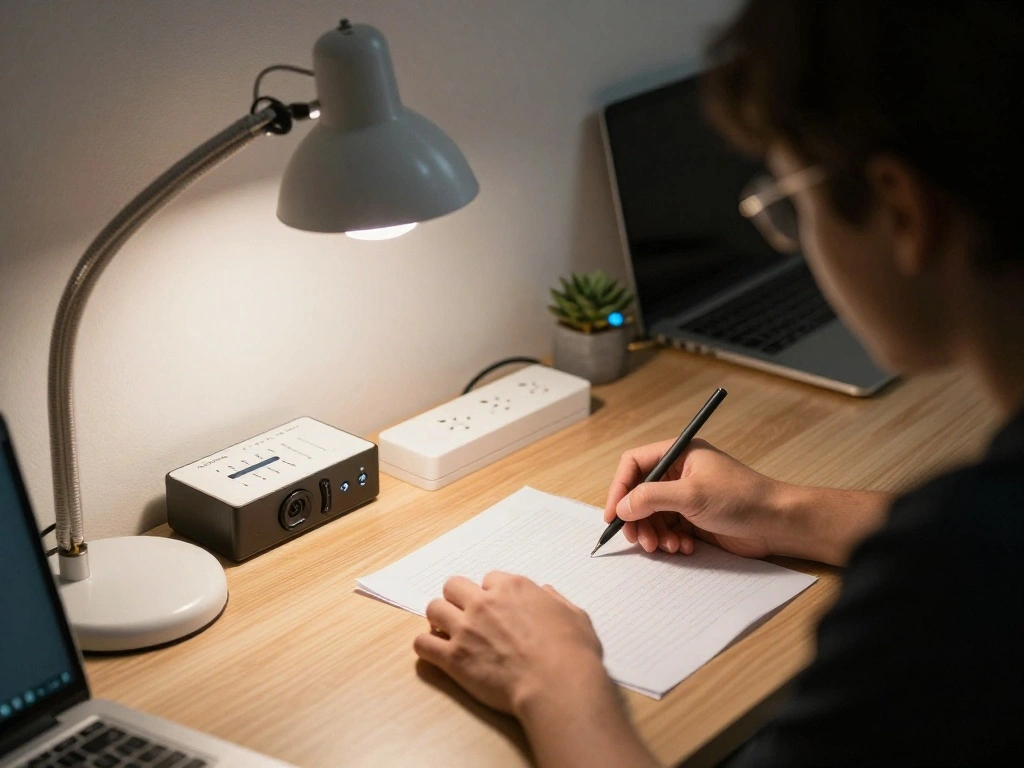
Proper lighting and electrical outlets are essential for a functional office. Follow these sub-steps:
- Find an available power source nearby.
- Install a power strip if necessary, ensuring it’s easily accessible.
- Add a desk lamp or wall-mounted light to brighten the workspace.
Warning: Avoid overloading electrical outlets. Pro Tip: Look for LED lights to save energy and enhance visibility. This step should take about 30 minutes.
Recommended Products

【All-in-One Storage for Small Spaces】 Say goodbye to messy workspaces! This compact computer desk comes with a dedicated CPU stand, a handy storage shelf, and a spacious desktop, providing ample storage for your computer tower, books, stationery, and office supplies. It keeps your essentials within easy reach and your workspace tidy, making it a perfect small writing desk or study desk for small spaces

Square Folding Table with Compact 27” Tabletop - This folding table features a practical 27" x 27" square tabletop, offering ample space for meals, board games, snacks, laptops, or outdoor cooking prep. Ideal as a folding coffee table, patio card table, or portable table for small spaces, apartments, balconies, and RVs.

THE PERFECT SOLUTION - This magnificent foldaway desk is perfect for setting up your at home office. Save space with this rigid, durable, and professional design.
Step 4: Set Up Electrical and Lighting
Editor’s Choice

Surge Protector Power Strip – Nuetsa Flat Plug Extension Cord with 8 Out…
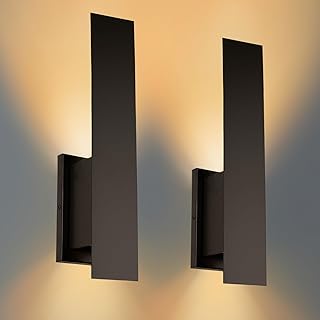
Edwarmlux Indoor Wall Sconces, Modern Wall Lights, Up and Down Wall Moun…

LEPOWER Desk Lamp, 800LM LED for Home Office, 12W Reading for Desk, Eye-…
Step 5: Organize Storage Solutions
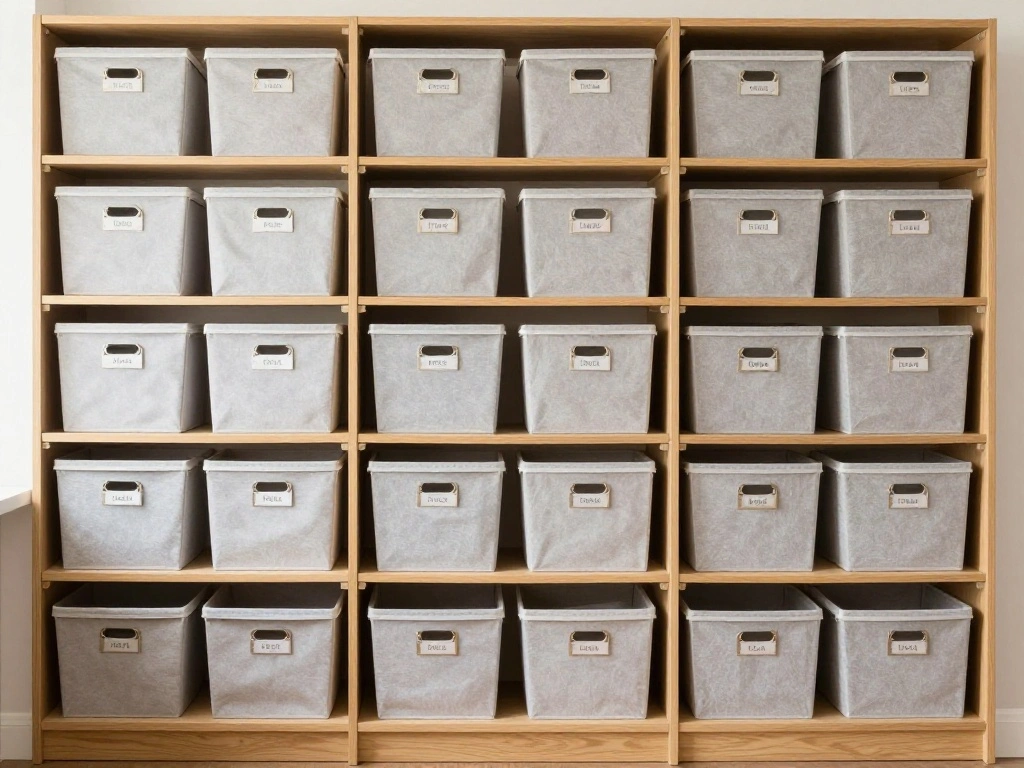
Organizing your office supplies is vital for maintaining a tidy workspace. Follow these sub-steps:
- Choose storage bins or organizers that fit the closet’s dimensions.
- Label bins for easy access to supplies.
- Utilize vertical space by adding shelves if needed.
Pro Tip: Use clear bins to quickly identify contents. This step should take about 30-45 minutes.
Recommended Products

BREATHABLE MESH BACK: 100% ventilated mesh back promotes airflow to keep you cool and comfortable during long hours of sitting, ideal for home offices and workspaces, and daily use.

Space Saving Design: This small armless office chair is designed with space-saving features in mind. The height-adjustable dimensions (24.21"(L) x 16.33"(W) x 34.25"(H)) ensure that it will fit perfectly into any office or workspace. Additionally, the armless design makes it easy to store it under your desk when not in use, maximizing the available space in your office area
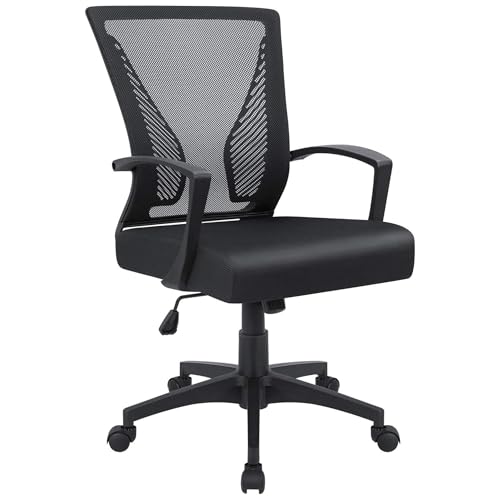
Ergonomic Design: The overall design of this office chair is ergonomic, two lumbar supports on the backside of the chair back are not only for beautiful looking, when you lean in the chair, it feels comfortable like two hands are supporting your waist, with a slightly concave design on the cushion, this chair can effectively relieve the back pain that caused by long hours of sitting, this will be a very wonderful experience for your use
Step 5: Organize Storage Solutions
Editor’s Choice

SUPVAN E11 Bluetooth Label Maker Machine with 4 Tapes, Support Keyboard …

8 Pack Extra Large Heavy Duty Moving Bags, Clear Storage Bins with Lids,…

Sakugi Storage Shelves – 5 Tier Shelf Organizer, Heavy Duty Garage Shelv…
Step 6: Personalize Your Space
Making your office inviting and inspiring can boost productivity. Follow these sub-steps:
- Add personal touches like photos, art, or plants.
- Consider a small rug to make the space feel more comfortable.
- Ensure the decor reflects your style and motivates you.
Pro Tip: Use removable wall decals for easy personalization without permanent changes. This step should take about 30 minutes.
Recommended Products

IDEAL STORAGE CHOICE – These large capacity bins are great for creating a clean and organized refrigerator or pantry. Perfect deep plastic home storage organizer bin for cube furniture shelving in office, entryway, closet, cabinet, bedroom, laundry room, nursery, and kids toy room. Ideal for kitchen storage, pantry storage, fridge storage and your pantry cabinet or storage cabinet. You can use these storage organizers anywhere in your home.

IDEAL STORAGE CHOICE – These large capacity bins are great for creating a clean and organized refrigerator or pantry. Perfect deep plastic home storage organizer bin for cube furniture shelving in office, entryway, closet, cabinet, bedroom, laundry room, nursery, and kids toy room. Ideal for kitchen storage, pantry storage, fridge storage and your pantry cabinet or storage cabinet. You can use these storage organizers anywhere in your home.

【Essential for Purse Lovers & Collectors】Elevate your purse storage with our clear purse organizer, designed to protect your precious handbag collection from deformation, dust, and damage—far better than traditional purse hangers or fabric storage bags. Give your beloved purses the premium care they deserve, keeping them in perfect condition for years to come.
Step 6: Personalize Your Space
Editor’s Choice

Easy to Grow Live Houseplants (6 Pack), Deluxe Collection of Assorted Ai…

63″x51″ Office Chair Mat for Hardwood Floor, Flannel Fabric Desk Rug for…

Chinco Office Inspirational Wall Decals Office Wall Decor for Quotes Pos…
Step 7: Arrange and Optimize Your Setup

Now it’s time to arrange your furniture and optimize the layout for functionality. Follow these sub-steps:
- Position your desk to face the door or window for natural light.
- Ensure your chair and desk are at a comfortable height.
- Test the arrangement by sitting in the chair and accessing supplies.
Warning: Ensure there is enough space to move around without feeling cramped. Pro Tip: Adjust the setup based on your workflow preferences. This step should take about 30 minutes.
Recommended Products

Long Flexible Goose-Neck & Extended Lifespan: This desk lamp features a 360° long flexible goose neck, allowing you to direct the light precisely where you need it. the high-quality aluminum light board ensures superior heat dissipation and extends the lamp's service life up to 50,000 hours.

More than a Desk Light: This office lamp isn't just for brightening your workspace—it's designed to brighten you, too. With a slight adjustment in direction or position, this LED desk light seamlessly transitions from a desk lamp to a webcam light. You could say it combines the functionality of a desk lamp and a ring light;

EYE-CARING LED DESK LAMP: The SUPERDANNY gooseneck clamp-on desk lamp has a unique 60° lighting angle that prevents direct light from shining into your eyes. It features 54 high-quality LED chips that provide even, no-flicker soft light, reducing eye strain even during long use. This lamp enhances focus and productivity, making it ideal for working on important documents or detailed crafting.
Step 7: Arrange and Optimize Your Setup
Editor’s Choice

VERSADESK EvoLift 32″ Electric Standing Desk Converter, Sit to Stand Mot…

WALI Desk File Organizer, 4 Tier Desktop Paper Letter Tray Organizer wit…
Step 8: Final Touches and Setup

Finally, add the finishing touches to your new office. Follow these sub-steps:
- Check that all items are in their designated places.
- Ensure lighting is adequate and comfortable for long hours.
- Test Wi-Fi and any necessary technology.
Pro Tip: Set up a small whiteboard or bulletin board for reminders and notes. This step should take about 30 minutes.
Step 8: Final Touches and Setup
Editor’s Choice

TP-Link AC1200 WiFi Extender – 1.2Gbps Home Signal Booster, Dual Band 5G…

LED Desk Lamp with USB Ports,Touch Desk Lamps for Home Office with 5 Col…
VUSIGN Small Dry Erase Whiteboard, 8.5 x 11 Inches White Board for Kids,…
Pro Tips
- Tip on Ergonomics: Invest in an ergonomic chair to prevent back pain during long hours.
- Tip on Sound: Use noise-canceling headphones to minimize distractions.
- Tip on Air Quality: Keep a small plant for improved air quality and aesthetics.
- Tip on Color: Choose calming colors for decor to promote focus and creativity.
- Tip on Tech: Organize cables with clips or ties to avoid clutter and tangling.
Pro Tips
Editor’s Choice

Hybrid Active Noise Cancelling Bluetooth 6.0 Headphones 120H Long Playti…
Easy to Grow Live Houseplants (6 Pack), Deluxe Collection of Assorted Ai…

TRALT Office Chair Ergonomic Desk Chair, 330 LBS Home Mesh Office Desk C…
Common Mistakes to Avoid
Warning: Don’t overcrowd the space with too much furniture; it can lead to discomfort. Keep it minimal.
Warning: Avoid placing your desk in a corner where light is limited; ensure enough natural light.
Warning: Don’t skip the measuring step; incorrect measurements can lead to poor-fitting furniture.
Common Mistakes to Avoid
Editor’s Choice

Lepro LED Desk Lamp for Home Office, 9.5W 750LM Metal Touch Control Desk…
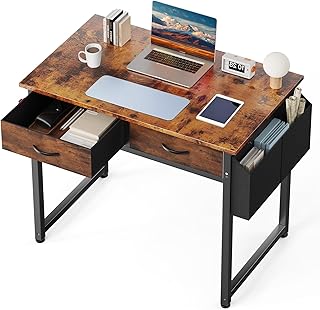
DUMOS 32″ Home Office Computer Desk with Drawers, Small Gaming Writing S…

DEWALT Atomic Compact Series 30 ft. Tape Measure (DWHT38130S)
Troubleshooting Section
Problem: I don’t have enough light.
Solution: Add a brighter lamp or consider installing a wall-mounted light fixture.
Problem: My chair is too low.
Solution: Purchase a chair with adjustable height or add a cushion.
Problem: I feel cramped.
Solution: Reassess furniture placement; consider using foldable options.
Problem: Too much clutter.
Solution: Implement strict organization and declutter regularly.
Problem: Difficulty accessing supplies.
Solution: Arrange frequently used items within easy reach.
Troubleshooting Section
Editor’s Choice

ASD LED 36″ Vanity Flush Mount Light Fixture, Linear Bathroom Lighting B…
Variations/Alternative Methods
Consider these alternative methods based on your needs:
- Wall-mounted desk: Ideal for very small closets where floor space is limited.
- Convertible furniture: Use a Murphy bed or foldable table for versatility.
- Mobile cart: For those who need a flexible workspace that can be moved as needed.
Variations/Alternative Methods
Editor’s Choice
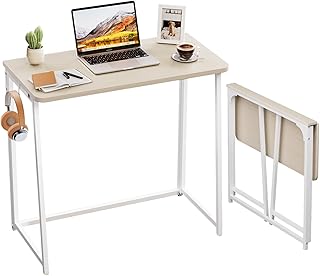
WOHOMO Folding Desk, Small Foldable Desk 31.5″ for Small Spaces, Space S…
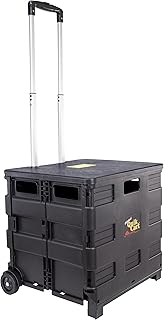
dbest products Quik Cart Collapsible Rolling Crate on Wheels for Teacher…

Pataku Folding Bed with Mattress, Twin Foldable Bed, Roll Away Beds for …
FAQs
What if I don’t have enough electrical outlets?
Consider using a power strip or a multi-port charger to maximize outlet use.
How long should I expect this project to take?
The entire process usually takes between 2-3 hours depending on your prep and install time.
Is it safe to work in a small, enclosed space?
Yes, as long as you have adequate ventilation and lighting, and you design the space for comfort.
Can I use this space for other activities?
Absolutely! You can adapt it for hobbies or reading as well.
What if I want to convert it back?
Keep items organized in bins so you can easily revert the space when necessary.
FAQs
Editor’s Choice

6Ft Power Strip Surge Protector – Yintar Extension Cord with 6 AC Outlet…

DREO Fan for Bedroom, 12 Inches, 70ft Powerful Airflow, 25db Quiet Table…

Giryuhd LED Desk Lamp for Office Home & Battery Operated Lamp Rechargeab…
Conclusion

Congratulations! You’ve successfully transformed your closet into a functional office space. This project not only maximizes your living area but also creates a dedicated space for productivity. Now that your new office is complete, consider setting a schedule to maintain organization and cleanliness.
For further inspiration, explore online resources or take a look at other small space office designs. Keep enhancing your workspace to make it even more enjoyable. Happy working!