
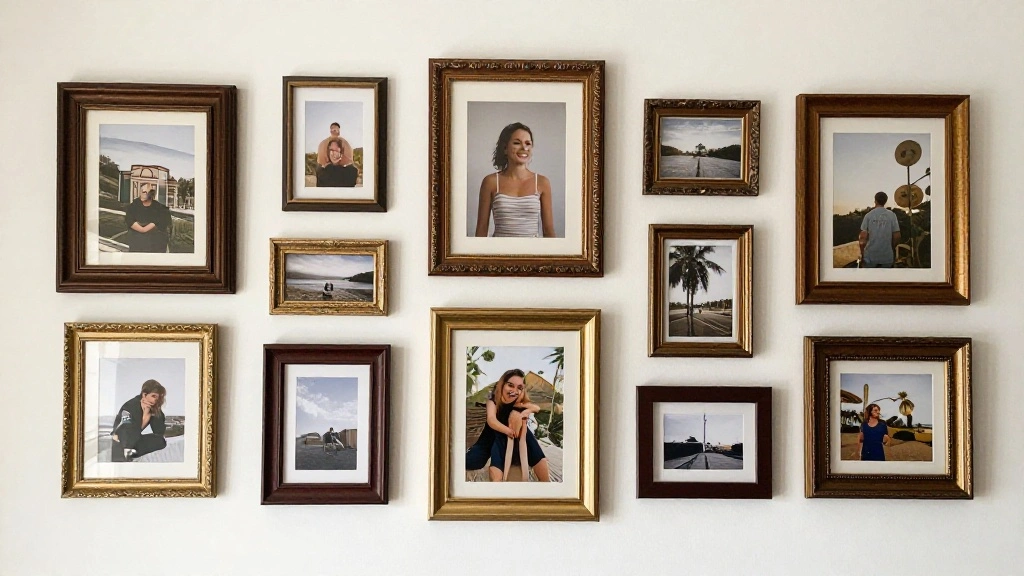
Are you tired of putting holes in your walls every time you want to hang a picture? The good news is that you don’t have to! Hanging pictures without nails is not only possible but also simple and effective. With the right techniques and materials, you can create a beautiful gallery wall or simply hang your favorite art pieces with ease.
In this guide, you will learn various methods to securely hang pictures without using nails. Expect to accomplish a stylishly decorated wall that showcases your personality and creativity. You’ll discover how to use adhesive hooks, picture hanging strips, and other innovative options that are kind to your walls.
This guide is designed for beginners and will take approximately 30 minutes to complete. Whether you’re renting, or just want to avoid wall damage, this guide is for you.
Get ready to transform your living space without the anxiety of damaging your walls!
TL;DR Summary
- Learn how to hang pictures without damaging walls.
- Explore different adhesive options and techniques.
- Follow easy, step-by-step instructions suitable for beginners.
- Decorate your space without the hassle of nails in just 30 minutes.
Recommended Products


HANGS UP TO 19 ITEMS: One Command Variety Pack includes six small picture hanging strips, four large picture hanging strips, three medium utility hooks, two large utility hooks, three small utility hooks, six small wire hooks and 20 strips

MAXIMUM FRAME SIZE 8 X 10 INCHES: One package includes 18 pairs (36 strips total) of the Command Small Picture Hanging Strips; four wall adhesive strip pairs hold 4 pounds; maximum frame of 8 x 10 inches
TL;DR Summary
Editor’s Choice

Command 15 lb Large Picture Hanging Strips 14 Pairs (28 Strips), Damage-…

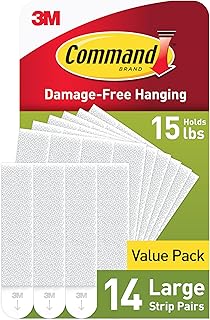
Command 15 lb Large Picture Hanging Strips 14 Pairs (28 Strips), Damage-…

Uniclife 20 Pcs Adhesive Picture Hooks 20 lbs Max 2.2”Load No Drill Sc…
Prerequisites/Materials Needed
- Adhesive Hooks: Choose hooks rated for the weight of your pictures.
- Picture Hanging Strips: Look for brand names like Command Strips.
- Level: A small level ensures your pictures hang straight.
- Measuring Tape: For accurate placement of your pictures.
- Pencil: To mark where your pictures will go.
Prerequisites/Materials Needed
Editor’s Choice

Command Large Utility Hooks, 7-Hooks, 12-Strips, Organize Damage-Free
Command 15 lb Large Picture Hanging Strips 14 Pairs (28 Strips), Damage-…

PREXISO Multi Surface Laser Level LED Light Vial, 30Ft Horizontal & Vert…
Skill Level & Time Estimate
Skill Level: beginner
Total time estimate: 30 minutes
Breaking it down:
- Gather materials: 5 minutes
- Measure and mark: 10 minutes
- Attach hooks/strips: 10 minutes
- Hang pictures: 5 minutes
Recommended Products

Removable and reusable

REMOVABLE HOLD: Securely holds lightweight items up to 2 lbs. without damaging walls - a smarter alternative to traditional tape, push pins, staples and thumbtacks

Packaging content: Feosky Adhesive putty, 120 pieces per pack These adhesive putty are pre cut into squares, each square measuring 0.4 inches x 0.4 inches (1 cm x 1 cm), and can be reused to reduce waste.
Skill Level & Time Estimate
Editor’s Choice
Command 15 lb Large Picture Hanging Strips 14 Pairs (28 Strips), Damage-…

Feosky Adhesive Poster Sticky Tack Putty, Reusable and Removable Adhesiv…
Step 1: Gather Your Materials

Start by collecting all the necessary materials listed in the prerequisites. Here’s how:
- Check that you have adhesive hooks and/or picture hanging strips available.
- Gather a level, measuring tape, and pencil for marking.
- Ensure you have clean, dry walls for optimal adhesion.
Pro Tip: Using a variety of hook sizes helps accommodate different frame weights.
Why this matters: Having everything ready will make the process smoother and more efficient.
Estimated time for this step: 5 minutes.
Recommended Products

Precision Hanging Tool: This frame hanging level tool ensures accurate positioning for picture frames, allowing you to mark hook spots effortlessly with its built in level, making wall decoration simple and precise.

THE ORIGINAL GO HANG IT! Easy picture hanging with zero measuring required. Our patented positioning system marks your nail holes accurately on the first try, so you're not guessing, patching drywall, or rehanging crooked frames. Works with sawtooth, wire, and D-ring picture hangers.

3-in-1 Art Hanging Kit with Built-in Level: This multi-functional picture hanging tool combines a built-in level, adjustable measuring ruler, and nail position marker in one compact device; extends to 30 inches for large frames, canvas prints, and gallery wall layouts with precise alignment every time.
Step 1: Gather Your Materials
Editor’s Choice
CRAFTSMAN 25-Ft Tape Measure with Fraction Markings, Retractable, Self-L…
Step 2: Measure and Mark the Wall

Next, you’ll need to measure and mark where you want your pictures to be hung. Follow these steps:
- Decide the layout for your pictures. Consider symmetry and spacing.
- Use the measuring tape to find the center point for each picture.
- Lightly mark the spots on the wall with a pencil.
Warning: Ensure your marks are level to avoid crooked pictures.
Why this matters: Proper placement will enhance the visual appeal of your display.
Estimated time for this step: 10 minutes.
Recommended Products

【Heavy Duty Adhesive Wall Hooks】These wall hangers without nails are made of stainless steel, polyvinyl chloride, and strong adhesive.

HOLDS UP TO 4 POUNDS: One package of the white Command Sawtooth Picture Hangers includes four picture frame hangers and eight large Command Strips; one adhesive picture hanger holds up to 4 lbs

INCLUDES- 3 metallic gray hangers, 6 large strips, 6 stabilizer pairs; 1 hanger holds 5 lbs
Step 2: Measure and Mark the Wall
Editor’s Choice

Torpedo Level Magnetic, Firecore 9 Inch Shockproof Small Leveler Tool wi…

Laser Measure 50M/165ft,RockSeed Digital Laser Distance Meter with 2 Bub…
Step 3: Prepare the Adhesive Strips or Hooks

Before attaching anything to the wall, prepare your adhesive strips or hooks:
- If using strips, peel off the backing on one side and press it onto the back of the frame.
- For hooks, remove the protective film from the adhesive side.
- Press the adhesive firmly against the wall in the marked spot.
Pro Tip: Let the adhesive sit for a few minutes to create a stronger bond.
Why this matters: Proper preparation ensures that your pictures stay securely in place.
Estimated time for this step: 10 minutes.
Step 3: Prepare the Adhesive Strips or Hooks
Editor’s Choice
Command 15 lb Large Picture Hanging Strips 14 Pairs (28 Strips), Damage-…
Step 4: Attach the Hooks or Strips to the Wall

Now that your hooks or strips are prepared, it’s time to attach them to the wall:
- Align the adhesive with your pencil marks.
- Press firmly against the wall for the recommended time (usually about 30 seconds).
- For hooks, ensure they are level before releasing.
Warning: Avoid moving the hook or strip once attached; this can weaken the adhesive.
Why this matters: A secure attachment is crucial for holding the weight of your picture.
Estimated time for this step: 10 minutes.
Recommended Products
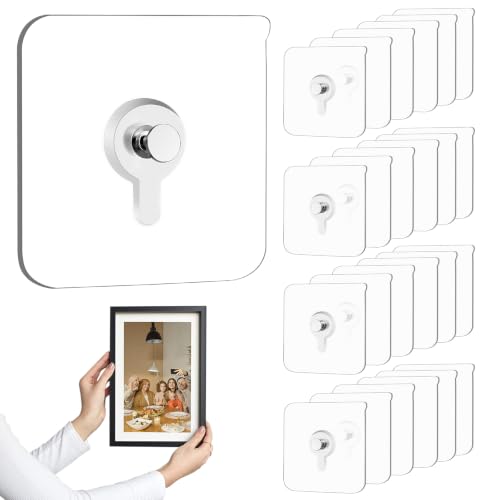
High Load Capacity: With a 2.2" L × 2.2" W size, 0.8 mm-thick PVC base, and removable metal peg, each adhesive picture hanger securely holds up to 9 kg/20 lbs. (For best results over time, we suggest keeping the load under 7.5 kg/15 lbs.) Its waterproof and oilproof build ensures dependable, lasting strength.

Suitable for Smooth & Dry Surfaces: Our heavy-duty adhesive hooks stick firmly to flat, dry smooth surfaces including tile, marble, glass, solid wood, metal and plastic. Not suitable for brick, concrete or textured rough walls.

【ANTI-DROP 20LB MAX HOLD – ZERO LAYER SMASHING】 Stop risking your wall decor to weak adhesive dots that give out unexpectedly. Our upgraded non-trace screw hook stickers are engineered with an advanced 100% thick nanotech acrylic adhesive gel layer across an expanded 2.36 x 2.36 Inches base. It distributes weight beautifully to deliver a rock-solid, anti-drop load capacity of up to 20lb (9kg). Your decorations, boards, and clipboards will stay securely locked to the wall for 365+ days without budging, completely preventing the heartbreaking drops common with low-grade alternatives.
Step 4: Attach the Hooks or Strips to the Wall
Editor’s Choice
15 lb Large Picture Hanging Strips 14 Pairs (28 Strips), Damage-Free Han…
Step 5: Hang Your Pictures

With your hooks or strips in place, it’s time to hang your pictures:
- Lift the picture frame and align it with the hook or strip.
- Press it firmly against the adhesive to ensure a strong bond.
- Step back and check that the picture is level.
Pro Tip: Use multiple hooks for larger frames for added stability.
Why this matters: Proper hanging keeps your pictures secure and visually appealing.
Estimated time for this step: 5 minutes.
Step 5: Hang Your Pictures
Editor’s Choice

Command 4 lb Small Picture Hanging Strips 36 Pairs (72 Strips), Damage-F…
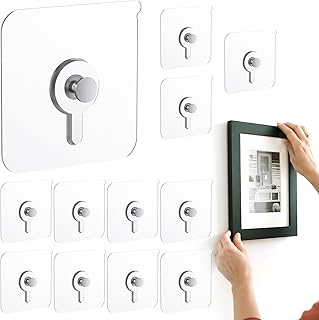
12 Pcs Picture Hangers without Nails, 20 Ibs Load Heavy Duty Self Pictur…
Torpedo Level Magnetic, Firecore 9 Inch Shockproof Small Leveler Tool wi…
Step 6: Step Back and Assess

Once all your pictures are hung, take a step back to assess the final look:
- Check if all frames are level and evenly spaced.
- Make adjustments if necessary by gently lifting the frames.
- Consider adding additional art or decor to enhance the display.
Warning: Be gentle when adjusting to avoid damaging the adhesive.
Why this matters: A well-arranged display creates a more cohesive and inviting atmosphere.
Estimated time for this step: 5 minutes.
Step 6: Step Back and Assess
Editor’s Choice

Level Ruler Picture Hanging Tool with Level – Precision Wall Mount Gui…
Step 7: Clean Up
After everything is in place, it’s time to clean up:
- Put away any tools or materials used during the process.
- Check the area for any debris or leftover adhesive.
- Enjoy your newly decorated space!
Pro Tip: Keep extra adhesive strips or hooks for future projects.
Why this matters: Cleaning up ensures your space remains tidy and ready for use.
Estimated time for this step: 5 minutes.
Recommended Products

Premium Materials & Durable Construction: DDMY Adhesive hooks crafted from robust stainless steel and durable PVC; high quality and longevity; remain clean and unaffected by time; non-toxic, recyclable, and transparent

Hanging Adhesive Strips: Picture Hanging strips (20 Pairs/40 Strips, L2.6in x W0.8in) can replace nails or liquid adhesives. Wall hanging strips are backed with high-quality adhesive backing, compared with ordinary double-sided adhesive, stronger adhesion for photos, artwork, or Christmas decorations without damaging the wall

HOLDS UP TO 2 POUNDS: One package of the Command Clear Medium Wall Hooks includes seven clear wall hooks and 12 adhesive strips; each adhesive wall hook can hold up to 2 pounds
Step 7: Clean Up
Editor’s Choice
Command Large Utility Hooks, 7-Hooks, 12-Strips, Organize Damage-Free
Uniclife 20 Pcs Adhesive Picture Hooks 20 lbs Max 2.2”Load No Drill Sc…
Step 8: Enjoy Your Decorated Space

Now that your pictures are hung, take a moment to appreciate your hard work:
- Invite friends or family to enjoy your newly decorated wall.
- Consider how the pictures enhance your space and reflect your style.
- Plan for future updates or changes to your gallery.
Pro Tip: Rotate your pictures occasionally for a fresh look.
Why this matters: Enjoying your decorated space boosts your mood and personalizes your home.
Estimated time for this step: 5 minutes.
Step 8: Enjoy Your Decorated Space
Editor’s Choice

Vittanly 20 Pack Picture Frames Collage Wall Decor, Multi Sizes Includin…

KURUI 303Pcs Picture Hanging Kit, Picture Hangers Assorted Kit with Heav…

Command Medium Picture Hanging Strips, Damage Free Hanging of Dorm Decor…
Pro Tips
- Weight Limits: Always check the weight limit for adhesive hooks and strips before use.
- Surface Preparation: Clean the wall with isopropyl alcohol before applying adhesive for better adhesion.
- Variety of Sizes: Use different sizes of hooks and strips for various picture weights and sizes.
- Picture Frames: Lightweight frames are best for adhesive methods to ensure stability.
- Seasonal Decor: Change your pictures with the seasons to keep your decor fresh and exciting.
Pro Tips
Editor’s Choice
Command 15 lb Large Picture Hanging Strips 14 Pairs (28 Strips), Damage-…

Adhesive Hooks, 32 Pack 33lb(Max) Sticky Hooks, Transparent Reusable Rem…

Wenqik 45 Pcs Adhesive Picture Hanger Foamboard Picture Hanging Hooks Wi…
Common Mistakes to Avoid
Warning: Don’t rush the adhesive setting time; it can cause frames to fall.
Warning: Avoid using heavy frames with weak adhesive; it will likely lead to issues.
Warning: Don’t forget to measure your wall space before marking; it can result in an unbalanced look.
Common Mistakes to Avoid
Editor’s Choice
Command 15 lb Large Picture Hanging Strips 14 Pairs (28 Strips), Damage-…

Large Hooks for Hanging Heavy-Duty 44Ib(Max) 10 Packs, Wall Hangers with…
Laser Measure 50M/165ft,RockSeed Digital Laser Distance Meter with 2 Bub…
Troubleshooting Section
Problem: Pictures keep falling off the wall.
Solution: Check the weight limit of your adhesive; replace it if necessary.
Problem: Adhesive strips aren’t sticking.
Solution: Ensure the wall is clean and dry before reapplying.
Problem: Pictures look crooked.
Solution: Adjust the frames gently and ensure the hooks are level.
Troubleshooting Section
Editor’s Choice
Torpedo Level Magnetic, Firecore 9 Inch Shockproof Small Leveler Tool wi…
Variations/Alternative Methods
If adhesive options aren’t for you, consider:
- Wall-Mounted Picture Ledges: Great for rotating art without damaging walls.
- Magnetic Strips: Ideal for metallic frames and easy to swap out.
- Command Strips with Velcro: Perfect for removable frames that need frequent changes.
Variations/Alternative Methods
Editor’s Choice

Command Picture Hanging Strips Variety Pack, Damage Free Hanging Picture…

Floating Picture Ledge Shelves Set of 2, 16 Inch Solid Wood Wall Shelves…

12-Pairs Magnetic Picture Hanging Strips, Magnetic Fixator Removable and…
FAQs
What if I don’t have adhesive hooks? You can use picture hanging strips instead; they work similarly.
How long should I wait before hanging a picture after applying adhesive? It’s best to wait at least an hour to ensure a strong bond.
Is it safe to move pictures around once they’re hung? Yes, but be gentle to avoid damaging the adhesive.
What if my wall has texture? Choose hooks specifically designed for textured surfaces for better adherence.
Can I use this method outdoors? Some adhesives are not suitable for outdoor use; check labels carefully.
FAQs
Editor’s Choice

Gorilla Mounting Putty, Natural Tan Color, 168 Pre-Cut Squares (Pack of …

No Hole Adhesive Ceiling Hooks for Popcorn Concrete Textured Ceiling Uns…
Command 15 lb Large Picture Hanging Strips 14 Pairs (28 Strips), Damage-…
Conclusion

Congratulations! You’ve successfully learned how to hang pictures without nails. Enjoy the satisfaction of a beautifully decorated wall free from damage. Consider expanding your decor with new pieces or rotating your existing artwork for a fresh look.
Now that you know the basics, explore other DIY projects that enhance your living space. Whether it’s creating a gallery wall or adding personal touches, your home is now a canvas for your creativity!