

Are you tired of looking at a cluttered desk at the end of a long workday? A messy workspace can lead to stress and a lack of productivity. That’s why it’s crucial to find a solution that allows you to hide your desk and keep your work environment tidy. In this guide, you’ll learn how to effectively clear your workspace and hide away your office clutter.
This step-by-step guide will enable you to declutter your desk space, organize your materials, and create a more serene work environment by the time you clock out. You’ll discover practical techniques to manage your workspace efficiently, ensuring you leave work feeling accomplished and stress-free.
By the end of this guide, you’ll be equipped with actionable steps that will transform your desk into a clean, organized, and hidden workspace ready for tomorrow. Difficulty: beginner. Estimated time: 20-30 minutes.
TL;DR Summary
- Clear your desk of all items to create a tidy workspace.
- Organize your materials in a way that makes them easy to store.
- Use storage solutions to hide away essential tools and documents.
- Establish a routine for maintaining a clean desk at the end of each workday.
Recommended Products

【Larger size】: 14.9"x 9.8"x 9.8" (L x W x H). Fabric Storage Bins allows you to accommodate more things, such as clothes, toys, magazines, books and anything else, which is very convenient and practical .

[Multi-Purpose Organizers] Small storage drawers help you to organize everywhere in your home. They can be used as organizers and storage for makeup, bathroom countertop, kitchen or laundry under sink, medicine cabinet, pantry, vanity. You can flexibly use our storage organizer for house organization and storage according to your needs.

【Wide Application and Multi-purpose】Kmiectse folding storage bins organizer is versatile to be used as kitchen organization, bathroom organizer, bedroom storage, closet organizer, food storage containers, laundry room organization, toy storage, snack organizer, book case, hat storage box, etc.
TL;DR Summary
Editor’s Choice

Sterilite 4 Pack Ultra Latching Box, Storage Bins with Lids, Clear Plast…

Under Desk Cable Management Tray No Drill, Metal Mesh Cable Management U…

WALI Desk File Organizer, 4 Tier Desktop Paper Letter Tray Organizer wit…
Prerequisites/Materials Needed
- Storage bins or boxes (1-2)
- Desk organizers (1-2)
- Cleaning supplies (e.g., wipes, spray)
- Labels (if needed)
- Cable ties or clips (optional)
Recommended Products

9-compartment drawer organizer holds writing instruments, paper clips, tape and notepads

Improve drawer storage with this home or office desk organizer tray 4 compartments for various functions, such as pencil holder, makeup drawer organizer insert, jewelry drawer organizer, sundries, pencil case, drawer divider, all-purpose container, etc

All-in-One Desk Organizer: WALI multi-tier desk organizer features 4 letter trays, a vertical file folder organizer, 2 metal pen holders and a sliding divided drawer, keeping your office supplies for desk tidy and maximizing desktop space, ideal for ideal for women and men as office desk accessories
Prerequisites/Materials Needed
Editor’s Choice

XHF 120 PCS Adhesive Cable Wire Clips Black, Outdoor Christmas Light Cli…

gianotter Wood Desk Organizers and Accessories with File Holder, 4-Tier …

ZICOTO Decorative Storage Boxes with Lids – Set of 2 Beautiful PU Leat…
Skill Level & Time Estimate
Skill Level: beginner
Total time estimate: 20-30 minutes
Breakdown of time by major steps:
- Clearing the desk: 5-10 minutes
- Organizing materials: 10-15 minutes
- Finalizing storage: 5 minutes
Skill Level & Time Estimate
Editor’s Choice

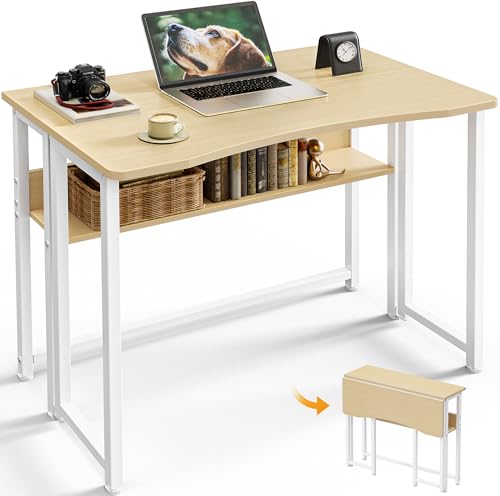
Huuger Folding Desk with Storage Shelf, 31.5 Inch Foldable Computer Tabl…
Step 1: Clear Your Desk
Begin by clearing everything off your desk. This allows you to assess the situation and decide what to keep and what to get rid of.
- Remove all items from your desk surface.
- Sort items into categories: keep, discard, or donate.
- Wipe down the desk to remove dust or stains.
Pro Tip: Use a trash bin nearby to quickly discard items you no longer need.
Why this matters: A clean slate makes it easier to organize your workspace effectively.
Time estimate for this step: 5-10 minutes.
Recommended Products

【No Drill Mounted】Cable management tray can be assembled in as little as 3 minutes or less-simply. Side clips easily clampe the edge of desk, pass through the holes on the sides, and secure excess cables with baskets. Desk cable management supports inward or outward installation to meet your needs in different scenarios, and provides you with great convenience when collecting and organizing wires.
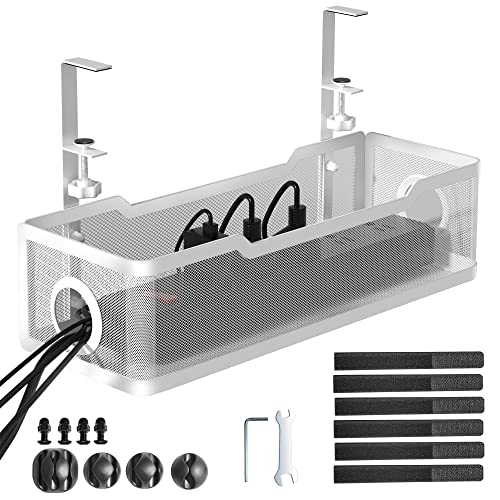
No Need to Drilling Holes - Instead of damaging to your desk, our under desk cable management tray can be hanged directly to desk frames and change its position easily as you like, unlike others screw installation. It Excellent to install a clamp on any wood, glass, or any material on your desk.

Large Capacity and Durable. The cable tray size 36"L x 5.5"W x 5.5"H (The product images include detailed dimension diagrams. Please measure your table before purchasing to select the appropriate size.), it fits all size adapters and sockets, holds and hides everything under your table. It is ideal cable management under desk.
Step 1: Clear Your Desk
Editor’s Choice

Lancord Cord Organizer for Appliances, 8 Pack Upgraded Kitchen Appliance…

Clear Desk Mat, Non-Slip PVC Desk Protector Mat with Round Edge, Heat Re…

gianotter Desk Organizers and Accessories, Monitor Stand with Drawer and…
Step 2: Sort Your Items

Now that your desk is clear, it’s time to sort through the items you want to keep. This will help you determine the best way to organize them.
- Check the items you want to keep for their necessity.
- Group similar items together, such as stationery, documents, and personal items.
- Decide on the frequency of use to prioritize items you need daily.
Pro Tip: Keep only essential items on the desk surface to minimize clutter.
Why this matters: Sorting items helps create an organized system that allows you to find things easily.
Time estimate for this step: 5-10 minutes.
Recommended Products

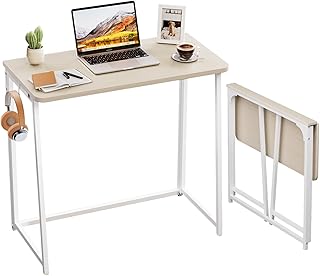
【Compact Foldable Desk for Small Spaces】Short on space? This foldable computer desk is your go-to solution for small home office, apartments, small bedrooms, tight corners, or RVs. This office desk folds down to only 9.3" thick, so you can put it next to the couch, door, or narrow gaps when not in use. Free up your living area without sacrificing functionality
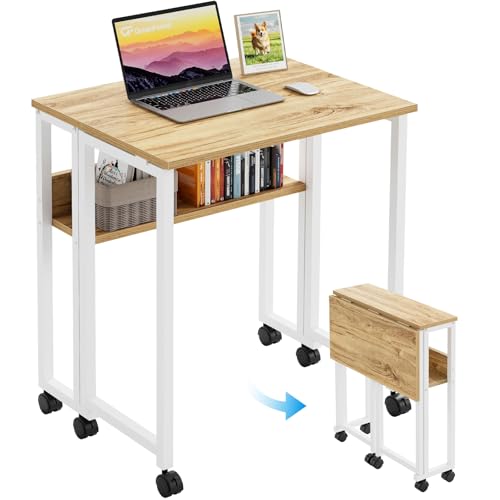
Smooth Mobility and Locking Wheels: 6 swivel casters move effortlessly on any floor. Roll portable workstations from bedroom to kitchen, brakes lock stability

Space-Saving Sanctuary: Great for home office and small apartments, this fold out desk frees up your space when closed—only 7.7" deep. Switch effortlessly between a full workspace and a neat display cabinet, helping you reclaim your living area
Step 2: Sort Your Items
Editor’s Choice
WOHOMO Folding Desk, Small Foldable Desk 31.5″ for Small Spaces, Space S…

Marbrasse Mesh Pen Holder for Desk, Multi-Functional Pencil Organizer wi…
Step 3: Choose Storage Solutions
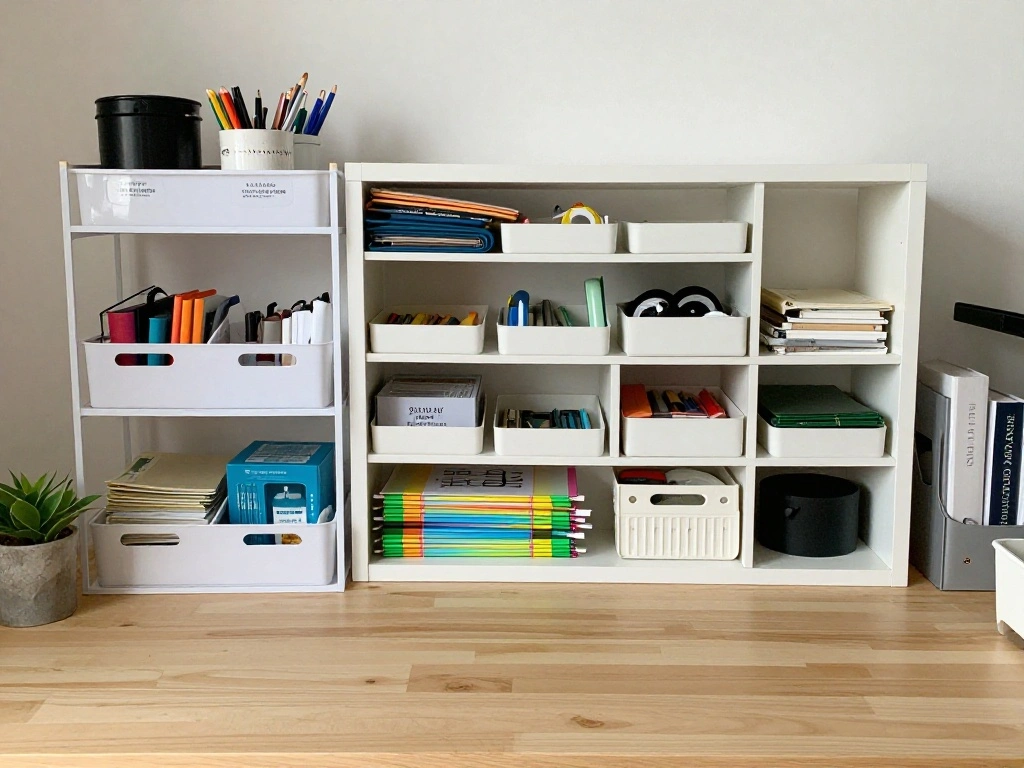
Identify storage solutions that will work best for your needs. Various options are available to help keep your items organized and out of sight.
- Consider using storage bins or boxes for larger items.
- Desk organizers can help keep smaller items like pens and paper clips sorted.
- Label your storage solutions for easy identification.
Pro Tip: Use transparent bins so you can see what’s inside without opening them.
Why this matters: Proper storage keeps your desk uncluttered and makes items easily accessible when needed.
Time estimate for this step: 5 minutes.
Recommended Products
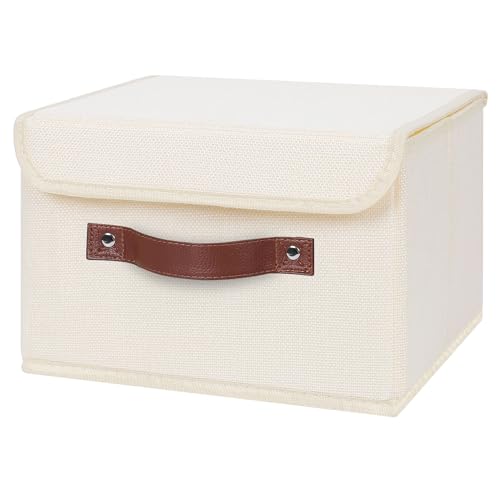
Includes 1 pack small lidded storage bin, measuring 10.2" long, 8" wide and 7" high.

INCLUDES SIX CUBES: Keep your home tidy and organized with this set of six cloth storage cubes

File Cabinet with Dividers: The small file cabinet has a non-woven fabric drawer to fit A4 or letter-size hanging files. With 3 detachable dividers to create four storage zones, this file organizer helps you organize files and books efficiently, maintaining a tidy workspace
Step 3: Choose Storage Solutions
Editor’s Choice

Rollo USB Shipping Label Printer – Commercial Grade 4×6 Thermal Label Pr…
WALI Desk File Organizer, 4 Tier Desktop Paper Letter Tray Organizer wit…
Step 4: Organize Your Desk Items

Now it’s time to organize your items into the chosen storage solutions. This will create a neat and efficient workspace.
- Place frequently used items in accessible spots.
- Store less frequently used items in bins or drawers.
- Arrange items in a way that makes sense to you (e.g., by category or usage).
Pro Tip: Keep a small section for personal items that inspire or motivate you.
Why this matters: An organized desk promotes productivity and can reduce stress when working.
Time estimate for this step: 10 minutes.
Recommended Products

Crystal-Clear Acrylic Material: Made of transparent, high-quality acrylic, you can see exactly what you have at a glance. No more digging around! It won't bend, deform, or rust like iron, and a non-slip base to protect your desktop and drawers.

【 Stylish & Space-Saving Design 】Modern, low-profile design blends effortlessly into any workspace. No tools required — Just unpack and organize.

Perfect Size: 6 compartment for spacious storage capacity. Dimensions - Measures 11" x 6.1" x 1.42".
Step 4: Organize Your Desk Items
Editor’s Choice
Marbrasse Mesh Pen Holder for Desk, Multi-Functional Pencil Organizer wi…
Step 5: Tackle Cables and Wires
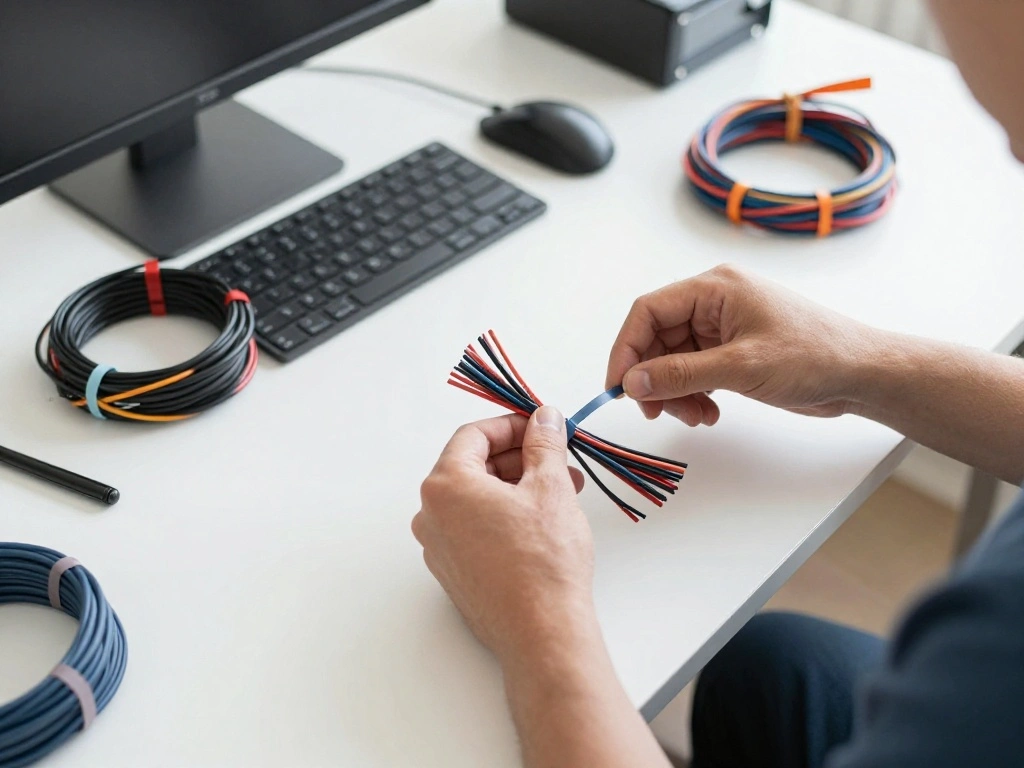
Next, it’s essential to manage your cables and wires to create a tidy look. This is often overlooked but can significantly impact desk aesthetics.
- Gather all cables and cords from devices on your desk.
- Use cable ties or clips to bundle them together.
- Hide the cables behind your desk or under a cable management tray.
Pro Tip: Label cables for easy identification, especially if you have multiple devices.
Why this matters: Organizing cables not only looks better but also prevents tangles and hazards.
Time estimate for this step: 5 minutes.
Recommended Products

【NEW UPGRADE DESIGN】Unique PORTABLE HANDLE design which makes the paper sorter organizer very convenient to move and place where you need it!
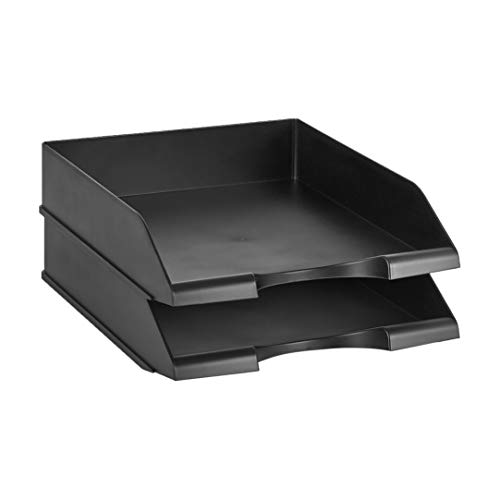
Stackable office letter tray (2-pack) for keeping papers and files neatly sorted

Stackability & NO Need Assemble: This Letter tray includes a total of 4 trays. The stackable design allows users to adjust the height and number of trays according to their needs. And the trays can be used separately, can be placed in different locations. Compared with other metal trays that are prone to rust, Our stackable and separable letter trays requires no assembly, and offer an economical and efficient solution.
Step 5: Tackle Cables and Wires
Editor’s Choice

Flezoo Cord Holder Cable Holder, 12PCS Black Adhesive Cable Clips Cord O…
Under Desk Cable Management Tray No Drill, Metal Mesh Cable Management U…
Step 6: Clean Your Desk Surface
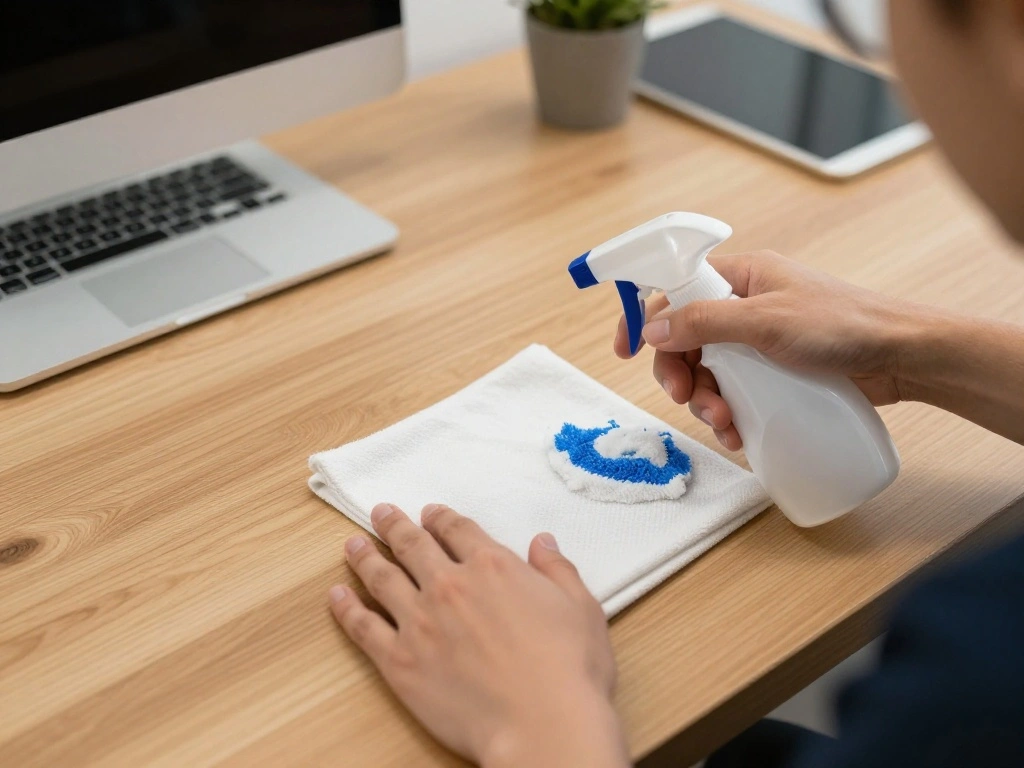
With everything organized, clean your desk surface to ensure it looks inviting and fresh for the next workday.
- Use a microfiber cloth and cleaning spray to wipe down the desk.
- Pay attention to corners and edges where dust accumulates.
- Buff the surface to give it a polished look.
Pro Tip: Regularly clean your desk to maintain a healthy work environment.
Why this matters: A clean workspace promotes a positive mindset and productivity.
Time estimate for this step: 5 minutes.
Recommended Products

We used ChatGPT to analyze our reviews and determine the main benefits our customers received. Here is the summary:

【Premium Quality】: A high-quality under-desk premium fabric cable organizer made of thickened flame-retardant Oxford cloth, which effectively enhances safety. It can hide wires and power strips, offering flame resistance and dust protection, thus creating a safe, neat and orderly cable management tray for standing desks.

【High-Quality Metal Cable Management Under Desk】The under desk cable management contains two U-shaped channels cord organizer for desk crafted from pure metal, offering a high-end texture and robust, stable construction. The rounded corners and smooth surface of our desk cable management guarantee no harm during use, providing a safer environment for you and your family. This under desk organizer is undoubtedly the optimal solution for under desk cable management
Step 6: Clean Your Desk Surface
Editor’s Choice

USANOOKS Microfiber Cleaning Cloth Grey – 12 Pcs (12.5″x12.5″) – High Pe…

Method All-Purpose Cleaner Spray, Lime + Sea Salt, Perfect for Most Coun…
Step 7: Establish a Daily Routine

To maintain your newfound organization, establish a daily routine that includes tidying up your workspace at the end of each day.
- Set a specific time each day to clear your desk.
- Make it a habit to put items back in their designated places.
- Encourage coworkers to do the same for a collective effort.
Pro Tip: Set a reminder on your phone to prompt you at the end of the workday.
Why this matters: Creating a routine helps reinforce the habit of keeping your desk organized.Time estimate for this step: 5 minutes.
Recommended Products
【Compact Foldable Desk for Small Spaces】Short on space? This foldable computer desk is your go-to solution for small home office, apartments, small bedrooms, tight corners, or RVs. This office desk folds down to only 9.3" thick, so you can put it next to the couch, door, or narrow gaps when not in use. Free up your living area without sacrificing functionality

【Compact Foldable Desk for Small Spaces】Short on space? This foldable computer desk is your go-to solution for small home office, apartments, small bedrooms, tight corners, or RVs. This office desk folds down to only 9.3" thick, so you can put it next to the couch, door, or narrow gaps when not in use. Free up your living area without sacrificing functionality

Anti-Slip Design: The purse hook features anti-slip grip rubber backings on each hanger hook, ensuring that your bag stays securely in place and prevents slippage on various surfaces.
Step 7: Establish a Daily Routine
Editor’s Choice

caktraie Makeup Organizer Storage With 16 Drawers, 4 Pcs Desktop Office …

ZhiYo Cable Management Box Black, 2Pack Cord Organizer Box – Extra Large…
Step 8: Share Your Tips with Others

Finally, share your tips for organizing and hiding your desk with coworkers. This creates a culture of tidiness.
- Discuss your methods during team meetings.
- Offer to help others organize their desks.
- Share resources or articles that inspired your organization.
Pro Tip: Organizing together can foster teamwork and camaraderie.
Why this matters: Encouraging others to maintain a clean workspace leads to a more productive environment for everyone.
Time estimate for this step: 5 minutes.
Step 8: Share Your Tips with Others
Editor’s Choice
Lancord Cord Organizer for Appliances, 8 Pack Upgraded Kitchen Appliance…
WALI Desk File Organizer, 4 Tier Desktop Paper Letter Tray Organizer wit…
Step 9: Evaluate Your Setup Regularly

To ensure your workspace remains effective, evaluate your setup regularly. This allows you to adapt to any changes in your work style.
- Set a monthly reminder to review your desk organization.
- Adjust storage solutions as needed based on your workload.
- Make changes to improve accessibility and efficiency.
Pro Tip: Keep a notepad to jot down any changes that come to mind throughout the month.
Why this matters: Regular evaluations help maintain an efficient workspace that suits your needs.
Time estimate for this step: 5 minutes.
Step 10: Celebrate Your Success

After completing these steps, take a moment to celebrate your success in creating a clean and organized workspace.
- Reflect on how your desk looks and feels now.
- Share your achievement with friends or coworkers.
- Consider treating yourself to a small reward for your efforts.
Pro Tip: Keep inspiring quotes or images at your desk to remind you of your success.
Why this matters: Celebrating achievements boosts motivation and reinforces positive habits.
Time estimate for this step: 5 minutes.
Step 10: Celebrate Your Success
Editor’s Choice
WALI Desk File Organizer, 4 Tier Desktop Paper Letter Tray Organizer wit…
Pro Tips
- Stay Consistent: Consistency is key to maintaining an organized desk.
- Minimize Paper Clutter: Go digital where possible to reduce paper usage.
- Invest in Quality Storage: Durable storage solutions can last longer and look better.
- Color Code Items: Use colors to categorize items visually for quicker access.
- Use Vertical Space: Utilize shelves or wall organizers to free up desk space.
Pro Tips
Editor’s Choice

SONGMICS Cabinet Organizer Shelf, Set of 2 Kitchen Counter Shelves, Kitc…
WALI Desk File Organizer, 4 Tier Desktop Paper Letter Tray Organizer wit…

D-Line Cable Management Box, Power Strip Holder, Floor Outlet Hiders, De…
Common Mistakes to Avoid
Warning: Avoid keeping unnecessary items on your desk, as it can lead to clutter.
Warning: Do not ignore the importance of regular cleaning; it can lead to dust buildup and unhealthy workspace conditions.
Warning: Don’t neglect to label storage items; it can cause disorganization later.
Common Mistakes to Avoid
Editor’s Choice

DECOMOMO Storage Bins, Cube Storage Bin with Labels, Fabric Storage Cube…
WALI Desk File Organizer, 4 Tier Desktop Paper Letter Tray Organizer wit…
Troubleshooting Section
Problem: My desk still feels cluttered after organizing.
Solution: Reassess your organization method and consider minimizing the number of items on your desk.
Problem: I can’t find my items quickly.
Solution: Create a designated space for frequently used items and practice returning them after use.
Problem: Cables are still visible.
Solution: Use more cable ties or consider cable management solutions that hide them better.
Troubleshooting Section
Editor’s Choice

Alex Tech 10ft – 1/2 inch Cord Protector Wire Loom Tubing Cable Sleeve S…

2 Pack Under Desk Shelf – 13 Inch Under Desk Storage Shelf, Metal -Under…

Supeasy 5 Trays Paper Organizer Letter Tray with Handle-Mesh Desk File H…
Variations/Alternative Methods
Method 1: Use a mobile cart for items you frequently use. This way, you can easily move it out of sight when not in use.
Method 2: Implement a ‘one in, one out’ rule where for every new item you bring into the workspace, you remove an old one.
Each method has its pros and cons:
- Mobile carts offer flexibility but require space to store.
- The one in, one out rule ensures minimal clutter but requires discipline.
Variations/Alternative Methods
Editor’s Choice

Universal Collapsible Mobile Storage Crate, 18.25″ x 15″ x 39.4″, Black

SKYDUE Pink Desk Accessories, Pink Office Supplies Set, Mesh Desk Organi…
FAQs
What if I don’t have enough storage solutions? You can use household items like boxes or baskets to store your workspace items temporarily.
How long should I spend organizing my desk? Aim for 20-30 minutes for a thorough organization session.
Is it safe to store electronics in bins? Yes, as long as they are dry and not overheating, you can store them in bins.
FAQs
Editor’s Choice
WALI Desk File Organizer, 4 Tier Desktop Paper Letter Tray Organizer wit…

ClearSpace Plastic Storage Bins with Lids X-Large – Perfect Kitchen Or…
Conclusion

Congratulations! You’ve successfully hidden your desk and created a more organized workspace. You should feel accomplished and ready to tackle the next workday with a fresh mindset.
Now that you’ve mastered this technique, consider sharing your newfound skills with others or exploring additional organization strategies to further improve your workspace. Keep the momentum going!