
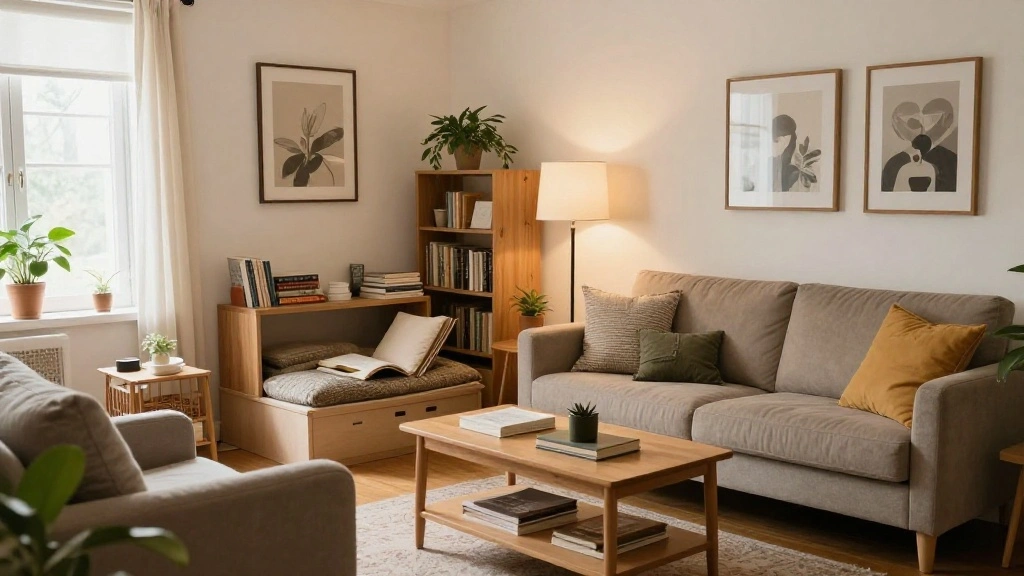
Living in a small space can often feel cramped and chaotic. Without defined areas, your living room may lack functionality and comfort, making it difficult to relax or entertain. You might find yourself wishing for more organization and style in your limited square footage. But don’t worry! This guide will show you how to create distinct zones in your small living room, transforming it into a multi-functional and inviting space.
By following these steps, you will learn how to effectively utilize every inch of your living room. You will discover techniques for zoning that enhance both practicality and aesthetics. From creating a cozy reading nook to a stylish entertainment area, you will gain the skills needed to maximize your space.
This guide is designed for beginner decorators and will take approximately 2-3 hours to complete. Ready to dive in? Let’s get started on this exciting journey to a beautifully zoned living room!
TL;DR Summary
- Identify your living room zones based on activities.
- Use furniture and decor to define each zone.
- Incorporate lighting to enhance the ambiance.
- Keep the layout open and functional for better flow.
TL;DR Summary
Editor’s Choice
IDEALHOUSE FoldingTable, Drop Leaf Dining Table with 6 Wheels and 2-Laye…

Room Divider 6FT Portable Room Dividers and Folding Privacy Screens, 88’…

Modern Floor Lamp Simple Design with White Shade, Foot Pedal Switch, 60″…
Prerequisites/Materials Needed
- Furniture: Sofa, chairs, coffee table, side tables
- Decor: Rugs, cushions, art for walls
- Lighting: Floor lamps, table lamps
- Tools: Measuring tape, level, markers
Prerequisites/Materials Needed
Editor’s Choice

64.4” Slim Floor Lamp for Living Room with Magnetic Remote and Foot Sw…

Homkdom Convertible Loveseat Sleeper, Space-Saving Folding Sofa Bed for …

YIHOUSE Rustic Cabin Area Rug 5×7,Machine Washable Lodge Bear Rug,Non-Sl…
Skill Level & Time Estimate
Skill Level: beginner
Total time estimate: 2-3 hours
Breakdown of time:
- Planning zones: 30 minutes
- Arranging furniture: 1 hour
- Adding decor and lighting: 1-1.5 hours
Skill Level & Time Estimate
Editor’s Choice

JOSTYLE Boho Room Divider with Leaves Carving, 4-Panel Openwork Wood Scr…

PACOVY Floor Lamp, Adjustable Height Floor Lamps for Living Room Bedroom…
IDEALHOUSE FoldingTable, Drop Leaf Dining Table with 6 Wheels and 2-Laye…
Step 1: Assess Your Space

Begin by assessing your living room space thoroughly. Take measurements and note the location of windows, doors, and electrical outlets. This information is crucial for planning your zones effectively.
- Use a measuring tape to determine dimensions of the room.
- Sketch a simple floor plan to visualize the space.
- Identify existing features like windows and outlets.
Pro Tip: Make use of online room planners to visualize different layouts.
Why this matters: Understanding your space allows you to create functional zones without overcrowding.
Time estimate: 30 minutes
Step 1: Assess Your Space
Editor’s Choice

Room By Room Project Planner: Room By Room Organizer – Record Interior D…

CRAFTSMAN 25-Ft Tape Measure with Fraction Markings, Retractable, Self-L…

The Interior Design Space Planning Book: A Step-By-Step Approach To Desi…
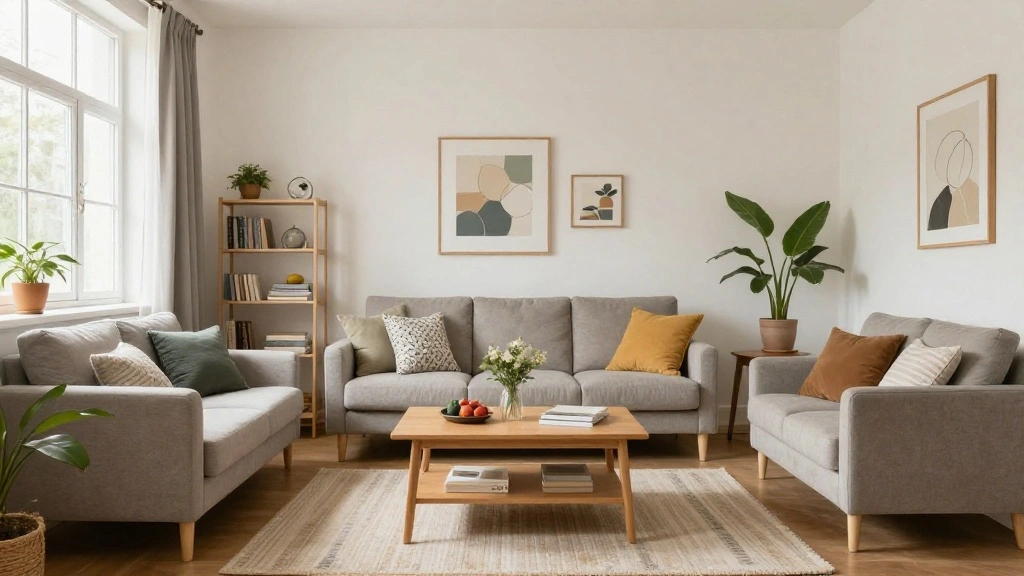
Step 2: Define Your Living Room Zones

Next, decide what zones you want to create based on how you use your living room. Common zones include a seating area, a reading nook, and an entertainment space.
- Consider your daily activities in the living room.
- Choose at least three zones that make sense for your lifestyle.
- Write them down for reference.
Pro Tip: Think about flow; zones should connect seamlessly.
Why this matters: Clearly defined zones enhance the functionality of your space, making it more enjoyable to use.
Time estimate: 30 minutes
Step 2: Define Your Living Room Zones
Editor’s Choice
Room Divider 6FT Portable Room Dividers and Folding Privacy Screens, 88’…

DUMOS 43 Inch Folding Storage Ottoman Bench, Large Hidden Storage Chest …

Soalmost Washable Area Rug 8×10, Large Soft Rugs for Living Room Vintage…
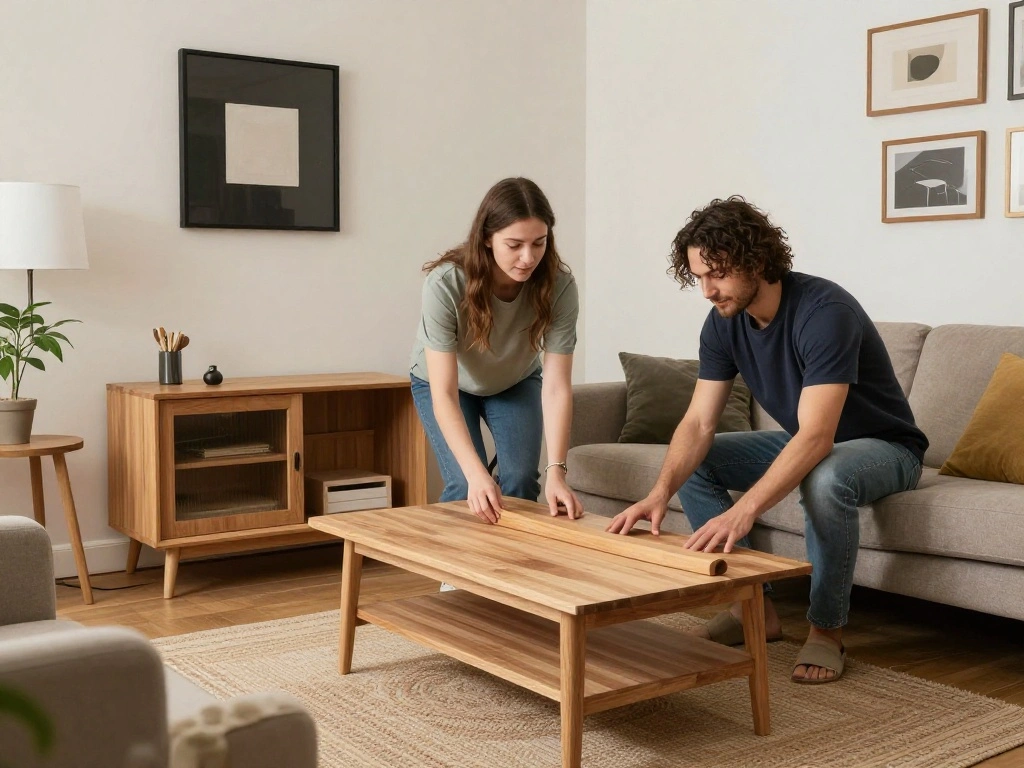
Step 3: Choose Your Furniture Wisely

Furniture selection is key to creating defined zones. Opt for pieces that are appropriately scaled to your space and serve multiple purposes.
- List furniture pieces needed for each zone.
- Choose multifunctional furniture like ottomans or coffee tables with storage.
- Ensure furniture is not oversized to maintain an open feel.
Pro Tip: Use furniture placement to delineate zones without physical barriers.
Why this matters: Thoughtful furniture choices maximize functionality while keeping the space visually appealing.
Time estimate: 30 minutes
Step 3: Choose Your Furniture Wisely
Editor’s Choice

BLEXA Round Set of 2 Ottoman with Storage-Upholstered Velvet Vanity Stoo…

Round Nesting Coffee Table Set of 2, Modern Marble Pattern Wooden Nestin…

SEDETA 31.5″ Lift Top Coffee Table with Storage, Square Coffee Tables fo…
Step 4: Arrange Your Furniture
Now, it’s time to arrange your furniture to create the defined zones you’ve identified. The layout is crucial to making the space work.
- Start with the largest piece, like the sofa, and position it to anchor the main zone.
- Arrange additional seating in relation to the sofa to foster conversation.
- Place smaller furniture items, like side tables, within each zone for functionality.
Pro Tip: Leave at least 18 inches between seating for comfort.
Why this matters: A well-thought-out arrangement enhances the flow and usability of your living room.
Time estimate: 1 hour
Step 4: Arrange Your Furniture
Editor’s Choice

Bonnlo Fine Beige Accent Chairs Set of 2, Upholstered Mid Century Modern…

108 Inch Sectional Sleeper Sofa with Pull Out Bed, U Shaped 7 Seat Modul…

WLIVE End Table with Charging Station, Small Night Stand with Storage Ad…
Step 5: Add Area Rugs
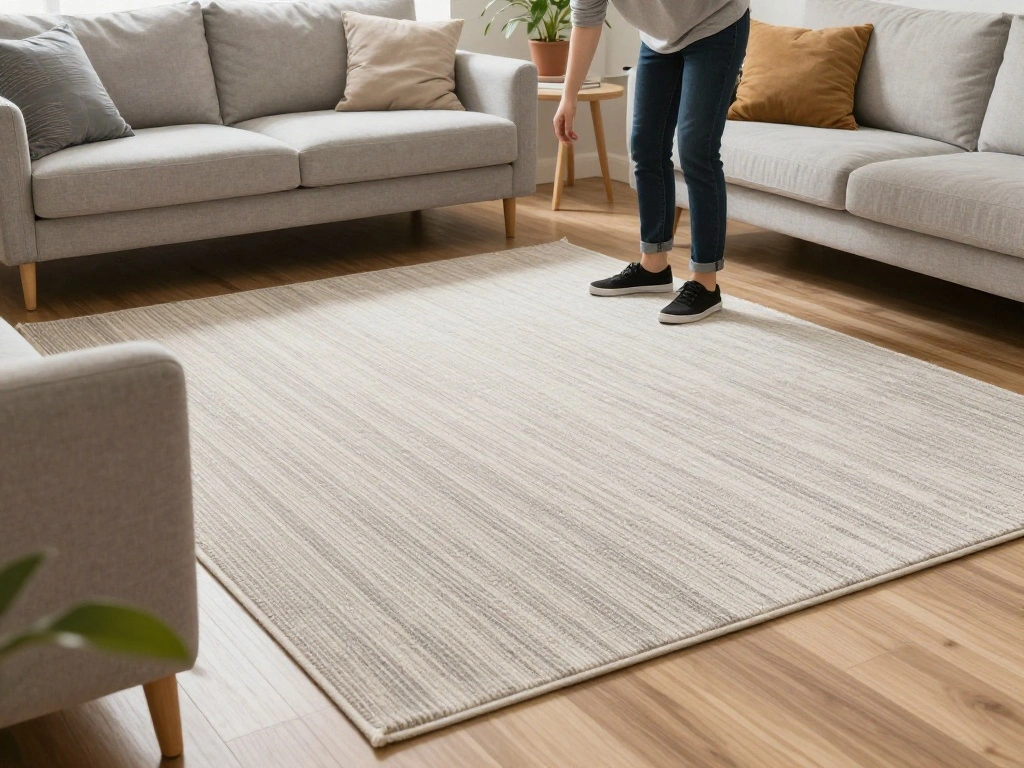
Area rugs are an excellent way to visually separate different zones within your living room. They define spaces and add warmth.
- Choose rugs that complement the furniture and decor style.
- Place rugs under the front legs of furniture in the seating area.
- Ensure rugs are proportionate to the zones they define.
Pro Tip: Use different rug textures to create visual interest.
Why this matters: Rugs help to visually anchor each zone, making the layout more cohesive.
Time estimate: 30 minutes
Step 5: Add Area Rugs
Editor’s Choice

RELEANY Area Rugs 8’x10′ Washable Non-Slip, Floral Vintage Distress Meda…

RUGPADUSA – Basics – 8’x10′ – 1/4″ Thick – 100% Felt – Protective Cushio…

6×9 Ft Large Area Rugs for Living Room, Soft Non-Slip Washable Rugs Mode…
Step 6: Use Lighting to Enhance Each Zone

Lighting plays a crucial role in defining zones and setting the mood. Use different lighting types to enhance each area.
- Install floor lamps in reading nooks for focused light.
- Use table lamps on side tables for ambient lighting.
- Consider dimmable options for flexibility in mood setting.
Pro Tip: Layer your lighting with at least three sources in each zone.
Why this matters: Proper lighting creates a welcoming atmosphere and highlights the distinct areas in your living room.
Time estimate: 30 minutes
Step 6: Use Lighting to Enhance Each Zone
Editor’s Choice

ONEWISH Industrial Table Lamp for Bedroom, Fully Dimmable Modern Bedside…

COSYLUX Modern Floor Lamp for Living Room, Industrial Tall Standing Lamp…
Step 7: Decorate with Purpose
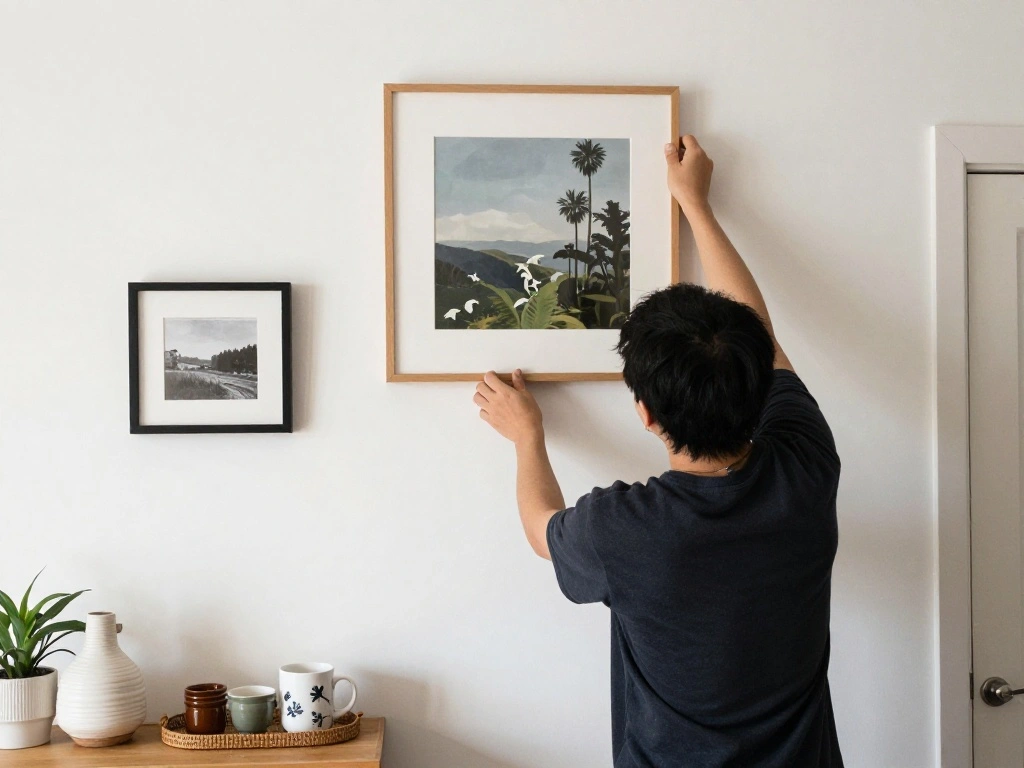
Decorating is the final touch that personalizes each zone. Choose decor items that reflect your style while serving a purpose.
- Select wall art or mirrors to enhance the visual appeal.
- Incorporate plants for a touch of nature and color.
- Use bookshelves to add character and functionality to reading zones.
Pro Tip: Keep decor minimal to avoid clutter.
Why this matters: Thoughtful decoration enhances each zone’s purpose and adds personality to your living room.
Time estimate: 1 hour
Step 7: Decorate with Purpose
Editor’s Choice

Costa Farms Live Indoor House Plants (3-Pack), Hand Selected Easy to Mai…

Furinno LUDER Book Shelf, 3-Cube Bookshelf, Bookcase with Open Shelves, …

Large Framed Neutral Abstract Wall Art for Living Room, Set of 2 Black a…
Step 8: Keep It Organized

Organization is essential to maintaining a functional living room. Create systems that keep your space tidy and clutter-free.
- Use storage solutions like baskets or cabinets to hide items.
- Designate specific areas for items like magazines or remote controls.
- Regularly declutter to maintain organization.
Pro Tip: Label storage containers for easy identification.
Why this matters: An organized space enhances the usability of each zone, making your living room inviting.
Time estimate: 30 minutes
Step 8: Keep It Organized
Editor’s Choice

GRANNY SAYS Wicker Storage Baskets for Shelves, Wicker Baskets for Organ…

Homhedy Farmhouse Bathroom Storage Cabinet with 2 Doors, Toilet Paper Ca…

SUPVAN E11 Bluetooth Label Maker Machine with 4 Tapes, Support Keyboard …
Step 9: Step Back and Adjust

Once everything is set up, take a step back and evaluate your living room zones. Make adjustments as needed for comfort and functionality.
- Walk through each zone to assess flow.
- Adjust furniture if necessary to improve layout.
- Ask for feedback from family or friends on the setup.
Pro Tip: Don’t be afraid to rearrange elements until it feels just right.
Why this matters: Final adjustments ensure that your living room meets your daily needs and preferences.
Time estimate: 30 minutes
Step 9: Step Back and Adjust
Editor’s Choice
DUMOS 43 Inch Folding Storage Ottoman Bench, Large Hidden Storage Chest …

Room Divider 4 Panel Partition Room Dividers & Folding Privacy Screens w…
![4 Pcs Adjustable Height Furniture Support Legs [with Screws] 3.15-4.72 i...](https://m.media-amazon.com/images/I/61YoSOf22HL._AC_UL320_.jpg)
4 Pcs Adjustable Height Furniture Support Legs [with Screws] 3.15-4.72 i…
Pro Tips
- Choose Multi-Functional Furniture: Opt for items that serve more than one purpose.
- Use Vertical Space: Hang shelves to save floor space while adding storage.
- Color Coordination: Use a cohesive color palette to unify different zones.
- Incorporate Textures: Mix textures to add depth and interest to the space.
- Be Flexible: Be ready to change layouts as your needs evolve.
Pro Tips
Editor’s Choice

79″ Convertible Sofa Bed with Fixed-Shape Frame & Removable Armrests, Mo…

Preboun 8 Pcs 18 x 18 Inch Fresh Colors Decorative Throw Pillow Covers, …

QsQueen Scalloped Wood Wall Shelf – 17 Inch Floating Shelf with Wood B…
Common Mistakes to Avoid
Warning: Avoid overcrowding zones with too much furniture.
Overcrowding makes the space feel cramped and unwelcoming. Stick to essential pieces for each zone.
Warning: Don’t ignore the flow of movement.
Blocking pathways can disrupt functionality. Ensure there is enough space to move comfortably through each zone.
Warning: Avoid using the same lighting in all zones.
Uniform lighting fails to create distinct atmospheres. Use varied light sources to enhance each area’s purpose.
Common Mistakes to Avoid
Editor’s Choice

SUNALLY Room Divider No Drilling Curtain Rod Wall Divider for Room Separ…

Rolanstar Coffee Table Lift Top, Multi-Function Convertible Coffee Table…
Troubleshooting Section
Problem: Zones feel too crowded.
Solution: Remove non-essential furniture or decor items to open up the space.
Problem: Lack of visual separation between zones.
Solution: Introduce rugs or use furniture arrangements to define boundaries.
Problem: Lighting is too harsh or dim.
Solution: Adjust light sources or add dimmers for better control.
Problem: Zones don’t feel cohesive.
Solution: Use a unified color scheme or decor style to tie elements together.
Problem: Furniture placement disrupts flow.
Solution: Reassess the layout and adjust pieces for better movement.
Troubleshooting Section
Editor’s Choice
Modern Floor Lamp Simple Design with White Shade, Foot Pedal Switch, 60″…

8×10 Area Rugs for Living Room Rug Washable: Abstract Large Rug for Dini…

Traceease Furniture Layout Template Guide, House Furnishing Drafting Ste…
Variations/Alternative Methods
There are different approaches to zoning your living room:
- Use Room Dividers: If you prefer physical separation, consider using room dividers. They provide a clear boundary but can make the space feel smaller.
- Floating Furniture: Position furniture away from walls to create a more dynamic layout. This method encourages conversation but may require careful planning.
- Color Zoning: Paint different wall sections in distinct colors to visually divide zones. This method adds character but may not suit every style.
Variations/Alternative Methods
Editor’s Choice

Bates- Paint Roller Kit, 19 pcs, Roller Set with Microfiber Sleeves & Fr…
Room Divider 6FT Portable Room Dividers and Folding Privacy Screens, 88’…
FAQs
What if I don’t have enough furniture for each zone?
Use multifunctional pieces that can serve in multiple zones, like a sofa bed.
How long should I spend on planning?
Spend at least 30 minutes to ensure a cohesive plan that meets your needs.
Is it safe to use multiple lighting sources?
Yes, just ensure they complement each other in terms of brightness and style.
What if my zones feel disconnected?
Use a consistent color palette or decor style to create harmony throughout.
Can I change the zones later?
Absolutely! Feel free to rearrange as your needs and preferences evolve.
FAQs
Editor’s Choice

SONGMICS MAZIE Collection – 43 Inches Folding Storage Ottoman Bench, Ott…
Modern Floor Lamp Simple Design with White Shade, Foot Pedal Switch, 60″…

COMAX Futon Sofa Bed, 4‑in‑1 Convertible Sofa Bed, Folding Boneless …
Conclusion
Congratulations on transforming your small living room into a beautifully zoned space! You’ve taken important steps to create defined areas that enhance both functionality and style. Remember, it’s all about how you use your space and making it work for you.
Your next steps could include maintaining your newly zoned areas by keeping them organized and updating decor as your tastes change. Consider exploring additional resources on small space living or interior design tips to further enhance your home.
Keep enjoying your cozy living room!