
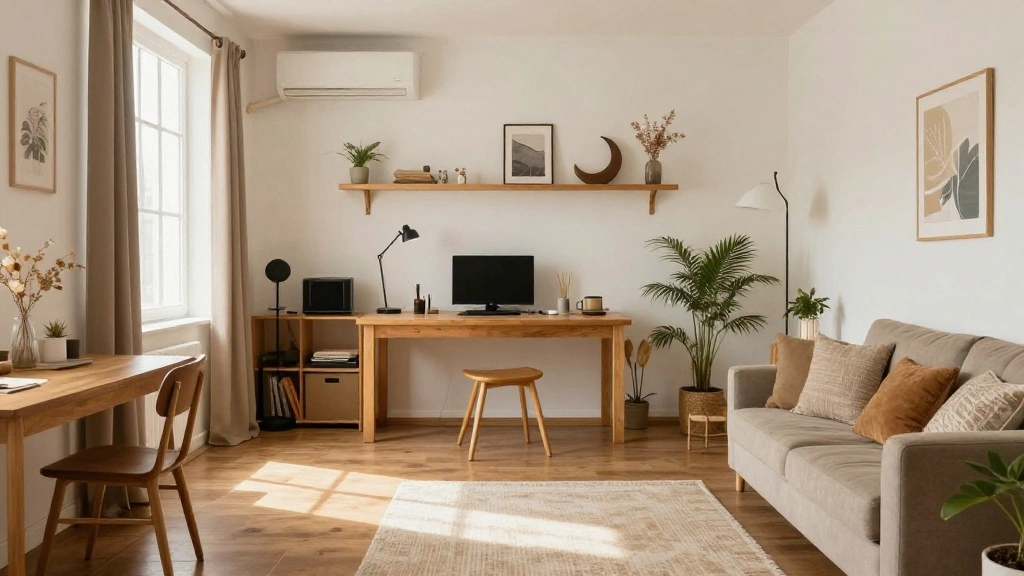
Living in a studio apartment offers charm and convenience, but it can also pose challenges when it comes to privacy and organization. As the demand for urban living spaces continues to rise, many people find themselves in smaller homes where the lack of distinct rooms can lead to feelings of claustrophobia. If you feel overwhelmed by the open space and need a way to create separate areas for sleeping, working, or entertaining, you’re not alone. The good news is that you don’t need to build walls to achieve this!
In this guide, you will learn practical and creative ways to divide your studio apartment without the need for permanent structures. By utilizing furniture, lighting, and decorative elements, you can create distinct zones that enhance your living experience. With a little ingenuity, you will transform your studio into a more functional and aesthetically pleasing space.
This guide is designed for beginners and will take approximately 2-3 hours to complete. You’ll discover specific techniques to maximize your space effectively. Get ready to roll up your sleeves and dive into the world of apartment design!
TL;DR Summary
- Transform your studio apartment without building walls.
- Use furniture and décor to create distinct living areas.
- Follow 9 simple steps to maximize your space effectively.
- This guide is aimed at beginners and takes 2-3 hours to complete.
TL;DR Summary
Editor’s Choice

RYB HOME Wall Divider Curtain for Living Room, Noise Reduction Privacy C…

Roundhill Furniture Oriental Shoji 4 Panel Screen Room Divider, Natual

VASAGLE CUSTOS Collection – Bookshelf, 4-Tier Bookcase, Book Shelf, Open…
Prerequisites/Materials Needed
- Furniture: Bookcases, room dividers, or shelving units (1-2, depending on space)
- Textiles: Curtains or large fabric panels (2-3)
- Lighting: Floor lamps or table lamps (1-2)
- Decor: Plants, rugs, or artwork (various)
- Tools: Measuring tape, scissors, and adhesive hooks (1 each)
Prerequisites/Materials Needed
Editor’s Choice

Tribesigns Wall Room Divider, Wood Freestanding Room Divider Bookcase wi…

PACOVY Floor Lamp, Adjustable Height Floor Lamps for Living Room Bedroom…

Room Divider 6FT Portable Room Dividers and Folding Privacy Screens, 88’…
Skill Level & Time Estimate
Skill Level: Beginner
Total time estimate: 2-3 hours
Breakdown of time:
Planning: 30 minutes
Gathering materials: 30 minutes
Implementation: 1-2 hours
Skill Level & Time Estimate
Editor’s Choice

Shelf Dividers, 50 Pack, Self Adhesive, 3” H x 9.5” L Shelf Separato…

FDW Room Divider 6FT Wall Divider Wood Screen 4 Panels Wood Mesh Hand-Wo…
RYB HOME Wall Divider Curtain for Living Room, Noise Reduction Privacy C…
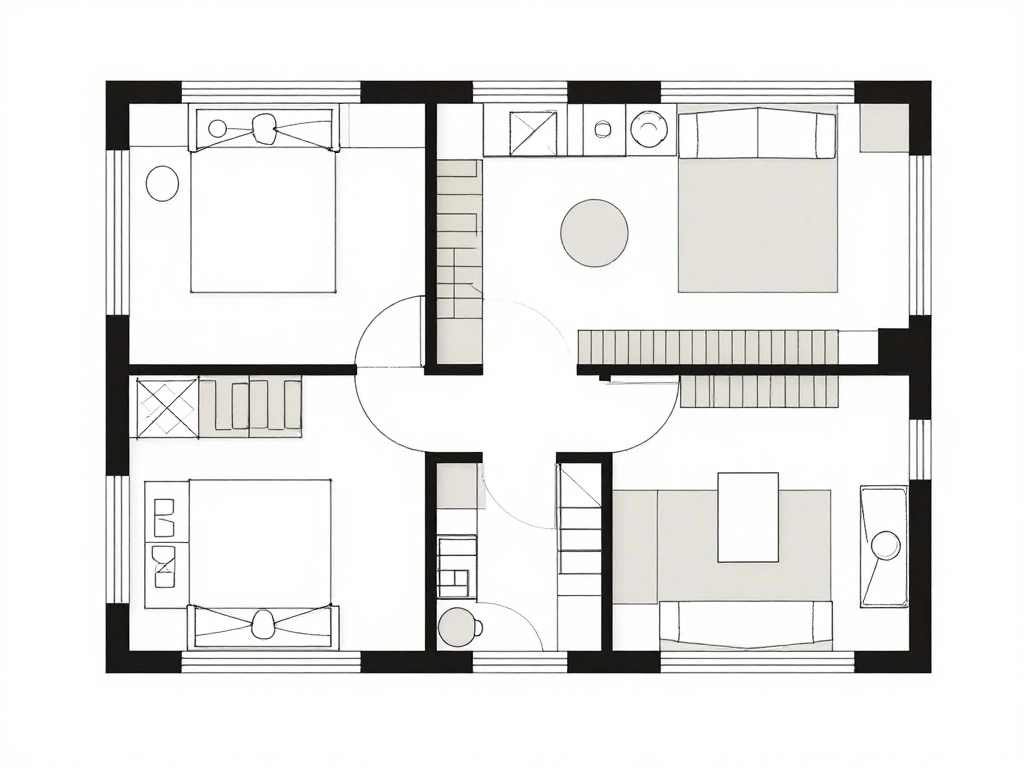
Step 1: Assess Your Space

Start by taking a close look at your studio apartment. Why this matters: Understanding the dimensions and layout will help you plan the best way to create distinct areas. Follow these sub-steps:
- Measure the length and width of your studio using a measuring tape.
- Sketch a floor plan on paper, noting the locations of windows, doors, and furniture.
- Identify areas where you need separation, such as a sleeping nook, workspace, or living area.
Pro Tip: Take photos of your space from different angles for reference.
Time estimate: 30 minutes
Step 1: Assess Your Space
Editor’s Choice

Room Divider with Shelves, Wall Room Divider Bookshelf, Freestanding Woo…

VEVOR Room Divider, 4 Panel Room Dividers and Folding Privacy Screens, F…
Room Divider 6FT Portable Room Dividers and Folding Privacy Screens, 88’…
Step 2: Choose Your Dividers

Next, select the types of dividers you want to use. Why this matters: The right divider can enhance both privacy and style in your apartment. Consider the following options:
- Furniture: Use bookshelves or tall cabinets to create physical barriers.
- Textiles: Hang curtains or fabric panels to offer a soft, flexible separation.
- Plants: Large potted plants can act as natural dividers while improving air quality.
Pro Tip: Choose dividers that complement your existing décor for a cohesive look.
Time estimate: 30 minutes
Step 2: Choose Your Dividers
Editor’s Choice

Der Rose 28” Fake Plants Tall Artificial Monstera Faux Plants Indoor Ou…
VEVOR Room Divider, 4 Panel Room Dividers and Folding Privacy Screens, F…

VASAGLE Wooden Bookcase, Display Shelf and Room Divider, Freestanding De…
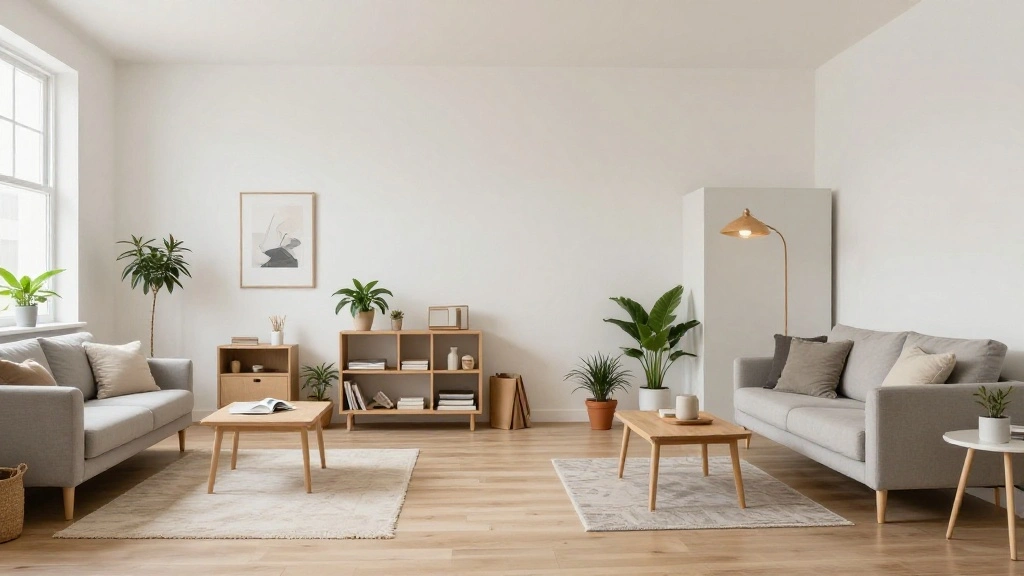
Step 3: Define Your Zones
It’s time to define specific areas within your studio. Why this matters: Creating clear zones will make your living space more functional. Here’s how to do it:
- Decide on the primary functions of each zone (e.g., sleeping, working, relaxing).
- Mark each area on your floor plan with dimensions based on your furniture and divider placements.
- Visualize how you will move between each zone to ensure flow and accessibility.
Pro Tip: Use painter’s tape on the floor to outline where each zone will be.
Time estimate: 30 minutes
Step 3: Define Your Zones
Editor’s Choice
FDW Room Divider 6FT Wall Divider Wood Screen 4 Panels Wood Mesh Hand-Wo…

DUMOS 43 Inch Folding Storage Ottoman Bench, Large Hidden Storage Chest …
Step 4: Arrange Your Furniture

Begin arranging your furniture according to the zones you have defined. Why this matters: Proper furniture arrangement enhances usability and aesthetics. Follow these steps:
- Place larger pieces, like your bed or sofa, first to establish the main areas.
- Position dividers to create boundaries, ensuring they do not block natural light.
- Fill in with smaller items like side tables and chairs to complete each zone.
Warning: Avoid overcrowding any area; ensure there’s enough space to move comfortably.
Time estimate: 1 hour
Step 4: Arrange Your Furniture
Editor’s Choice

Rolanstar Coffee Table Lift Top, Multi-Function Convertible Coffee Table…

Fluffy Rugs for Living Room: Dark Grey Soft Shag Rug for Bedroom, Large …

VEVOR Wood Room Divider, 8 Panel Wood Folding Privacy Screen, 66.9 Inche…
Step 5: Add Textiles and Accessories
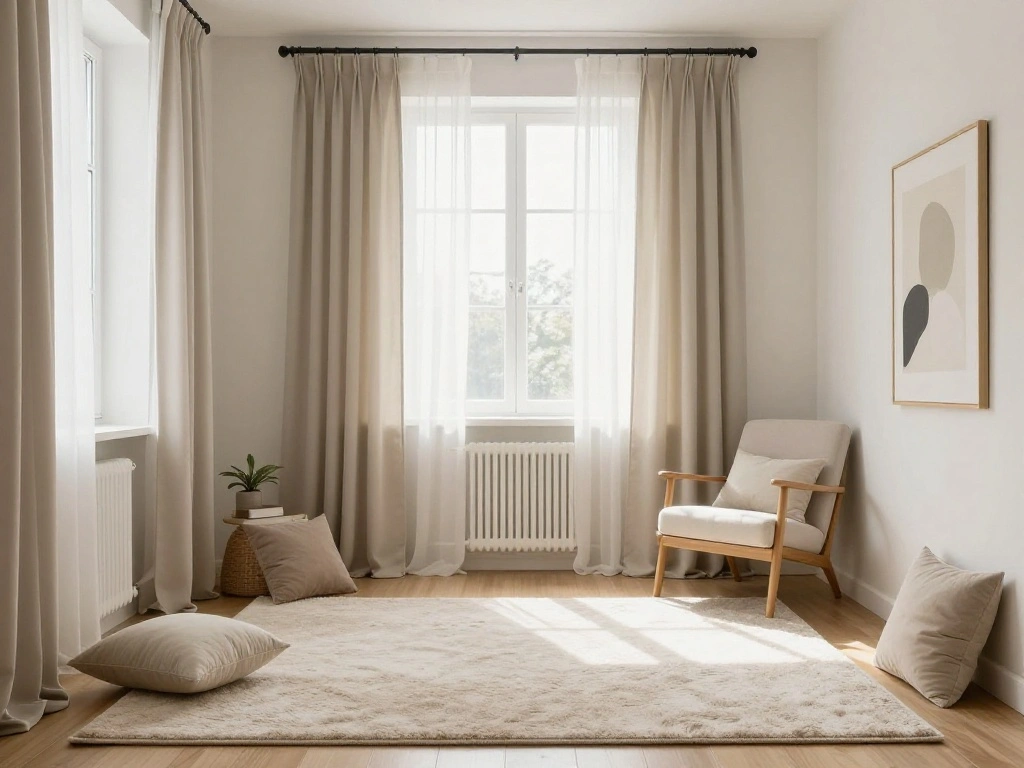
Now it’s time to add textiles and accessories to enhance your newly defined zones. Why this matters: Textiles add warmth and comfort while also delineating spaces. Follow these steps:
- Add rugs to each zone to visually separate them.
- Hang curtains or fabric panels where needed for privacy.
- Incorporate cushions, throws, and decorative items that reflect your style.
Pro Tip: Use color schemes that tie the zones together for a harmonious look.
Time estimate: 30 minutes
Step 5: Add Textiles and Accessories
Editor’s Choice

Room Divider Curtains Flexible Ceiling Tracks Set Curtain Track Ceiling …

Area Rugs 6×9 Living Room: Washable Rug Modern Abstract Large Rug Soft N…

Preboun 8 Pcs 18 x 18 Inch Fresh Colors Decorative Throw Pillow Covers, …
Step 6: Incorporate Lighting

Lighting plays a crucial role in defining spaces. Why this matters: Different lighting can create ambiance and enhance functionality. Here’s how to do it:
- Position floor or table lamps in each zone for task lighting.
- Consider string lights or fairy lights for a cozy atmosphere.
- Use accent lighting to highlight artwork or decorative items.
Pro Tip: Dimmers can help control the mood in each area.
Time estimate: 30 minutes
Step 6: Incorporate Lighting
Editor’s Choice

addlon 50FT LED Outdoor String Lights with Edison Shatterproof Bulbs, We…

EDISHINE Tripod Table Lamp, Small Cute Bedside Lamp with Linen Beige Lam…

64.4” Slim Floor Lamp for Living Room with Magnetic Remote and Foot Sw…
Step 7: Personalize Your Space
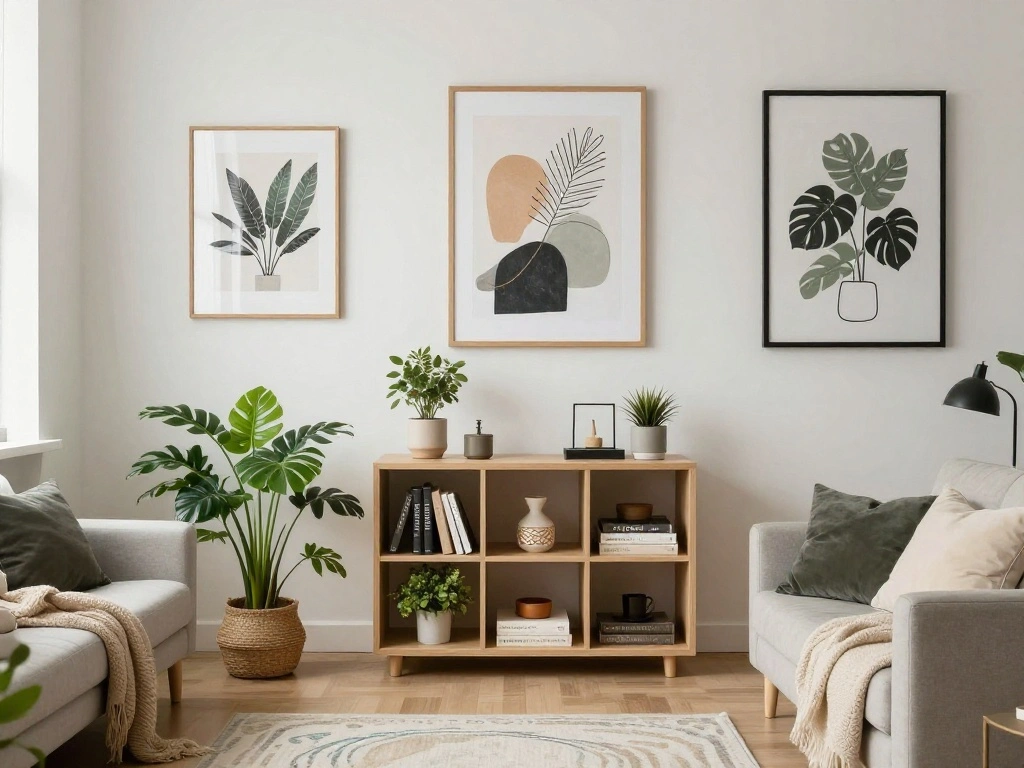
Now it’s time to add your personal touch! Why this matters: Personalization makes your space feel like home. Follow these steps:
- Display artwork, photos, or personal items in each zone that reflect your personality.
- Incorporate plants or greenery to add life to your apartment.
- Use decorative storage solutions to keep areas tidy while adding style.
Pro Tip: Regularly rotate items to keep your space feeling fresh and new.
Time estimate: 30 minutes
Step 7: Personalize Your Space
Editor’s Choice

Costa Farms Live Indoor House Plants (3-Pack), Hand Selected Easy to Mai…

Personalized Custom Canvas Prints: Photo On Canvas (Framed 11X14) Transf…

BALEINE 1 Pack Fabric Closet Storage Bins for Shelves, Linen Closet Orga…
Step 8: Evaluate and Adjust

After setting up your zones, take a step back and evaluate the layout. Why this matters: Adjustments may be necessary for optimal functionality. Here’s how:
- Walk through each zone to assess comfort and accessibility.
- Make changes to furniture placement or decorations as needed.
- Consider feedback from friends or family for a fresh perspective.
Warning: Avoid making too many changes at once; it can lead to confusion.
Time estimate: 30 minutes
Step 8: Evaluate and Adjust
Editor’s Choice

aboxoo Coffee Table Nesting White Set of 2 Side Set Golden Frame Circula…
Tribesigns Wall Room Divider, Wood Freestanding Room Divider Bookcase wi…

JOSTYLE Boho Room Divider with Leaves Carving, 4-Panel Openwork Wood Scr…
Step 9: Maintain Your Space

Finally, it’s important to maintain your newly divided space. Why this matters: Regular upkeep helps your apartment feel inviting and organized. Follow these steps:
- Schedule regular cleaning and decluttering sessions.
- Reorganize items as needed to keep everything functional.
- Update decorations seasonally to keep your space feeling fresh.
Pro Tip: Make it a habit to tidy up daily to prevent clutter from accumulating.
Time estimate: Ongoing
Step 9: Maintain Your Space
Editor’s Choice

RattanView 41 Pcs Interchangeable Seasonal Decor Mini Standing Sign Farm…

QsQueen Scalloped Wood Wall Shelf – 17 Inch Floating Shelf with Wood B…

StorageWorks Fabric Storage Bins with Lid, Decorative Storage Boxes for …
Pro Tips
- Multi-Functional Furniture: Invest in furniture that serves multiple purposes, like a sofa bed or an ottoman with storage.
- Use Mirrors: Mirrors can create an illusion of more space and reflect light, making your studio feel larger.
- Vertical Space: Don’t forget about vertical space! Use wall shelves and hooks to free up floor space.
- Keep it Light: Lighter colors can make small spaces feel more open and airy.
- Be Flexible: Don’t hesitate to change your layout as your needs evolve!
Pro Tips
Editor’s Choice
DUMOS 43 Inch Folding Storage Ottoman Bench, Large Hidden Storage Chest …

Flamaker Futon Sofa Bed Modern Folding Futon Set Convertible Recliner Lo…

BAYKA Floating Shelves for Wall, Wall Mounted Rustic Wood Shelves for Ba…
Common Mistakes to Avoid
Warning: Overcrowding: Avoid cramming too much furniture into one zone, which can make it feel cramped.
Warning: Ignoring Flow: Don’t block pathways between areas; ensure there’s enough space to move freely.
Warning: Skipping Lighting: Neglecting lighting can make zones feel disconnected and uninviting.
Common Mistakes to Avoid
Editor’s Choice
PACOVY Floor Lamp, Adjustable Height Floor Lamps for Living Room Bedroom…
Room Divider 6FT Portable Room Dividers and Folding Privacy Screens, 88’…

78.8″ Convertible Sofa Bed,Corduroy Futon Couch with Storage Pocket,Fold…
Troubleshooting Section
Problem: My studio feels cluttered after dividing.
Solution: Reassess your furniture placement and remove any unnecessary items.
Problem: I can’t find the right divider.
Solution: Consider alternative materials like curtains or plants as dividers.
Problem: Zones feel disconnected.
Solution: Use consistent color schemes or décor styles to tie areas together.
Troubleshooting Section
Editor’s Choice
Costa Farms Live Indoor House Plants (3-Pack), Hand Selected Easy to Mai…

RYB HOME Blackout Thermal Insulated Blind Curtains, Noise Reduce Barrier…

Utopia Bedding Throw Pillow Inserts (Pack of 4, White), 18 x 18 Inches D…
Variations/Alternative Methods
- Open Shelving: Use open shelving units as dividers for both storage and separation.
- Sliding Panels: Consider installing sliding panels for an adjustable separation option.
- Temporary Walls: Use freestanding temporary walls if you need a more solid divider.
FAQs
What if I don’t have enough furniture? Consider using textiles or plants as dividers until you can acquire more furniture.
How long should I wait before making adjustments? Give yourself at least a week to settle in before making changes.
Is it safe to hang heavy items on walls? Yes, as long as you use appropriate anchors and supports for the weight.
Conclusion
Congratulations on successfully dividing your studio apartment without walls! You’ve taken an essential step towards creating a more functional and personalized living space. Remember that your apartment will evolve over time; feel free to adjust and adapt as your needs change.
Now that your living area is transformed, consider exploring additional home décor projects or organization techniques to enhance your space even further. Keep your creativity flowing, and enjoy your new home!