
Small bathrooms can be a real challenge when it comes to storage. With limited space and often minimal cabinetry, it’s easy to feel overwhelmed by clutter. You may find that you lack a place for essential items like towels, toiletries, and cleaning supplies. This situation creates an urgent need for smart storage solutions that do not require drilling into walls, which can be both inconvenient and damaging.
In this guide, you will learn how to effectively add storage to your small bathroom without the hassle of drilling. By using clever space-saving techniques, you can transform your bathroom into a more organized and functional space. You’ll discover various methods of utilizing available vertical space, repurposing items, and selecting the right storage solutions that match your decor.
This guide is designed for beginners and will take you approximately 2-3 hours to complete. By the end of this article, you will have a well-organized small bathroom that meets your storage needs while maintaining its aesthetic appeal.
TL;DR Summary
- Learn practical techniques to add storage without drilling.
- Use vertical space, repurpose furniture, and choose appropriate storage options.
- Follow beginner-friendly steps that take 2-3 hours.
- Transform your small bathroom into an organized space.
TL;DR Summary
Editor’s Choice

Kitsure Over Toilet Storage Rack – Metal Over Toilet Bathroom Organizer …

4 Pack Storage Baskets for Organizing, Woven Baskets for Shelves – Perfe…

Yieach 4 Pack 15″ Acrylic Shelves for Wall,Bathroom,Bedroom – with Adhes…
Prerequisites/Materials Needed
- Storage Bins – 3-5 (various sizes)
- Over-the-Door Hooks – 1-2
- Wall-Mounted Shelves – 1-2 (adhesive or tension-mounted)
- Shower Caddy – 1
- Coat Rack or Towel Ladder – 1
- Command Strips or Hooks – 5-10
- Drawer Organizers – 1-2 (for cabinets)
Prerequisites/Materials Needed
Editor’s Choice

SOFFEE DESIGN Set of 5 Floral Wall Hooks, French Garden Eye-catching Ent…

Fabric Wardrobe Storage Bins -6 Pack, Large Pink Foldable With Handles…
Skill Level & Time Estimate
Skill Level: beginner
Total Time Estimate: 2-3 hours
Breakdown of time by major steps:
1. Planning – 30 minutes
2. Shopping for materials – 1 hour
3. Installing storage solutions – 1-2 hours
Skill Level & Time Estimate
Editor’s Choice

OAPRIRE White Floating Shelves Wall Mounted Set of 2 – Easily Expand Wal…

Moforoco White 9-Tier Over The Door Pantry Organizer, Pantry Organizatio…

Homhedy 67″ H Tall Bathroom Storage Cabinet with 2 Barn Doors and 1 Draw…
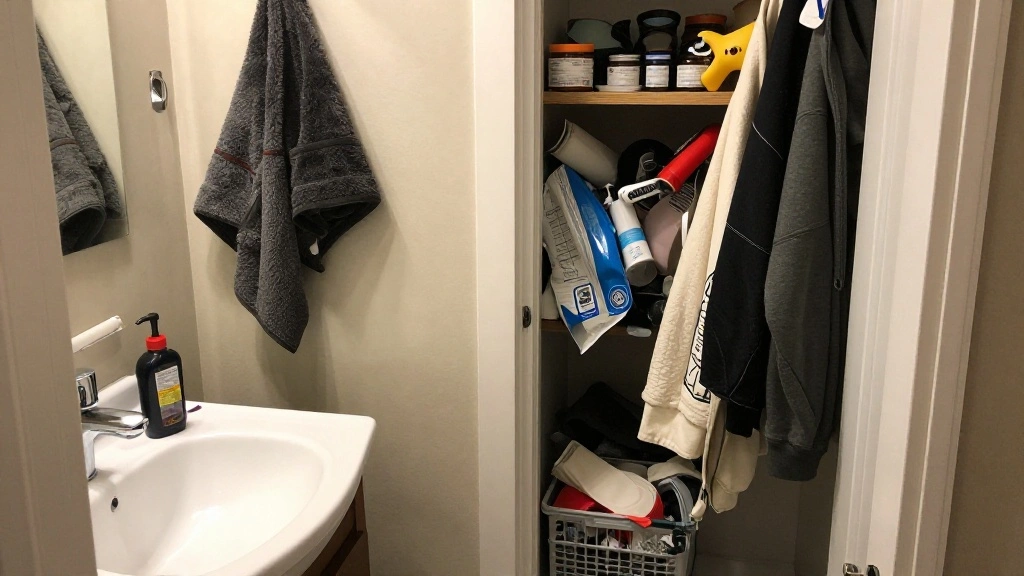
Step 1: Assess Your Bathroom Space
Start by taking a good look at your bathroom. Assess the available space, current storage solutions, and areas that are underutilized. Follow these sub-steps:
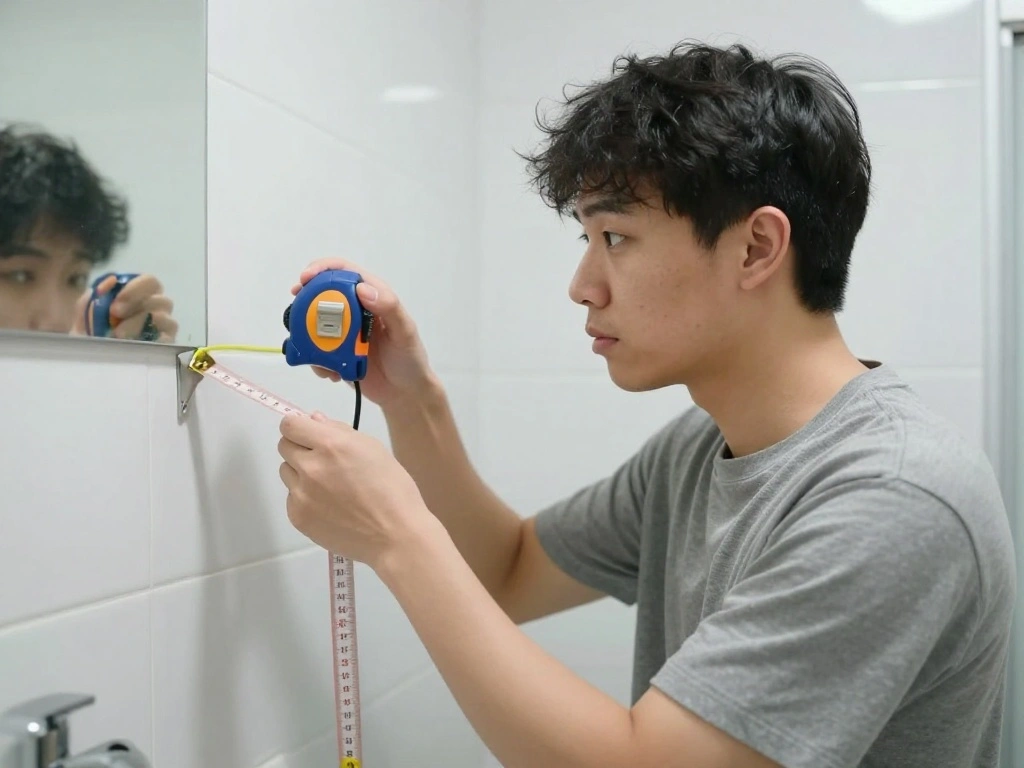
- Measure the dimensions of your bathroom, including vanities, shelves, and any wall space.
- Identify areas where you can add storage, such as above the toilet, behind the door, or in corners.
- Make a list of items that require storage and their sizes.
Pro Tip: Use a notebook or a digital app to track your measurements and ideas. Why this matters: Understanding your space will help you select the right storage solutions that fit well and look good. Time Estimate: 30 minutes.
Step 1: Assess Your Bathroom Space
Editor’s Choice

Kalrin Over-The-Toilet Storage Rack, 4-Tier Bathroom Organizer Shelf Ove…

Nandae 5-Tier Bathroom Storage Shelf, Heavy Duty Wire Shelving Unit Free…
![4 Set [EXTRA LARGE] Hanging Wall Mount Storage Baskets with Adhesive Hoo...](https://m.media-amazon.com/images/I/812qykSTCXL._AC_UL320_.jpg)
4 Set [EXTRA LARGE] Hanging Wall Mount Storage Baskets with Adhesive Hoo…
Step 2: Choose Your Storage Solutions
Now that you have assessed your space, it’s time to select the right storage solutions. Consider various options that do not require drilling:
- Look for over-the-door hooks to hang towels or robes.
- Consider adhesive wall-mounted shelves for extra space.
- Repurpose a shoe organizer to store toiletries.
Pro Tip: Choose storage solutions that complement your bathroom decor. Why this matters: Selecting the right styles ensures that your storage solutions blend seamlessly with your existing decor. Time Estimate: 30 minutes.
Step 2: Choose Your Storage Solutions
Editor’s Choice

Optish Over The Door Hooks, Door Hanger Hooks for Hanging, Over The Door…

LAZYROSY 4 Pack Floating Shelves – Clear Acrylic/PET Wall-Mounted No D…

HOTOR Travel Toiletry Bag for Women & Men, Waterproof Makeup Bag with Ha…
Step 3: Install Over-the-Door Hooks

Installing over-the-door hooks is a quick way to maximize space without drilling. Follow these steps:
- Choose the door you want to use, ideally the bathroom door.
- Hang the hooks over the top of the door securely.
- Organize towels or robes on the hooks for easy access.
Warning: Ensure the hooks are compatible with your door type to avoid damage. Why this matters: Using over-the-door hooks keeps items off the floor and readily accessible. Time Estimate: 15 minutes.
Step 3: Install Over-the-Door Hooks
Editor’s Choice

JARLINK Over The Door Organizer Storage, 5 Shelf Hanging Door Organizer …
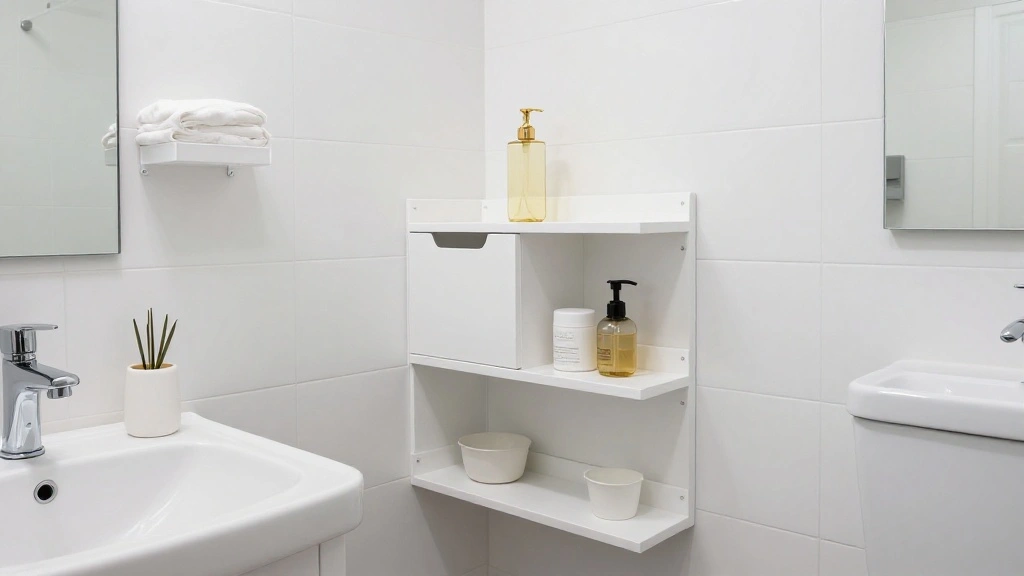
Step 4: Apply Adhesive Wall-Mounted Shelves
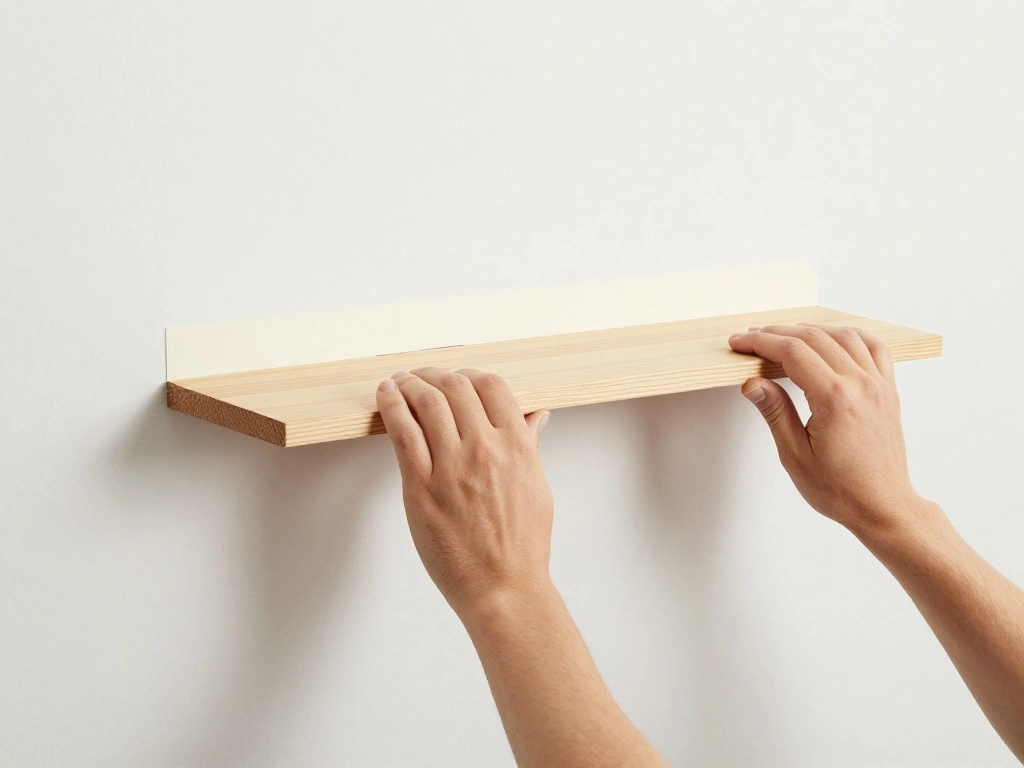
Adhesive wall-mounted shelves can add vertical storage without drilling. Here’s how to install them:
- Select a suitable wall area, preferably above the toilet or sink.
- Clean the wall surface to ensure good adhesion.
- Peel and stick the adhesive backing of the shelf to the wall, pressing firmly.
Warning: Follow the weight limits provided with the shelves to avoid accidents. Why this matters: This step adds valuable storage while keeping the floor clear. Time Estimate: 20 minutes.
Step 4: Apply Adhesive Wall-Mounted Shelves
Editor’s Choice

Godboat Bathroom Organizers and Storage, 3-Tier Wall Shelves, Over Toile…

Midukit Butterfly Design Wall Hooks for Towel and Coat: 20LB Screw in Ae…

Godboat Bathroom Organizer – Over the Toilet Storage Cabinet, 2-Tier Flo…
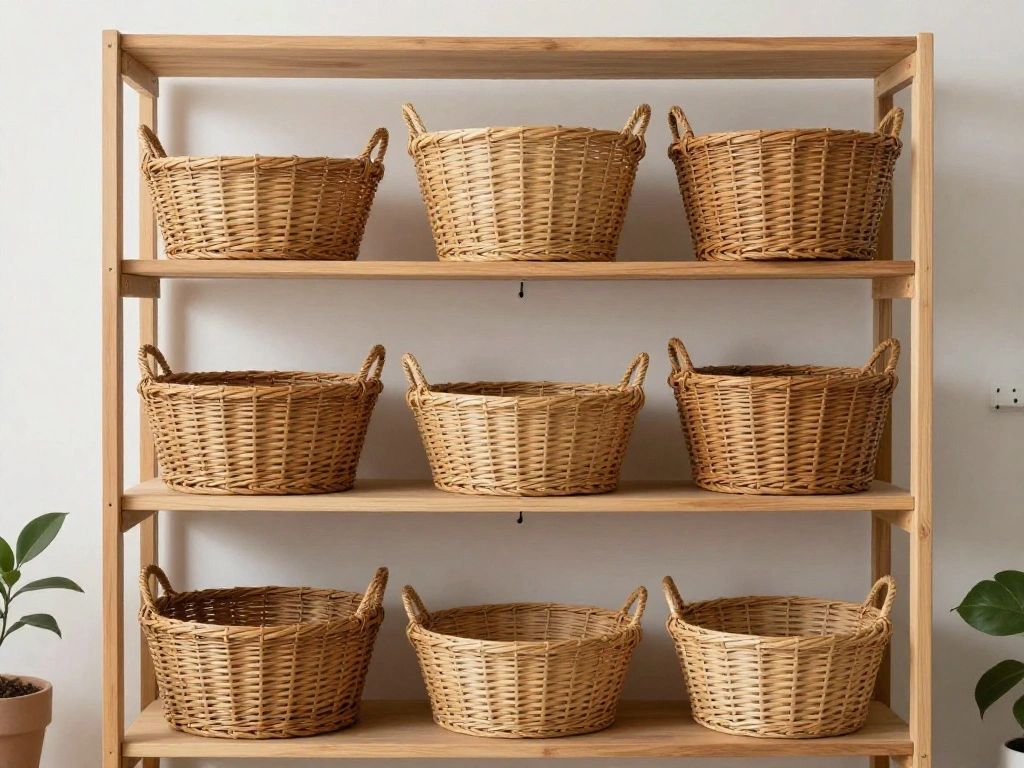
Step 5: Organize with Storage Bins

Storage bins can help keep smaller items organized. Implement these steps:
- Choose clear or labeled bins for easy identification.
- Place bins on shelves or in cabinets to maximize space.
- Sort items into bins by category, like toiletries, cleaning supplies, and extra linens.
Pro Tip: Use bins with lids for a tidier look. Why this matters: Organized bins help maintain cleanliness and make it easy to find items. Time Estimate: 30 minutes.
Step 5: Organize with Storage Bins
Editor’s Choice

Nelko Label Maker Machine with Tape, P21 Bluetooth Label Printer, Wirele…

IRIS USA 6-Pack Storage Bins with Lids, 6 Quart – Crystal Clear, Shoe Bo…

5 Pack Stackable Closet Storage Basket – Stackable Storage Bins, Multifu…
Step 6: Utilize a Shower Caddy
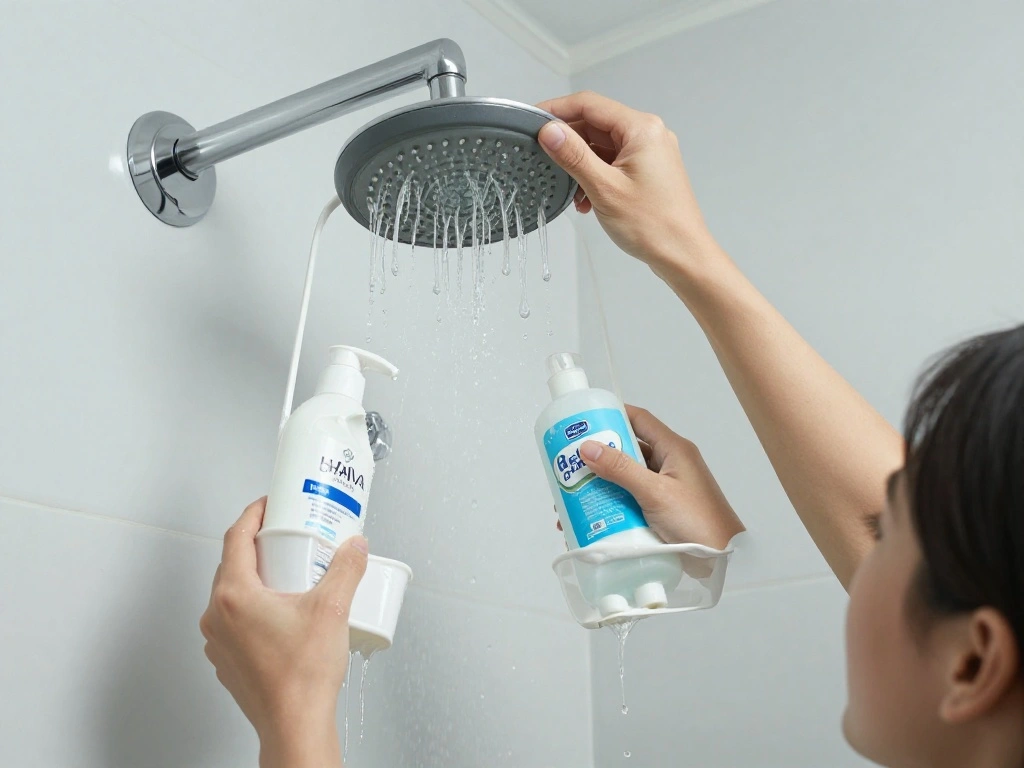
A shower caddy is an efficient way to store items while saving space. Follow these instructions:
- Choose a shower caddy that fits your shower space.
- Hang it on the showerhead or attach it to the wall using adhesive.
- Organize shampoo, conditioner, and other shower essentials in the caddy.
Warning: Ensure the caddy is securely attached to prevent slipping. Why this matters: A caddy keeps shower items organized and within easy reach, freeing up space on counters. Time Estimate: 15 minutes.
Step 6: Utilize a Shower Caddy
Editor’s Choice

YASONIC Shower Caddy Adhesive, Rustproof Shower Shelves for Inside Showe…

EUDELE Adhesive Shower Caddy, 5 Pack Rustproof Stainless Steel Bath Orga…

YASONIC Corner Adhesive Shower Caddy, with Soap Holder and 12 Hooks, Rus…
Step 7: Create a Towel Ladder or Rack
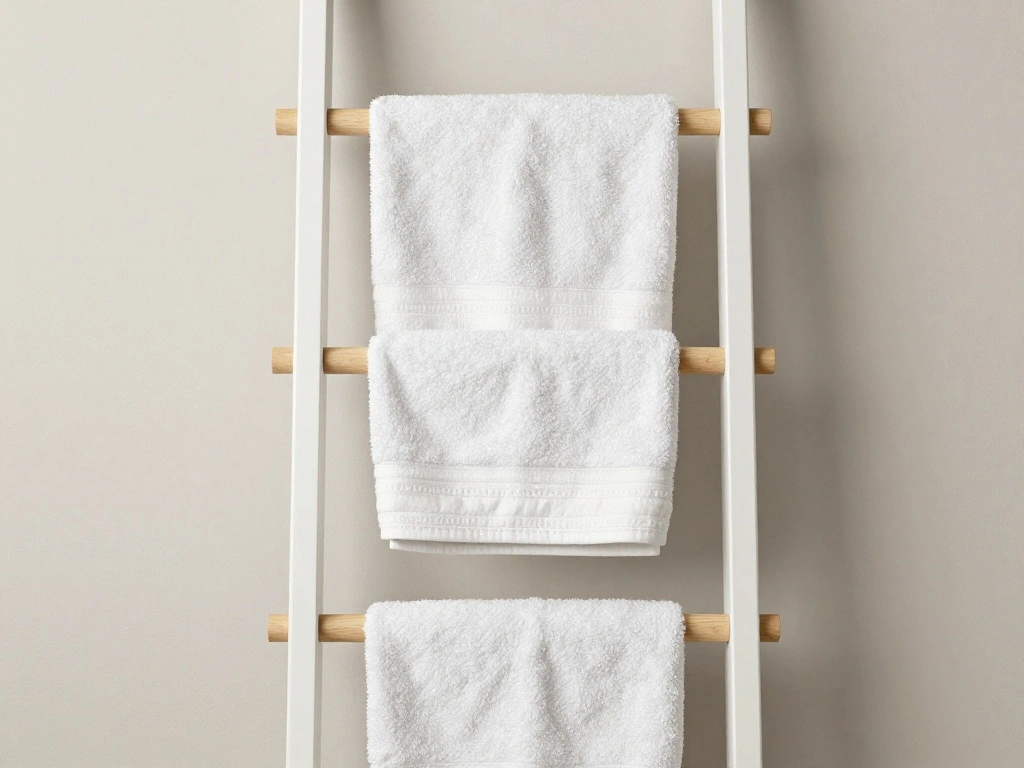
A towel ladder or rack adds style and function. Here’s how to set one up:
- Select a wall or corner area of the bathroom.
- Choose a free-standing towel ladder or a wall-mounted rack that doesn’t require drilling.
- Hang towels stylishly for easy access.
Pro Tip: Opt for a decorative ladder to enhance your bathroom decor. Why this matters: A towel ladder not only organizes towels but also adds a decorative element. Time Estimate: 30 minutes.
Step 7: Create a Towel Ladder or Rack
Editor’s Choice

24 Inch Adhesive Towel Bar – Stainless Steel Stick on Towel Rack for Bat…

TICONN Over The Door Hooks, 5 Heavy Duty Tri Coat Rack All Metal Coat Ha…

Blanket Ladder, 5-Tier Towel Holder with 4 Removable Hooks, Farmhouse Wa…
Step 8: Label Your Storage Solutions

Labeling your storage solutions can streamline organization. Here’s how to do it:
- Purchase labels or use a label maker.
- Label bins, shelves, and caddies for easy identification.
- Ensure labels are clear and placed where they are visible.
Pro Tip: Use waterproof labels for bathroom storage. Why this matters: Labels help everyone in the household know where things belong, maintaining organization. Time Estimate: 15 minutes.
Step 8: Label Your Storage Solutions
Editor’s Choice

Wicker Storage Basket with Wooden Handle – Paper Rope Decorative Toile…

HVSWLY 120 PCS Travel Toiletry Labels Waterproof,Clear Labels for Cosmet…

BAGSMART Hanging Jewelry Organizer Storage Roll with Hanger Metal Hooks …
Pro Tips
- Plan Before You Buy: Measure your space and plan your storage solutions to avoid purchasing items that won’t fit.
- Maximize Vertical Space: Use wall-mounted shelves or hooks to take advantage of height.
- Use Clear Containers: Clear bins make it easier to see what you have stored, saving time when searching.
- Rotate Seasonal Items: Keep less frequently used items in storage and rotate them as needed.
- Incorporate Multi-Functional Furniture: Look for pieces that serve more than one purpose, like a stool that also serves as storage.
Pro Tips
Editor’s Choice

4 Pack Qtip Holder Dispenser with Bamboo Lids – 10 oz Clear Plastic Apot…

Kaiferty Over The Door Hooks Organizer, Coat Rack Over The Door Storage …

upsimples Acrylic Shelves for Bathroom Storage, 15″ Floating Shelves Wal…
Common Mistakes to Avoid
Warning: Not measuring your space can lead to purchasing items that don’t fit. Always measure before buying.
Warning: Overloading shelves can lead to accidents. Follow weight limits for each storage item.
Warning: Ignoring the aesthetic of the bathroom may lead to a cluttered look. Choose items that complement your decor.
Warning: Not utilizing vertical space can waste potential storage. Always look up for storage options.
Warning: Forgetting to label can lead to confusion and clutter. Use clear labels to keep everything organized.
Common Mistakes to Avoid
Editor’s Choice

28 Pack Sticky Hooks for Hanging Heavy Duty, Wall Hooks Adhesive, Clear …

360° Rotating Makeup Organizer, Upgraded 3 Tier Skincare Perfume Organi…

Aveniee Corner Bathroom Counter Organizer, Bathroom Countertop Shelf Mak…
Troubleshooting Section
Problem: Items keep falling off shelves.
Solution: Check if the shelves are properly adhered to the wall. Consider upgrading to more robust shelves.
Problem: Hooks are not sticking to the door.
Solution: Ensure the door surface is clean and dry before applying hooks. Wait the recommended time before hanging items.
Problem: Caddy slipping off the showerhead.
Solution: Ensure the caddy is securely attached and check the weight of the items in it.
Problem: Bins are too small for items.
Solution: Reassess organization needs and consider purchasing larger bins.
Problem: Labels keep coming off.
Solution: Use waterproof labels or double-check adhesion.
Troubleshooting Section
Editor’s Choice

LEVERLOC Shower Caddy Suction Cup, 2 Pack suction shower shelf with Hook…

Command Display Ledges, Holds up to 2 lb, Quartz, 2 Ledges with 8 Medium…

Adhesive Wall Hooks for Hanging Heavy Duty 50 lbs Large Hooks for Walls …
Variations/Alternative Methods
If you want to explore different methods of adding storage:
- Magnetic Strips: Use magnetic strips to hold metal items like scissors or tweezers. This is great for small spaces.
- Rolling Carts: A rolling cart can serve as a mobile storage unit that fits in tight spaces and can be moved as needed.
- Under-Sink Organizers: Use stackable bins or pull-out drawers specifically designed for under-sink storage.
Variations/Alternative Methods
Editor’s Choice

Vtopmart 4 Pack Large Stackable Storage Drawers,Easily Assemble Acrylic …

5-Tier Magnetic File Holder, No Drilling Installation File Cabinet Organ…

Pipishell Slim Storage Cart with Wheels – 3 Tier Bathroom Organizers and…
FAQs
What if I don’t have enough wall space for shelves?
Consider using a rolling cart or a free-standing storage unit to maximize storage without needing wall space.
How long should I wait for adhesive solutions to set?
Most adhesives require at least 24 hours to set properly before you start using them.
Is it safe to use command hooks in a bathroom?
Yes, command hooks are designed for moisture and can be used safely in a bathroom environment.
What if I don’t want to buy new storage solutions?
Look around your home for items you can repurpose, such as baskets or crates.
Can I use suction cups for bathroom storage?
Yes, suction cups can be effective for lightweight items, but ensure your surfaces are clean for the best adhesion.
FAQs
Editor’s Choice

Pipishell 3 Tier Rolling Cart Organizer, Plastic Rolling Cart with Locka…

Livabber Adhesive Towel Hooks, 304 Stainless Steel Self Sticky Wall Hook…
360° Rotating Makeup Organizer, Upgraded 3 Tier Skincare Perfume Organi…
Conclusion
Congratulations! You have successfully added storage to your small bathroom without drilling. By using clever solutions and repurposing existing items, you’ve transformed your space into a more organized and functional area.
As a next step, maintain the organization by regularly sorting through your items and keeping things tidy. Consider exploring other rooms in your home that may benefit from similar storage solutions. With a little creativity, you can make even the smallest spaces work for you!